

Introduction: Unique DIY Beautiful HeadPiece & Small Veil


This vintage-inspired headpiece and detachable birdcage veil is beautifully unique and not difficult to make! It just takes a little creativity and patience! I needed something to do as I've been stuck at home for the past few days with my son who has been really sick. I have a lot of beads and wire for making hair clips. I even had the veil material which I bought for a college art project. I also had a large silver cuff bracelet that I bought on sale for a $1 from Michaels - and this item I transformed by bending and shaping it to create the base for the whole headpiece.
I noticed the wedding headpieces sold online easily go for a couple hundred of dollars - and some are pretty but many of them look generic or made in a factory somewhere. If you want to make your own, I will do my best to take you through the steps I used, in this Instructable.
Step 1: Materials Needed for DIY Wedding Headpiece


Items Needed:
- A silver cuff bracelet to use as the base for the headpiece
- Beading Wire - two different sizes - 22 gauge and 20 gauge (or thicker is fine)
- A Variety of Beads in lots of different sizes and colors (your choice)
- I used crystal beads for the very front part of the headpiece
- Pearls in varying sizes were used for most of the headpiece
- Hair combs (2) or Hair Extension Clips (2) or Fascinator Clips (2)
- Pliers for bending the wire
- *Optional: Veil
- Birdcage veil material (I purchased mine on sale for a couple dollars at a craft store - Hobby Lobby)
- Or another type of material for the veil, such as tulle or lace, etc.
- A sewing machine or hand-sewing materials for some minor sewing of the veil - really easy
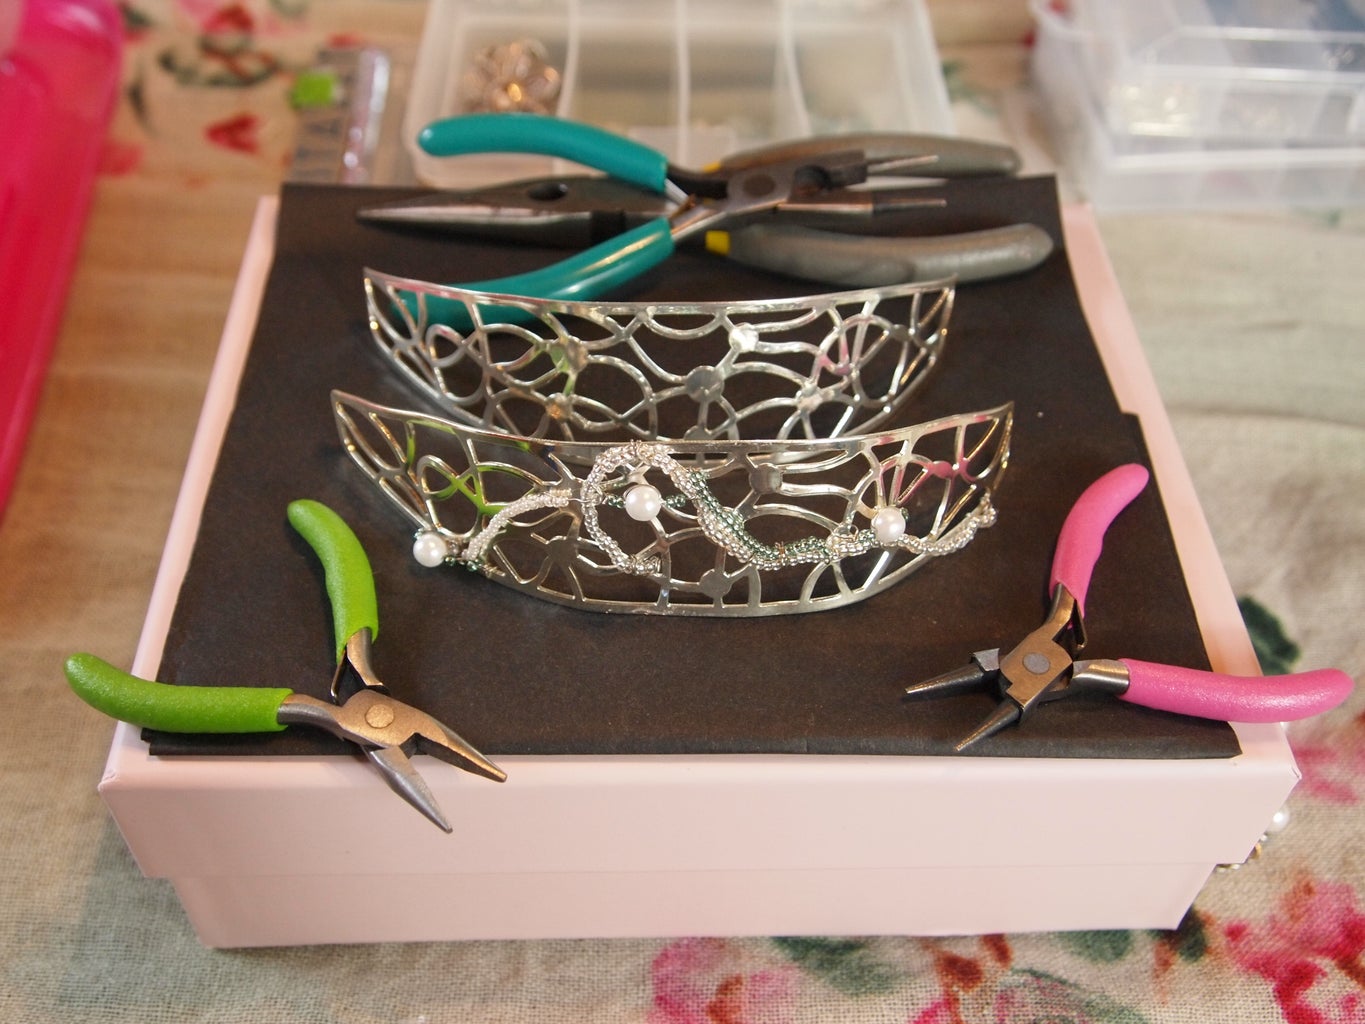
Step 2: Getting Started With the DIY Headpiece


Getting Started
Step 3: Beading on the Headpiece


To start beading on the inside of the headpiece, I switched the wire to the 22 gauge as it's easier to work with. If you find it too thin, feel free to use the thicker wire.
I started on the end and began with a long row of white beads. Then I continued on by wiring some frosted beads into a teardrop shape. I added a large clear bead in the middle of it. I then went back to the first set of white beads and created another row with medium pearls and then smaller pink pearls. Whatever you decide to do - try to keep things flowing nicely and as consistent as possible. If you decide to use certain beads, then when you do the next row of beads - try to keep the pattern going throughout the piece.
Step 4: Bigger Beads or Pearls


The bigger the beads, the faster the project! I was surprised that I really liked how the large pearls looked on here - as I usually like things subtle and smaller. But I ran out of the medium-sized pearls. So I continued to bead all around and tried to make it flow nicely. As you go along, you might not like how it looks at times - but if you stand back and really look at it or try it on you might get a better feel for how you want it to look and if you like it. It doesn't need to be perfect - and sometimes less is more. In the next step I will be doing the final touches of the beading and have more wire showing and use smaller beads and find it very beautiful. I almost wish I would have done more of that, but I still like how it looks. :)
Step 5: Adding Beautiful Finishing Touches With Crystals


I thought the headpiece needed some more style, even though it looked like it could be done at this point. So I decided to use the thicker wire and create an arch from one side of the front of the piece to the other. I wrapped the wire around to secure it at both ends. I then used the thinner wire to pull it in at certain points to create scallop-like curves with the wire.
I then took out the thinner wire again and secured it at the beginning of a curve and beaded it with several little crystals and one larger pink crystal. I tried to do that for all the curved areas - although they differ with the number of beads depending on how much space there was available. Most of the crystals i beaded on were hung underneath the main curved piece, but a couple were placed above it - see pictures. If I could do this again, I would definitely make the thick wire curves bigger and more prominent - it would be even more stunning. It's hard to see exactly how this looks in the photos - but it makes a really beautiful effect and I think it's the prettiest part of the headpiece.
Step 6: Attaching the Combs to Secure the Headpiece


Now it's time to attach the combs to the headpiece! Hopefully you'll read all these steps before you make your own headpiece - because it's a wise idea to attach the combs before you begin beading. I didn't have them on-hand at the time, so I added them last. But, it wasn't difficult so either way would be fine. Also, if you can purchase some hair extension clips, they work even better than these clips I used. They are sold at Sally's and online also - some sites call them fascinator clips. I was surprised how well these little clips held up with the weight of the piece though. You can also use bobby pins to secure it in even more.
I basically used some thick wire to secure the two hair wire combs onto the main piece - and I secured them only at the top of the combs.
Step 7: Small Detachable Birdcage Vintage Veil


This part is pretty easy and the options are endless! If you decide to use the birdcage veil material - you'll want to cut out a fairly long piece just to first play around with. You can then move it around and create different looks by just moving it around on your head or behind the hairpiece you've made. If you wanted to, you could secure this to the headpiece. If I wanted to do that, I would have probably sewn it the same was I did, but also sew it directly onto the back end of the headpiece. I would have use clear thread to do that.
But, Instead, I made a stand-alone small veil and it can be moved around any way you like - so you can make it look attached but take it off whenever you want. I cut out a small piece and wore my beaded headpiece while shaping the birdcage material with my hands. I made somewhat of a large pleat by folding some material inward and then sewing straight across it with my sewing machine. I then made one more pleat and sewed across it again before trimming off the excess. I decided to make it shorter and do another long seam across the veil and trimming the excess. Finally, I used a small piece of decorative ribbon and sewed that directly onto the small veil - to hide the stitches and give it a finished look. I thought about sewing a bobby pin or clip under or onto it. But, I thought it was easiest to use use some small bobby pins to put it on and hold it in place - and it worked really well.
Step 8: Finished Unique Wedding Headpiece With Small Veil


Here are some more pictures of the finished product! I hope the pictures are ok as I struggled to take the photos by myself of myself wearing it!
I hope you enjoyed the Instructable - please feel free to ask me anything!

Runner Up in the
Wedding Contest

Participated in the
Jewelry Contest


