

Introduction: Upcycled Wool Slippers (and More!)


Slippers are made from an upcycled felted wool sweater. They are very easy and fast to make and keep your feet very warm and comfortable. Since the wool has been felted (washed in hot water / dried on high heat in dryer) - the slippers can withstand being washed and dried along with your normal wash.
Supplies
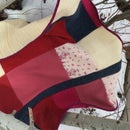
Felted Wool Sweater (Mine was WindRiver Outfitting Co. - Size Large - 100% Wool)
Slipper Pattern from Sewing Green - Betz White
Non-Slip Sole Grippers (Anti-Skid Gripper Fabric or I used thrifted washable leather from a pair of pants)
Supplies Not Photographed
Sewing Machine, Thread, Scissors, Pins, Tape Measure, and Leather Sewing Machine Needle (Optional)
Step 1: Cutting Out Pattern Pieces

After washing and drying the wool sweater - inspect it to identify moth holes / other holes. Avoid any holes when laying out the pattern pieces. Both the sweater sleeve cuffs as well as the sweater bottom ribbing can be utilized for the top slipper cuff. In this project - I decided to use the sweater bottom ribbing for the slipper cuff and saved the sweater sleeve cuffs for something else. If you use the sweater sleeve cuff - cut it to measure 5" wide. If you use the sweater bottom ribbing - cut it the width of the pattern piece.
Step 2: More on the Cuff


In this project - I decided to use the sweater bottom ribbing for the slipper cuff and saved the sweater sleeve cuffs for something else. If you use the sweater sleeve cuff - cut it to measure 5" wide. If you use the sweater bottom ribbing - cut it the width of the pattern piece and approximately 12" long. As can be seen in the third photo - I measured 6" - which equals 12" doubled. Each of the two sewn edges of the ribbing were used which allowed me to only have to sew closed the ribbing 1/4" after I cut 6" from either side (fourth photo).
Step 3: Sew Non-Slip Gripper to Slipper Sole

Sew non-slip sole gripper of choice (I used washable leather) to right side of slipper sole. I like to re-enforce and sew around the gripper circle twice.
Step 4: Assemble Body of Slippers

To keep slippers comfortable, sew them, wrong sides together with a 1/4" seam allowance along the right and left edges.
Attach the sole to the body of the slipper. Place the body of each slipper to a sole (wrong sides together). Pin around the sole edge and stitch in place with a 1/4" seam allowance.
Step 5: Cuff Attachment

Insert the cuff - pinning the right side to the inside of the slipper. Sew with a 1/4 seam allowance (twice). Turn cuff right side out.
Step 6: Ta-da!

Our finished slippers! It probably took me longer to create this Instructable than to create the slippers. But wait - there is more!
Step 7: Another Pair of Slippers

These were made from a felted United Colors of Benetton Shetland Wool Sweater (Made in Italy)
Step 8: Another Something!

I was able to make these mittens from yet the same sweater! See my Instructable Fleece-Lined Upcycled Woolicious Mittens to learn how!
Step 9: That's All There Is!

This is what is left of sweater! But there is still a little life left -- I see another part of a mitten in it's future. Take care!

Participated in the
Sew Warm Speed Challenge


