

Introduction: Water Level
A water level is a simple, ancient way to measure the vertical distance between two (or more) points. I built one to level out the ground in preparation for having a shed built. Follow along and I'll show you how to make a water level and how to use it.
Step 1: Supplies

You'll need a water container, some clear tubing, and a way to attach them together. You've probably got some of these supplies laying around already. I didn't, so I bought it all from Home Depot for about $20. You'll also need a long-ish stick, a couple of zip ties, some food coloring, and some silicone sealant or RTV (not pictured).
The specifics don't matter much here. You just need to get the tubing attached to the bucket so that it won't leak. I used 20 feet of 3/8" ID tubing, a 3/8" brass hose barb, and a brass bushing as an inside nut, since Home Depot didn't have a nut that would fit the hose barb. I also used some O-rings, but it leaked anyway so you can probably skip the O-rings if you use sealant.
Step 2: Assembly


Drill a hole in the bucket to fit the hose barb. I put an O-ring on the hose barb both inside and outside the bucket. It leaked anyway, so you can probably skip the O-ring and just plan to use some RTV or other waterproof sealant.
Screw the nut onto the inside of the hose barb, then attach the tubing to the outside. Smear a good bit of sealant around on both the inside and outside and wait a bit to let the sealant set up.
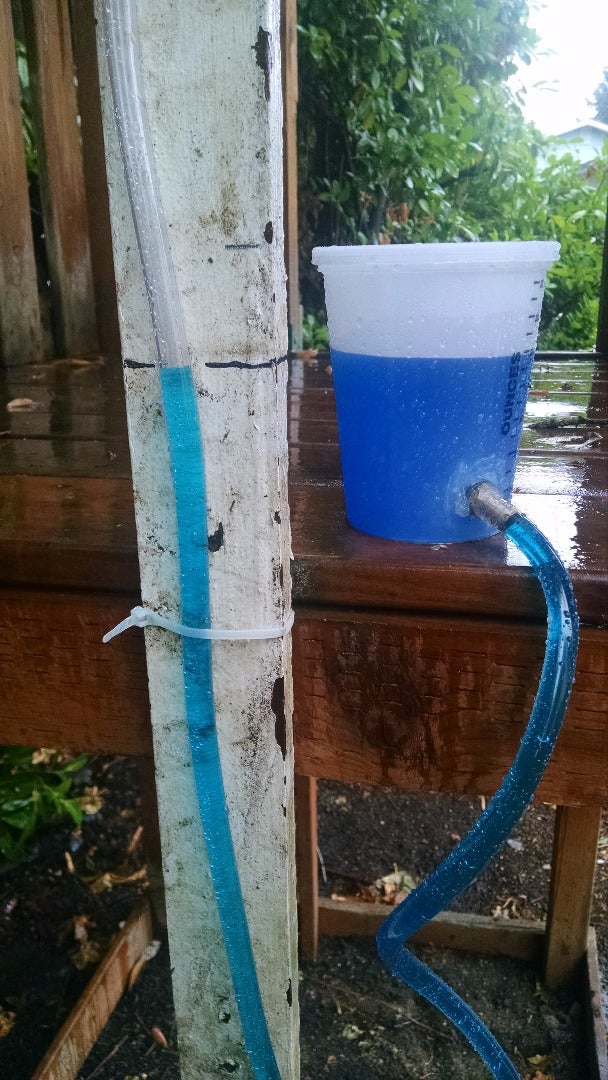
Attach the loose end of the tubing to the piece of scrap wood with a couple of zip ties. Put some food coloring in the bottom of the bucket and fill it about 3/4 full with water. The food coloring just helps you to spot the water level in the tubing, so color it as you see fit. Be careful to keep the other end of the tubing high enough that your water doesn't drain out!
If your bucket has a lid, drill a small vent hole in the lid so your water level adjusts easily.
Step 3: Use It!


Here's the fun part! Put a little bit of physics, some ancient technology, your own ingenuity, and some elbowgrease to work and get your ground leveled out.
Attach the bucket to something reasonably solid. The bucket needs to stay still through the whole process, so find somewhere out of the way and attach it well. You need the bucket to be up off of the ground a bit too, so that the water level will be readable against the wood. I zip tied mine to a chair and that held it still well, but I wished it had been a bit higher.
Make sure you don't have any bubbles in your tubing. I lifted the tubing above the bucket and drained the water all back into the bucket, then slowly lowered it so that the tubing was full of colored water with no bubbles.
Decide what spot on the ground will be your reference point. In my case, I wanted to bring the entire area down to the level of the lowest point, so the low spot was my reference point. Set the stick on the ground at your reference point and watch the water level in the tubing rising and falling as it settles.
Once the water level has stopped moving, mark the stick at the water level. It doesn't matter where this is on the stick, you're just going to use this as a relative mark. Now go to another spot you want to measure. Stand the stick up there and wait for the level to settle. How far is the new water level from the mark you made? That's the vertical distance between the ground you measured before and the ground you're on now. Set the stick aside and dig/fill as needed -- that's it! Measure around the area and level out the ground as needed. Keep doing this throughout your area until you've got it all leveled out.
A couple of things to keep in mind:
- If the water level is below your original mark, you need to make the ground lower to match. If the water level is above your mark, raise the ground to match. This seems counter-intuitive at first but makes sense when you think about what's happening: if the ground is higher than your reference point, the stick (with the mark) moves up while the water level stays the same, so the water level will be below your mark. See the notes on the pictures on this step for an example.
- If your bucket gets moved, you'll need to go back to your reference point and make a new mark. Same is true if your water evaporates. It's a good idea to check back to your reference point regularly and make sure that the water level still comes right to your mark.
Thanks to Dino at Hackaweek for showing me how to do this. Check out his video at http://hackaweek.com/hacks/?p=1736 to see his water level in use.
Let me know if you've got any questions or if this isn't clear.


