

Introduction: Wild Life Feeder


Hello everyone
This time I’ll be showing you how to build a super easy and cheap feeder. Just across my house there’s a nice semi wild forest of Pines, Acacia and Eucalitpus there's a lot of grass and others plants and a nice wild life. We’ve seen Hares, Woodpeckers, assorted prey birds like Hawks and tons of a local rodent species called Aperea (picture a grey Guinea Pig) They are lovely and super fearful, mostly nocturnal so they show at the edge of the grass around sunset and sunrise. I see like a dozen of them every morning taking the kids to school and every night when we have a cold one with the wife. I thought a feeder would be nice, recycled would be nicer. After looking here for something I came up with this design. Being rustic I didn't worry about getting everything just perfect.
Let's go
Step 1:


had 2 -3 boards from a dismantled pallet from another INST(link) so… those. Glue, a few nails, ruler and pencil, table saw and on with it. First y cut a 30 cm long piece.
Step 2:


On the same board and using a ruler and a little math y drew 2 lines making a 90° angle. Cut the rest and I got the angle, cut that board in half so to get both sides the same and did the same drawing on the other end. Now I have 3 30 cm pieces 2 of them have a “pointy” end. The bed and the two walls.
Step 3:


Took the bed to the bench and pressed it so I could start putting it together. I glued and nailed one of the walls an inch or so below the bed so it can act as “legs” and not let the bed be in the floor all the time. Did the same with the other wall.
Step 4:


Then I cut two 30 cm long strips and an inch wide from the other board. Glued them on the sides of the bed. This is because I don't want all the food to fall.
Step 5:


For the roof I cut 2 35 cm long boards, but they fell short so I recommend maybe 38 or 40. Tried them as a roof and saw that they were too wide leaving no room for the Apereas to eat. Took them to the saw and “thinned” the wide by and inch of both.
Took one board to the bench and pressed to glue them together. Added 3 nails to be sure. Then I glued the “roof” to the rest of the house and that was it.
Step 6:


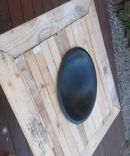
The whole thing took about an hour or so. I charged the little bed with rabbit food and took it to the forest. I placed it so I can see from my house if they liked it. Maybe you can tell that I planted a few trees myself :) I know they are probably doomed in the long run… but I feel good seeing them grow.
I hope you liked it.
Bulid On !!


