

Introduction: Wiring Plugs


Step 1: The Plug
[pluhg]
noun
Electricity. a device to which may be attached the conductors of a cord and which by insertion in an outlet, establishes electrical contact.
----------------
There are many different plugs on the market, but over the years, I have narrowed my use down to two particular plugs, due to their good looks and ease of use. The wiring principles of these two will apply to almost any plug out there, so don't feel obligated to follow my narrow minded plug path. :)
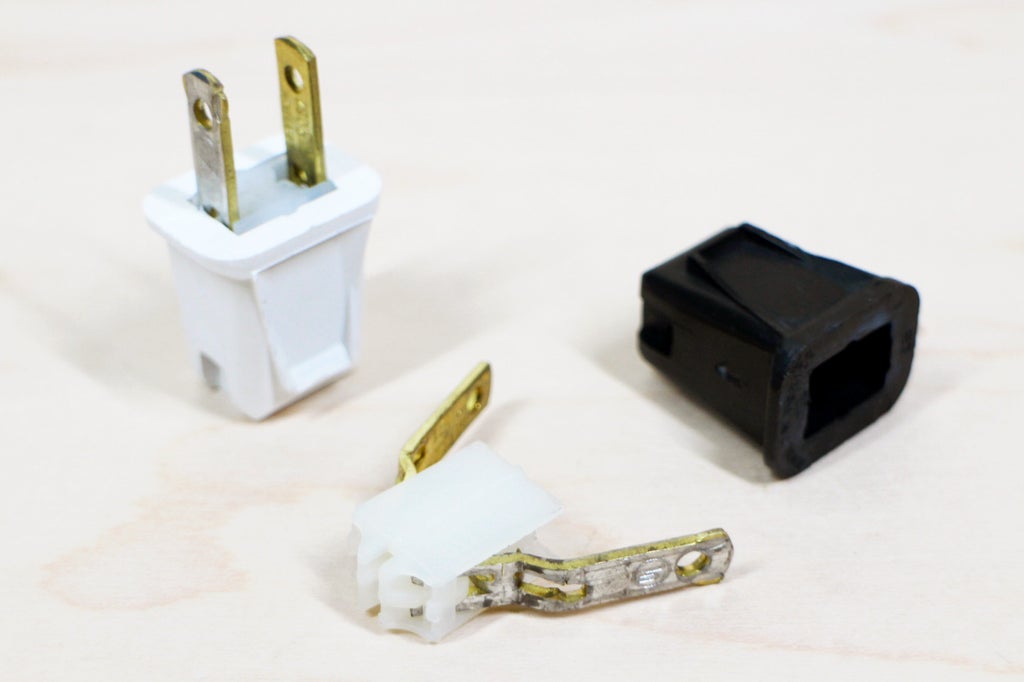
The insert of this 2-part Kwik plug just slides out. Super easy!
For SPT-1 cord I use the above Leviton brand's polarized Kwik Easy lamp plugs. But any 'easy' polarized plug will do. This style of plug works by piercing the outer insulation of the cord with sharp interior metal prongs. These connect with the Hot and Neutral interior copper wires, establishing a connection.

The insert of this antique style plug must be unscrewed to be removed. Still pretty easy!
And for SVT & SVT-B cords, I use Grand Brass brand antique style polarized plug with screw terminal connections. Due to having to strip, wrap, and screw in the wire ends to make the connection to the plug prongs, they are slightly less 'easy' than the SPT-1 plugs, but are still super simple to wire. :)
Note: It is commonly recommended to tie an Underwriter's Knot inside this style of plug to protect the wire/terminal connections if the plug gets pulled from the outlet by the cord. However, I find that there isn't always enough room inside the plug housing for the knot (with this plug in particular), so I just make sure to only use them on lamps that won't be getting unplugged often and that won't be for sale. Also, this style is shaped to have a 'handle', which makes it super easy to pull out without using the cord. Feel free to check out other old-timey plug styles if you want or need to add the knot.
Step 2: What Does Polarized Mean?


In the case of plugs, it means that one prong (the Neutral) is wider than the other (the Hot). This helps keep the wiring of the whole lamp circuit clear (which wire goes to which connection), as well as ensuring that the Neutral wire goes into the Neutral receptacle of the wall outlet. While non-polarized plugs are still available and their use won't keep a lamp from working, it's a safer bet to stick to polarized parts.
Step 3: Wiring SPT-1 Cord to a Plug

Let's get plug-gy with it and start with your SPT-1 cord set.


Pick up the end of the cord that we haven't worked on yet and use wire cutters to make a perpendicular, or 'square' cut as close to the end as possible.


Next, pull the interior prong piece out of the plug housing. If it won't come out easily with your fingers, use the small flathead screwdriver to push it out from the bottom hole.

Slide the cord up through the bottom hole so that it sticks out of the opening about 3-4 inches. Set aside.


Pick up the plug interior and pull open the prongs. Push and pull the wider, and in this case also silver, Neutral prong in and out a few times while looking into the cavity where the cord will go until you know which metal piercing prong is the Neutral one. Hold the interior piece so that the Neutral tab is on top.


While keeping this orientation, pull both prongs open as wide as they'll go and insert the cord end with the ribbed/Neutral side up so that it lines up with the Neutral piercing tab. Make sure the cord is pushed in all the way so that it's butting up against the plastic end.


Squeeze the prongs towards each other as far as they'll go.


Slide the plug housing up the cord and over the interior piece as far as it will go. If you're using the Kwik Easy plug, you may need to press it the rest of the way in by placing the bottom of the plug on your work surface and using the phillips head screwdriver to push it down, with a hand on each side. Do this gently, but firmly, so the plug -- and sharp screwdriver -- don't slip.


Use pliers to straighten out the prongs if necessary. And, ta da!
Step 4: Wiring SVT & SVT-B Cord to a Plug

Now onto the SVT cord + plug adventure!


Measure and mark 1 1/8" from the cord end opposite the socket, then wrap a piece of tape around the cord at the mark. As with the socket wiring, this prevents the cloth cover from fraying while you wire up the plug.
Now, we're going to repeat the same steps for prepping the cord for we did for wiring the socket.
1. Remove the cloth cover and insulation of the 1 1/8" end by using the box cutter.
2. Cut off the insulation fibers and green ground wire (if using 18/3 cord) using the wire cutters.
3. Remove the tape and glue the very end of the cloth cover to the end of the outer insulation. Set aside to dry.

Next, unscrew the two screws on the plug and pull out the prong interior. (Put the screws in a safe and obvious place.)

This step is SUPER important!
Insert the cord end into the small opening of the plug housing, and slide it approx. 1 foot down. If you forget to do this and wire up prong insert... you'll have to undo the connections, and start again. So do this! Do it.


Strip 5/8" of the wire ends' insulation off. Fan, twist, and bend the wire ends into horseshoe shapes from left to right, or clockwise.


Starting with the Neutral wire, place the bent wire end around the threads of the silver screw terminal that corresponds to the wide prong. Use your small flathead screwdriver to tuck the wire neatly behind the screw head. And as with wiring the metal cap and shell socket, hold this in place with your non-dominant hand and then tighten the screw with your dominant.
I like to use my small flathead screwdriver for this also so that I can tuck any runaway wire strands back in place as I tighten. Repeat for the Hot wire/prong. Do a finishing tightening of both terminals with the phillips head screwdriver for good measure. Remember, a tidy wire connections are safe connections!


Slide the plug housing back up the cord and over the prong interior, orienting tab on the interior to the slot on the housing.


Replace and tighten the screws. Then admire your work. ;)
Step 5: Yay!
Nice job on completing the plug wiring lesson!! Your two practice cord sets should look like this so far:


Step 6: Quiz Time!
{
    "id": "quiz-1",
    "question": "Which is the Neutral prong on a plug?",
    "answers": [
        {
            "title": "Wider one",
            "correct": true
        },
        {
            "title": "Narrower one",
            "correct": false
        }
    ],
    "correctNotice": "That's correct!",
    "incorrectNotice": "That's incorrect"
}


