

Introduction: Wood-fired Rocket Stove Hot Tub


HOT TUB! 🛀 Need I say more? Ok, a few more words. Wood-fired! Rocket stove! No electricity needed! No pumps! No noise! Want to make tea, coffee, or hot chocolate? Want to cook while the tub heats up? You can do it on the rocket stove!
My wife and I have always enjoyed the IDEA of a hot tub for our backyard, but did not like the idea of it being hooked up to electricity, the noise of the pumps, dealing with chlorine, not to mention the cost of a hot tub.
I still had 3 or 4 5-gallon size buckets of clay left over from having built a full-size earth oven out of cob (clay, sand, water, and straw) and then a miniature version with and for my kids. You can see the process of the mini-build here:
https://www.instructables.com/MINI-WOOD-FIRED-EART...
I saw that someone was giving away a free soaking tub so I put two and two together and the idea started to take shape.
I did read Becky Bee’s book entitled “THE BEST HOT TUB EVER!” which describes how to make a hot tub using cob and running the fire underneath the tub to heat up the water but the tub I obtained was made of fiberglass and so I had to figure out how to configure it differently. Plus, the idea of sitting in a tub over a fire seemed like I’d be cooking myself in a very large pot over the world’s largest stove burner. I went down the rabbit hole of researching hot tubs online which led me to the concept of rocket stoves.
I decided to try and pair the two together and that is ultimately how this Instructable for a wood-fired rocket stove hot tub was born. It works off the principle of a thermo-siphon, where as the water gets heated, it rises up through the copper coil in the rocket stove and into the tub. It then creates a 'suction' of cold water out of the tub and into the rocket stove where it continually gets heated. The cycle goes on until the water gets to your desired temperature.
I have read instances of people's concerns with the water getting too hot. You can stop the fire in the rocket stove, and also add a bucket or two (or three) of cold water to bring the temperature down if needed. That being said, have a floating thermometer or laser thermometer handy to check the temperature for your own safety.
Onward we go!
Supplies
Tub of choice (a steel watering tank works too)
Concrete (I used Quik-Crete)
Gravel
Cob mix (Clay, sand, straw, and water)
2 x 1/2" 90-degree (L-shaped) push-through fittings
2 x 1/2" Sharkbite 1/2" push connector fittings
20 x ft. 1/2" copper tubing
Hose bib (for hooking up hose when draining tub)
10 ft. of 10-inch wide flashing (for cob molds)
4-inch diameter cardboard tube about 3 feet long
Piece of cardboard about 3 feet in width and 2 feet length (from an old box works well)
2-feet of pipe, about an inch in diameter (3/4" is fine too)
Optional if you are building a tub frame:
Redwood
4’ x 8’ sheet of 3/4” plywood
Screws (I used pocket screws)
Pallet wood for the siding
Ceramic tile or sticky tile for the top of the tub frame
Step 1: Make the Foundation (and Tub Frame If Needed)


The tub: You can use a bathtub or a metal stock tank. The metal tank is easier for certain reasons such as having a flat bottom and vertical sides, but you won't be leaning back when 'tubbing'. Additionally, the metal can get quite hot! I used a soaking tub, nice and deep with a slant for leaning back in full relaxation, but it has 4 'feet', so I had to make sure my foundation was very level.
Find a good open spot with plenty of room for the tub and the rocket stove. Dig a rectangular hole about 8 inches down into the ground.
If you are using a metal stock tank, pour in enough gravel to fill this hole, and then pour sand (concrete sand will work fine) to fill in any gaps until it is level with the ground.
If you are using a regular bathtub with feet, I recommend pouring a concrete foundation on top of the gravel and sand. This is easy to do by building a rectangular frame out of 2x6's, pouring in concrete (use Quik-Crete! It's very fast, very easy, dries and cures quickly). Note: I put in 2 inches of gravel first, then poured the concrete foundation which was 6 inches high, and then filled the rest of the rectangular hole around the concrete with the rest of the gravel. See pictures for what I did.
Once the concrete is dried and cured, place your tub on top and make sure it is level.
Because the tub I used is made of fiberglass, I wanted to protect it and make it look nicer by building a tub frame and surround (I am no pro, so if I am getting any terminology incorrect here, please excuse me). I obtained the instructions on building the specific frame for the tub that I have by contacting the manufacturer. They sent me, free of charge, the instructions which included measurements and made it totally easy for a newbie tub-frame builder like myself. :) The top part of the tub surround is a 4'x8' 3/4" plywood with a hole cut out (the pattern of the hole comes with the manufacturer's instructions, again making it relatively easy to do).
If you have the metal stock tank, there is no need for building the frame, a nice perk, but comes down to the tub you can get, and personal preference.
Once I had the tub frame built, and AFTER I installed the tub drain, hose connector, and push-through fittings (next step), I add pallet wood around the sides of the frame to close it up and give it a nice rustic look. This took a little bit of time but was nice and meditative.
For the plywood top of the tub frame, I was going to install ceramic tile but this proved to be beyond my abilities and cost, so I went with cheap, stick-on "wood plank" tile. Granted, these tiles are meant for indoor usage, so I don't expect them to last too long, but they are cheap, easy to put on (and replace if needed), so we will see how they weather any storm, pun intended. They did give the tub a nice finished look.
Step 2: Add Tub Drain and Fittings


Because the tub was not connected to any traditional plumbing, I definitely wanted to be able to drain the water and use it for something instead of wasting it and letting it puddle into our yard, so I connected a simple hose fitting onto the pipe where the water would normally drain out into a traditional sewer system. The hose fitting has a little valve that opens or closes by pushing a 'dial'. We can connect a garden hose when we drain the tub, and while this isn't pressurized, there is enough pressure from gravity to water plants around our yard. If the pressure goes down to much near the end of draining, we can connect a very short piece of hose and collect any remaining water into a bucket for use. If there is any extra water remaining in the tub, we can also let that naturally drain out into the ground, but the amount is so small....maybe a gallon at most.
I drilled 2 holes on the side of the tub (a little nerve-wracking since I only got one chance at it!), one higher than other. This is where the push-through fittings with go. This allows the copper coil to connect to the tub, and also for the water to enter and exit the tub with hot and cold water respectively. I used a hole saw attachment for my drill and carefully drilled through the side of the tub.... success! The push-through fitting is 2 pieces, one fits through the outside of the tub and the other piece through the inside where they connect. I put some silicone caulking around the edge of both sides to prevent any leaking.
Step 3: Copper Coil


I used 20-feet of 1/2" soft copper coil tubing. I had to make a tighter coil than how it came when I purchased it, so I wrapped it around a piece of PVC pipe that I got for free as a scrap from a local hardware store. The diameter of the PVC pipe was 6 inches. I highly recommend looking up an Instructable or other tutorial on how to coil copper tubing for the best tips. In a nutshell, I secured one end of the tubing with a clamp to the PVC pipe, which itself was clamped down. Then I carefully wrapped the copper tubing tightly around the PVC pipe until I came to the end of the tubing. I left approximately 8 inches of straight copper at each end. These straight parts will be used to connect to the tub. If coiled tightly enough, your total HEIGHT of the coil should be about 8 inches or so, give or take some. it shouldn't be more than 10 inches in height. After coiling, the whole coil slides right off of the PVC pipe after taking off the clamp.
I do not have a picture of my finished coil, but here is a picture of a mangled piece of copper tubing from my first try (or we can safely call it a very failed attempt). Hence my recommendation to read and/or watch an Instructable on the subject.
This copper coil will be buried within the clay of the rocket stove when we build it.
Step 4: Building the Rocket Stove - Part 1 - Making Donuts


I LOVED this part because I got to work with cob again. It's always a nice feeling to work with earth.
Briefly, cob is a mix of clay, sand, straw and water. Ratios will vary, but generally, it is 2-4 parts sand, 1 part clay, 1/2 part water, and sprinkle on straw as needed (3-4 inches in length is preferable here). Lay it all out on a tarp and start to do the cob dance, mixing it all together with your feet until it all comes together into a nice cohesive mix. If done correctly, you can take a ball of cob about the size of a tennis ball, drop it from shoulder height, and if it retains most of its shape, you are good to go! If it goes SPLOOSH, it is too wet. If it cracks and breaks apart, it is too dry.
PLEASE refer to my other INSTRUCTABLE on how to mix cob. I give instructions step-by-step in step 3 there, along with pictures and video. Here is the link:
https://www.instructables.com/MINI-WOOD-FIRED-EART...
The only extra addition you will need to make to the cob mix for THIS Instructable is adding some puffed rice. Yes, puffed rice! It is super cheap at the market. I used 3 bags of it for this build. Sprinkle it on the cob liberally and mix it in right before you start building the donuts as described below.
See you back here soon!
--------------------------------------------------------------------------------------------------------------------
Ok, welcome back, cob-builder! Time to build our rocket stove.
I went way down the rabbit hole on this one, and must have looked at dozens of different models of rocket stoves, different shapes, different materials, different sizes, it was dizzying. I ended up finding a video on YouTube of a man who helps people build rocket stoves in countries where clay ovens are used in everyday life, BUT, they breathe massive amounts of smoke as a result of cooking on these clay ovens. So he devised a specific technique when building rocket stoves so they burn VERY clean, with minimal amounts of fuel (small sticks, animal dung.....) and little to no smoke, thereby saving these people from health issues related to smoke inhalation. I loved the idea and so the technique I offer here comes straight from him. His name is Russell Collins and he calls his rocket stove the Himalayan Rocket Stove. There are metal versions that he offers but the technique I learned through watching him is for a clay (cob) version. Search for "The Smokeless Cookstove Revolution" on You Tube for a video overview of what I describe in this step and the next.
After mixing your cob, you will make forms to put your cob into. This will make "donuts" of cob which you will stack and connect together to ultimately make your rocket stove.
You will need some metal flashing from your local hardware store. I found 10 feet of flashing with a 10-inch width. Since my molds were going to only be 5-inches high, I cut the flashing with tin ships in half lengthwise, giving me 20 feet of flashing with a 5-inch width.
Each donut should be 11 inches total in diameter which includes a 5-inch hole in the middle. So for each donut, you will have a 3-inch portion of cob, a 5-inch hole in the middle, and another 3-inch portion of cob, totaling 11 inches in diameter. See the pictures above for how this looks.
To make the forms, we need to calculate the length of flashing needed to make both the big circle and the little circle for the forms. The length of each circle is also known as the circumference. How do you calculate the circumference of a circle you ask? C = 2πr That is, circumference equals 2 x pi x radius.
Since we know the radius of the big circle (11 inches across divided by 2 = 5.5), we multiply 2 x pi x 5.5 and get 34.56 inches.... I rounded up to an even 35 inches for ease of purposes to make an 11-inch diameter circle. BUT, I cut the flashing at a length of 37 inches so I could overlap the two ends a little bit and then secured them with duct tape. If you cut 35 inches and then overlap the two ends to secure them, your diameter will be smaller.
We also need to make the small circle for the hole in the middle. This is a 5-inch hole, so the radius is half of that at 2.5 inches. Again, using the formula above, we multiply 2 x pi x 2.5 and get 15.71. I rounded this up to 15.75 (or 15 3/4) inches. Making sure I have enough to overlap, I added an extra 2 inches making the length 17 3/4 inches. Cut the flashing, overlap the ends by an inch on each side, and secure with duct tape. Voila! You have your first mold. You can make as many molds as possible with the length of flashing you have.
With 240 inches total of flashing at a 5-inch width, you can make 4 sets of forms. I ended up using only 2 sets, making 2 donuts in the morning, letting them dry and set some during the day, and then removing the forms from the cob in the late afternoon or early evening. I used some needle-nose pliers to pull the center form out of the cob, and then did the same for the larger form. 2 sets a day was enough for me, and you only need to make 6 donuts to make this rocket stove. It took 3 days for me to make the 6 donuts, but feel free to bust them all out at once if you prefer.
Do your best to center the small circle inside the larger circle, and then start adding cob. You WILL find your rhythm with this. I chose to build cob around the small inner circle first to help secure it in place so I could better center it within the larger circle. I then cobbed around the inner circumference of the larger circle to secure it as well. Then, build UP until the mold is full. Leave it for at least a couple hours, maybe longer if needed until it is a little firmer and a little drier, but not HARD. This is when you want to remove the forms, leaving a nice cob donut. Repeat! Again, you will need 6 cob donuts in total but read below before proceeding!
TWO IMPORTANT THINGS:
1) For ONE of the cob donuts, after removing the form and letting it dry a bit further (you can leave it overnight before doing this part), you will need to cut a portion of the donut out. I used a common household saw, but you can use a serrated knife (bread knife, for instance) to cut it as well. See the diagram above for an example of the cut needed.
This cut will cause the fire in your rocket stove to angle off, starting a vortex within the secondary burn chamber of your rocket stove (the tallest part of the stove). This will help any unburned fuel (smoke) burn hotter and cleaner! See the VIDEO above for the swirling effect of the vortex, and enjoy the bonus of hearing the rocket stove sound.... my favorite!
2) You will make ONE 'double-donut' that will also house the copper coil. In other words, you will bury the copper coil within the cob. After filling about half of a mold with cob, rest the copper coil on the cob, and then start adding more cob around all parts of the coil. Once you reach the top of your mold, take ANOTHER empty mold, place it over the remaining visible copper coil, and keep adding more cob, building it up until the full copper coil is buried, leaving only the straight horizontal portions of copper sticking out. Let these dry during the day or overnight before removing the forms.
To recap: You will have 3 full donuts, 1 donut with a wedge cut out, and 1 double-donut (10 inches in height) with the copper coil buried in it.
Step 5: Building the Rocket Stove - Part 2 - Stacking and Finishing


Plan for where your rocket stove will be. I sited mine behind where my back will be resting in the tub (see the second picture above) because the push-through fittings in my tub are pointed towards that part of the tub, so naturally the copper tubing (I ended up using PEX tubing) will be coming out from the push-through fittings towards the rocket stove, and ultimately will be connected TO the rocket stove. See pictures 2 and 3 above and you will see where the copper tubing ends are coming out of the rocket stove. I will connect another piece of copper tubing (again, I ended up using PEX tubing for that last connection) from the copper coming out of the rocket stove into the push-through fittings in the tub, completing the water circuit. This will ALL make sense as we go along.
I did choose to put my rocket stove on a flat dolly so I could move it around if I wanted to, but ultimately this ended up being pointless, so find a permanent spot for the stove and get on with things. I did adhere 2 12-inch saltillo tiles to the dolly to take the heat of the fire but you can put the rocket stove on the actual ground if it is level.
Take your piece of cardboard and roll it around your cardboard tube so the diameter of the two together is about 5 inches. This diameter will match the size of the donut holes at 5 inches. Secure the cardboard around the tube with something that can be burned off. I used twine. Set it aside, as you will be using it very soon.
STACKING DONUTS:
See the diagrams (forgive my art) above for how the donuts will be placed, along with the metal pipe, and cardboard tube to be used as a form.
- First, place your CUT donut on the ground (flat and level). Wet a little bit of cob and smear it on top of the cut donut (like cream cheese on a bagel) and then carefully place the double-donut with copper coil on top of the cut donut. MAKE SURE the straight parts of the copper coil are facing toward the push-through fittings on the outer part of the tub!
- Next, push the steel pipe through the lower edge part of the wedge cut so the pipe is a couple inches inside the CENTER of the donut hole. The rest of the pipe will angle outwards from the rocket stove. Secure it now with some cob.
- Take your cardboard tube and place it on the ground, facing straight on to the wedge hole. Start packing cob all around the tube, building the cob up and over the tube and start to build your own donut on top of the tube. You HAVE to keep a 5-inch circular opening in this donut and you MUST be able to still see the cardboard tube in this opening! This is where you will be feeding sticks into your rocket stove! See pictures above. I definitely used one of my forms for this once I built my cob high enough around the cardboard tube. The form is SUPER HELPFUL as a guide here.
- If your cob is somewhat wet, let it dry for a couple hours before placing your LAST cob donut on top of the donut you just created. Again, smear some wet cob between the layers so they will stick better.
- Once you add this last donut, your structure is almost complete!
FINISHING THE DONUTS:
- All that is left here is close up all the gaps between donut layers, around donut layers, around the base.... basically making it one whole cohesive piece. Start putting on one more layer of cob all over and around the whole thing, trying to make it as smooth as possible. I wet my cob a little more for this last layer, but mine still turned out a little rough. I didn't mind.
- On the donut that is highest on the secondary burn chamber, put in 3 little cob blobs so you can put a pot or pan on top of them while burning the rocket stove. This enables you to be able to cook or boil water! Total bonus! See the picture above for the blobs (nubs).
- ALSO IMPORTANT -- smooth off the front entrance of the rocket stove (where your cardboard enters the burn tunnel). You will be closing this part off after lighting your rocket stove, preventing air from being drawn in here. You need it flat so you can lay something in front of it to close it off such as a piece of tin.
You're almost there! Some patience is needed here, as the whole thing should dry out on its own to prevent cracking.
After one day, carefully pull out the inner cardboard tube (you wrapped it in a cardboard layer, remember?). You may have to rotate it a little and then slide it out. You may need a second person to hold the rocket stove, while you pull the tube. Mine came out easier than expected. See the video above to see what it looks like with the remaining cardboard left in there.
The remaining cardboard later can be burned out, and that was my plan, but after another couple days of drying, I was able to carefully pull the cardboard out as well.
You WILL want to smooth out everything on the INSIDE as well, and fill in any gaps (there WILL be some!) down the burn chambers, along the burn tunnel, just feel around inside and start adding some more cob (yes, MORE cob) to fill in the gaps....... then, WAIT some more. Don't worry, the hot tub is coming soon for all of your hard work!
You can see the different brown colors in the picture above. That is my wet cob vs. the dry cob.
Step 6: Connecting the Rocket Stove to the Tub !


You've arrived! One last step and you're ready to fire up this rocket and get to hot-tubbing!
We have to connect the copper pipes that are embedded in the "double-donut" to the push-through connectors on the outside of the tub.
Because I used Sharkbite fittings, it makes it relatively easy. Originally, I had two straight-ish pieces of copper pipe that I intended to connect to the push-through fittings and then connect the other ends to the "double-donut" copper pipes but connecting them together with the push-connect fittings wouldn't work since the rocket stove is now immovable, as is the tub. So the workaround is PEX tubing. Why? Because it is flexible! I can connect one end to the push-fittings, and then have enough bend on the other end to get it to push into the connector on the "double-donut" copper pipe. You can see these connections in the pictures above.
I cut two pieces of PEX tubing (you will have to measure the lengths you need based on your design), and insert one end each into the push-through connectors on the tub, and then connect the other ends to the Sharkbite straight coupling connectors on the 'double-donut' copper pipe. MAKE SURE each connection goes deep enough into the connectors per Sharkbite's instructions. This will prevent leaks.
One thing I learned after the fact (oops) is that PEX tubing is not meant for outdoor use as it will break down over time in sunlight. Thankfully, I have minimal PEX tubing exposed to the sun, but I still covered the PEX tubing with high-temperature cable conduit for protection.
Step 7: HEAT YOUR TUB AND SOAK YOUR BONES!


You have arrived! Well done! Time to fill the tub. Finally.
I put the hose into the tub and left it on the soaker setting to fill up while I gathered sticks to burn in the rocket stove.
This took about 25-30 minutes to get the water level ABOVE the higher push-connector fitting. THIS IS A MUST! It must be a closed system, meaning that no air will get in the copper tubing.
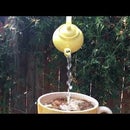
Once filled, it is time to fire up your rocket stove. Hopefully you have some knowledge about lighting a basic fire (tinder, kindling, etc.). Get a small fire going inside the burn tunnel just below the primary burn chamber (the lower hole on your rocket stove). This may take a few minutes to get going, as everything is cold. Once burning, slide a piece of metal or stone (wood won't work so well since it may catch on fire) in front of the burn tunnel entrance. This will cause air to be sucked down into the primary burn chamber, further ignite your fuel (sticks) and then have heat rise up and out of the secondary burn chamber. You CAN start to cook on top of your 3 nubs (blobs, protrusions) but best to wait until your fire really gets going a bit. It will take a little time for the cob to heat up, and ultimately your copper coil to heat up and start to cause the thermo-siphon to start working. After 20 minutes or so, I finally heard a ** BLURB **. I slid open the cover to the hot tub, watched the push-through opening, and finally saw what I had longed for after so much work........a bubble of hot water coming out into the tub. SUCCESS! Over time, this happened more frequently.
Keep feeding small-ish sticks (pencil-size to large pretzel stick size work best but this thing will accommodate bigger pieces. I used up to 1-inch diameter sticks once the fire started going well. Slowly but surely, the temperature of the water started to get warmer. Every so often, you will want to stir the water as temperature layers will form if not stirred. The top will be hotter than the bottom since heat rises and the hot water is coming out of the higher hole.
While the rocket stove was going, I did want to test out the nubs and see about boiling a pot of water. I put a rather large pot of water on the rocket stove (a tamale pot!) and it took about 45 minutes to bring all that water to a full boil. Pretty good, especially since the outside temperature was starting to dip down in the high 50's.
Eventually, I got the water to 88 degrees and honestly, I was VERY tired, and just wanted to get it, and by this point the outside temperature was 55 degrees. I removed the wood cover, adorned the 4 corners of the tub with some decorative lights, gathered a few extra small logs within my reach so I could feed the rocket stove if I wanted (I did!), put my pallet step down in front of the tub, stripped down and got in.
WOW did that feel amazing! It worked and I was soaking my weary bones! The moon AND Mars were right up in my view of the sky and I was a seriously happy guy!
Thank you for reading and supporting my Instructable, and if you have ANY questions at all, please feel free to ask me. I am always happy to help to the best of my ability.
Peace!

Runner Up in the
1000th Contest


