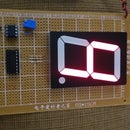
Introduction: 10 Bits Binary Counter
This is a binary counter that can count from 0 to 1023 because it's a 10 bits binary counter. However, it needs 10-1N914 diodes like interface between the counter and the 10-10mm LEDs used in this project. The counter is also integrated by 10-JK Flip-Flops; that is, 5-IC74LS76s and an IC555 timer for generating the clock.
Step 1: Bill of Materials
What you will need:
10-10mm Red LEDs
10 Diodes, 1N914
5-IC74LS76, Flip-Flops
5-16-pin, IC socket
1-8-pin, IC socket
1 IC555, Timer
1 5K Potentiometer
1 4.7K Resistor, 1/4 Watt
1 47uF Electrolytic Capacitor
1 7805 Voltage Regulator, +5V
1 9V Battery Clip
1 9V Battery
Some Connecting wires
Soldering Iron
Soldering 60/40 roll
Step 2: Schematics
With the set of schematics included in this step, you have enough information so that you can complete successfully this project. However, you have to make each connection in the first diagram because it's the whole project.
Step 3: Install the LEDs and Diodes
Installing the LEDs, you can connect each other the LED cathodes and solder them too. Remember to mount the diodes with its cathode toward the anode of its respective LED.
Step 4: Complete Your Project
In this step, you have to connect the missing positive terminal of each diode to its respective output of each Flip-Flop by having in count the connections showed in the corresponding schematics. Wiring the whole circuit, you can install everything you need to even install the IC555 because you require to verify the working frequency of your circuit built.
Step 5: Install the IC74LS76
In this step, you can install the rest of integrated circuits.
Step 6: Install the Battery
Once installed the integrated circuit in your new project, you can connect the 9V battery so that you can see its functionality.


