

Introduction: 10-Minute Pop-Can Penny Stove


Half of my last instructable draft just deleted itself while working on it. Instead of crying over spilled megabytes, I've decided to instructify another quick project from last week.
Full disclosure: I don't actually know if it took me 10 minutes or 5 or 15 to make the stove. I just know it's quick. Far quicker than it actually takes to write this!
So, to begin:
A pop-can penny stove is a small, ultralight alcohol-fueled stove for camping. It's useful as a back-up heat source for cooking, and despite its simplicity its one of the most efficient alcohol-burning set-ups available. There are more complicated versions of this stove, that likely do work better. But few are as simple or easy to make!
In a role as a back-up or emergency stove, it works quite well in conjunction with 190-proof Everclear. While there are better and far cheaper fuels available, the advantages of Everclear are that it has multiple other uses:
- Disinfectant/sterilizer for medical treatment
- Painkiller
- Intoxicant
- Solvent for tinctures
- Cleaning solution
In addition, it is less likely to contain toxins that can be absorbed through the skin while handling, and less likely to put out dangerous levels of carbon monoxide, making it relatively safer to use in confined spaces.
With this in mind, having this in an emergency medical bag, bug-out bag, or winter vehicle kit along with a small water bottle filled with everclear will cost you only a couple ounces and very little space. It could potentially save your life, or at least save your night if your other cooking solutions aren't working out.
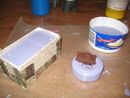
Step 1: Step 1: Gather Materials


Drink 2 cans of pop or beer, or find a volunteer to do it for you.
Grab a pocket knife & scissors, or a multi-tool if you have one. I used a keychain-sized leatherman tool to build the entire thing.
Grab a penny from a junk drawer or from under a couch cushion.
(Optional) find some sandpaper to smooth some of the edges. It makes it slightly safer to operate.
That's it! There's nothing here that can't be found inside your home.
Step 2: Step 2: Cut the Cans


Cut off the tops of both cans (the end with the opening to drink from). It's easiest to cut it with some scissors near the top, then peel it down to size in a spiral pattern. This ensures that the cut is nearly always smooth.
Peel or trim the cans down to a height of 2 inches or so.
Step 3: Step 3: Fit the Cans Together

Designate one tin cup as the inside piece, and the other as the outside piece. Lightly crimp the top edges of the inside can.
Face the two "cups" together, and gently press and wiggle one inside the other. Be careful to avoid cutting yourself, since sheet metal can be incredibly sharp! Continue working them together until there is a tight pressure fit, and no further movement is possible.
(Optional) On the spot where a bare edge connects with the top, take some sandpaper and soften the edges. This will make it slightly safer to use and give it a better fit.
Step 4: Step 4: Puncture Holes for Burning


There are many different patterns and models used for this type of stove, but the most common seem to be 6 or 8 holes. More will work, but are usually not necessary.
Note: the stove seems to work best if the out metal edge (the part sanded in the last step) is facing up when you puncture the burner holes. While it will work in either direction, it seems like it might leak fuel in certain circumstances if this advice isn't followed.
Using a knife tip, awl, nail, or even a sewing needle, puncture some evenly-spaced holes around the outer perimeter directly below the rim. Try to make the holes a uniform size, since any larger holes will jet more flames than the rest.
Puncture one hole in the very middle of the can, and widen it to be roughly large enough to push a pencil into. This hole will be where you pour the alcohol into, but will be covered by a penny during operation.
Step 5: Step 5: Fuel It and Light It!


Start pouring alcohol in until it's fairly full. Filling to the brim isn't necessary, but since there's no easy or safe way to refuel while it's running, you will need enough fuel to cook whatever you plan on cooking. Since all stoves burn a little differently, the best way to know fuel needs is to run tests.
Some stoves can simply have a match touched into the fuel hole, and they will begin working. If this is the case, congrats! You have a stove that's very easy to light.
If not, take a small bowl or lid (ceramic or metal only!) and fill with fuel, then place your stove directly on top. Place the penny in the middle, and light it up! Over the next 20 to 60 seconds, the heat will vaporize the alcohol, and jets will shoot the puncture holes. The flames from the starter fire will ignite those jets, and you will have a working stove.
If the jets are low enough, you can place a cooking container directly on top. If not, you will need a small pot stand of some type. Be careful not to tip over the stove while it's running, or flaming fuel will leak everywhere!
Unlike some other fuels, alcohol fires can be put out nearly instantly by a little water. Keep a small bottle near your side, and when you're done, douse the flames and let it cool.
Congratulations! In only a few minutes, using common tools and garbage from around the house, you've created one of the best ultralight backpacking stoves on the market. I'll drink to that!


