

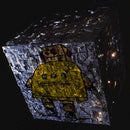
Introduction: 12 Volt Travelmate - a Cooler That Provides Storage and Power


As can be seen from my profile info to the right, I deliver mail for a living along the back roads of a small Massachusetts town. Its a good job, quiet, and most of the time I'm alone with my thoughts - which is where most of my ideas come from.
Anyway - I spend most of my time on the road in a typical postal LLV (Long Life Vehicle) - And an LLV only comes with two amenities.
- Power Steering
- Power Brakes
And a whole bunch of mirrors...
An LLV is also missing a few features common in virtually every car today -
- Glove/storage box
- Radio
- Cup holders or other places to store food
- Accessory ports
(some LLVs may have the remnants of an old cigarette lighter - many districts have systematically removed them as they cause electrical issues, if they work at all. They are often rusted out and useless.)
This Instructable sets out to address those deficiencies.
The easy thing would be to wire something into the truck, but the Post Office has a few real strict rules about that sort of thing. I can't add anything permanent to the vehicle, nor modify it in any way. -So, I had to devise a portable solution that I can fit into the truck, and take with me when I leave. The 12 Volt Travelmate is the result. It has room for my lunch, including a freezer pack, a place to store things such as my wallet and a small first aid kit, and the rechargeable 12 Volt 9 Amp battery pack provides enough juice to power small USB devices, charge phones and tablets, and power just about anything one can plug into an accessory port.
The 12 Volt Travelmate is a great solution for parents on the go - If you have kids in the back seat with USB rechargeable devices, but do not have a nearby accessory power port for them to use, plug them in to the Travelmate ! - Stick a couple of snacks in the cooler, and other things in the storage area and enjoy peace and quiet on your trip.
The 12 Volt Travelmate is also good for foot travel ! You can go hiking or to the beach and keep your lunch cold, your GPS hot, and your wallet dry.
Interested yet ? Read on !
Step 1: Collect Your Hardware, and Plan Accordingly.


If you intend to follow my lead on this, you will need these items ;
- Cooler
- 12V , 9Amp rechargeable battery
- "Trickle charger"
- Automotive accessory terminals
- Automotive carpeting
- Spray adhesive
- Two part epoxy
- Waterproof fiberglass wall panel
- Electrical tape
- Rotary tool and cutting discs
- Razor knife (and extra blades)
- Shears/snips
- Protective gear (long sleeves, eyewear, possibly a facemask)
- Measuring tape and a T-Square
- Patience.
You should be able to find everything you need at an automotive store, and a hardware store. -However, Id suggest getting your battery and charger from a company that specializes in batteries- that way you are certain that they match, and they can advise you on things such as charging times. In my case, the battery takes 12 to 18 hours to fully charge using the trickle charger I have to go with it. Your mileage may vary. - just be certain that you know what needs to be done, as overcharging will kill your battery. - The good news is that charging doesn't happen often. I have yet to drain my battery, and I have plugged a lot of stuff into the Travelmate.
Take the time to plan your layout, and make certain that everything will fit into your cooler once you are finished. The good news is the electronics portion of this project can be really simple. By choosing a battery that provides similar output to a car's native accessory port (often 12V , 10-15 Amps) you open up a whole world of premade items that can be used. In other words, "There is no need to reinvent the wheel". My battery puts out 12V, 9 Amps, which is far more than I need in most cases ( 5V, 1 to 2 Amps) and the plugin chargers/converters I am using already have the circuitry to step down the power to what the electronic item needs. Easy !
*This Instructable involves using sharp & stabby things such as razor knives, shears, and rotary tools. keep your wits about you and work in an uncluttered environment safely. This Instructable also involves using adhesives that have quite a bit of vapor involved. work in a well ventilated area, and if necessary, use a respirator to avoid breathing in the fumes.
Step 2: Prepare Your Cooler.


Start off by stripping any extras on the cooler away, and carefully remove the handle and the lid. In my case, I used a promotional cooler that had a vinyl decal wrapped around it. you really should remove anything extra first because whatever stays behind will end up under the covering. Its better to adhere the automotive carpet to the cooler and not a sticker.
In most cases, removing the cover is easy. Its often held in place with short pins. If you push on the side of the cooler, the lid comes right off.
The handle is a bit more tricky. it penetrates a bit more deeply into the cooler, and is usually 'keyed' - You will need to turn the handle to the correct position to remove it first. In my case there were small pegs that needed to line up with small holes, then the handle needed to be pulled straight out. If you just rip it off, it will never reattach with any sort of reliability again, so have patience and do it right.
Step 3: Measure and Cut for Your Accessory Ports.


If you followed the first step (you did, right... Right ?!? ) you know where you want to mount your ports. The set I have chosen were originally intended for "under dash" installation, and the top plane where the unit was intended to be screwed in place is exactly the same width as the top front edge of the cooler, making the installation obvious. Maybe you selected something different, that needs to have an opening drilled ? If you did, the same rule applies, plan accordingly.
I chose to mount the device along the top right front edge of the cooler, so I measured the size of the opening SLIGHTLY SMALLER than needed. Once I drew my lines, I used my rotary tool to score the plastic, and finished with the razor. I then test fit the piece, and cut away until it was perfect, then sunk the screw edge so that it is flush with the rest of the cooler. You should shoot for a nice, tight fit. Once you are happy, remove the device and set aside.
Step 4: Modify Your Top Lid.


If the cooler you have chosen is anything like mine, there will be some usable space inside the lid. I chose to make a place to store pencils, pens and other small things using a design similar to a 'CD wallet' or a car visor with a pocket.
First measure the inside of the area (or areas) you intend to use, Then cut some backboard to fit the space snugly. Next get your automotive carpeting, and lay it bottom side up on a flat surface. Your carpet may or may not be marked as to which side faces up - the softer side is for your feet, the rough side is for glue. Use your judgement.
Use spray adhesive on the plastic pieces, and glue them to the carpet. Once dried, trim off the excess.
Next, cut some strips of carpet and wrap them around the center of your finished pieces, making pockets for things. Glue them into place with your spray adhesive.
Finally, apply some epoxy to the cooler where you intend to attach the pockets. Only mix what you need. Press the pockets into place and set aside.
Step 5: Cover Your Cooler's Sides.


Okay, this next step can be tricky, but it will look awesome if you take your time.
Cut a section of carpet long enough to wrap your cooler entirely plus a few inches extra, and make sure to leave a generous amount extra over the top and bottom of the cooler.
Lay the carpet on a flat surface glue side up. spray one side of the cooler with adhesive and stick it to the carpet. Spray the next side of the cooler, and roll it along. Continue until all four sides are covered, and you are looking at the carpet overlap on the top.
Grab your T-Square, and a sharp razor knife. What you want to do is cut the carpet straight through the middle of the overlap, right down to the cooler. once you are through both carpet layers, remove the carpet from the top, and then peel back a bit and remove the edge you cut off that is glued to the cooler.
When you fold the carpet back over, you will have a nice, clean seam, where the edges join. Roll the cooler around and make sure the carpet is free of wrinkles, and the glue is evenly spread. Let it dry.
Step 6: Cover Your Cooler's Bottom.


Okay, you have gotten through the first part, now for something slightly more advanced.
Flip your cooler upside down, and cut a slit in each of the corners of the rug to loosen pressure. Apply spray adhesive to the carpet and stick it down to the cooler, top, bottom, left, right. Now we are going to do the same thing to each corner that we did to the side, line your T-Square up so that you are cutting the 90 degree corner into two 45 degree pieces. Cut straight through both layers, remove the excess from the top, peel off the excess from the bottom layer, and close up. next, cut a piece of carpet to cover the bottom of the cooler, leaving overlap. In my case, I decided to use the ridge around the bottom of the cooler as a guide. Once the bottom panel was glued in place, I used the T-Square to cut around that ridge, removing the excess from the top and the bottom one side at a time, leaving nice, neat seams.
Step 7: Wrap the Top Edge, Attach Accessory Ports.


Next is the top edge.
The odds are, the top of your cooler has a lot of shapes to wrap around. Start with one edge, apply a little spray adhesive to the part of the cooler you are covering, and stretch the carpet around it. Use your rotary tool and cutting disk to make small cuts to the carpet as you go to close seams, and remove excess. (Yes, I said rotary tool - the disk works well on the carpet fabric, and is real precise) Go right up to the top edge. do the same for the remaining sides. Next, use some electrical tape on the inside edge to keep the carpet from peeling up from use.
Dry fit your accessory ports. You might need to do some small adjusting to compensate for the carpet. Once you are happy, mix up some epoxy, and apply it to the back sides of all of the facing edges of the port, and into your cutout as well. Press into place and let dry.
Next, make certain that the connection points for the handle are free of carpet, and reattach the handle - be certain to watch the keying - . Make sure it lowers and raises properly. It will probably be tight, but it will break in over time.
Attach your lid too, make sure it fully closes. Once you are happy, remove the lid again. and set aside. You will probably need to wipe down the inside of the cooler. Its probably full of fabric bits and fuzz.
Step 8: Cut and Attach Your Divider, Setup Battery Compartment.


Measure out where you wish to place your divider, and cut a piece of the fiberglass backing to tightly fit the area. You will probably discover that the interior of your cooler isn't perfectly square, so you will need to adjust as you go. Once its in there tightly, epoxy it in place on all three sides. You could also add some clear calking around both sides of the divider to make certain that there won't be any leaks from the food side of the cooler to the battery side. Place your battery, use blocks to hold it in place (I used the part I cut from the front of the cooler) And add anything else down there you want to hide away. I partitioned my cooler such that I could fit the trickle charger in with the battery, so I always know where it is.
Step 9: Build Your Glove Box.


Now that you have your battery in place, its time to build the glove box.
First, measure the amount of space from the top of the cooler down to the battery for depth, subtract about a quarter inch then measure each of the sides. Cut five pieces of fiberglass panel, one for the bottom and one for each of the sides, and test fit them individually. You will need to adjust, especially around the accessory ports. (Unless you opted to drill your ports out down by the battery). Once they all fit, lay them on a piece of auto carpet glue side up to make sure they all fit entirely. Once you are happy, hit the pieces with spray adhesive, and glue them to the carpet.
Once dried, cut around the edge of the entire assembly keeping the pieces together. When you flip it over, you'll discover you have a collapsible, removable compartment. slide the edge under the accessory ports first, then work the rest into place.
Reattach your lid, load up your 12 Volt Travelmate, and enjoy !
Step 10: Gallery of Fail, the Radio, and Final Thoughts.


There is only one entry in the GOF for this project, involving carpet covering.
Make certain not to over spray the adhesive. I needed to redo my cover the first time as the adhesive soaked right through. Sticky. Gross.
The 12 Volt Travelmate is a perfect example of the phrase 'Necessity is the mother of invention' - This was created to fill a very specific need - and in the process I made something that lots of other people could use outside of spending life in a mail truck.
Along with being able to carry my lunch, I also have a first aid kit, and a small AM/FM radio I converted to run on a car adapter, as inspired by this Instructable by ZaneEricB - WIRELESS Wii BAR + CHEWED USB = NO MORE $$ BATTERIES!!. I also made the Wii bar, as I have the same unit, and had the same issues.
The radio is just an example of what can be done with the power the 12 Volt Travelmate provides. With a little imagination, one can adapt almost anything that uses 12VDC or less needed to the cooler, not just premade items !
When I'm on the job, the glove box keeps my wallet, keys, and a spare USB cable safe.
I certainly hope you have enjoyed this 'ible, and that you find use in it. If you make one, post a pic !

Runner Up in the
Glovebox Gadget Challenge

Participated in the
Tech Contest


