

Introduction: $15 Dream to Reality Interfacer, Control Objects in the Realworld From Your Lucid Dream


Have you ever wanted to get work done in the time you waste sleeping? Now you can!
This project is essentially a highly complex lucid dream mask which detects REM sleep by eye movement.
You can then send predefined eye commands to the mask when inside your dream to control the outside world!
want to turn on a speaker with a preset soundtrack to soar above the clouds to?
want to set an alarm in your dream to wake you up in a certain time?
want to communicate with morse code and talk with people outside your dream?
theoretically you could even connect two of these up to communicate over the internet and talk dream to dream..
the possibilities are endless.
Yes Yes, that's a bit of a stretch but controlling things with single commands sent from the eye as in moving eyes up 3 times in a row can trigger really anything you can attach to it. More work will be done for figuring good eye commands and light feedback in the future
___________________________________________________________________________________________________
I know there are a few lucid dream masks on instructables but most or all of them just have predefined triggers every x amounts of hours to notify you are sleeping. not only is this harmful to your quality of sleep but its a trial by error approach. You end up obtaining lucidity by random and its a chance of luck If you do get notified when you are in rem sleep.
This mask accurately detects rem sleep patterns and then notifies you when you are 100% in REM sleep so that you will always have full control of your dream and not be abruptly awoken annoyingly or damaging your sleep quality.
___________________________________________________________________________________________
please keep in mind that this is my first electronics project with little to no understanding of any components before I started this.
zero programming knowledge and zero experience making anything. A lot of this is rough and patchwork so please take it easy on me.
I learned everything about c++, mircocontrollers and circuits while I was making this. So If you are unsure of your capabilities, just know that you probably have more experience than I did before making this.
Step 1: Ingredients! (part List)

Parts included:
hook up wire
ATmega328(p)or similar
(p) is better for power consumption in sleep when using a battery pack
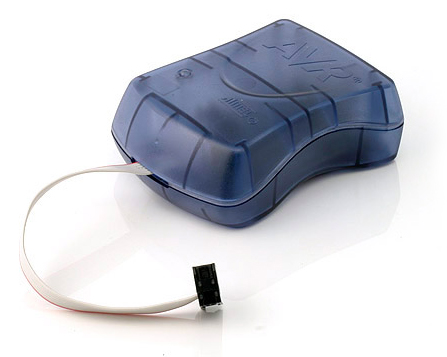
an arduino or AVR programmer
6 red 3mm leds
10k resistors for pullups/pulldowns
200-400 ohm resistors for leds
breadboard for prototyping(optional if you are ballsy)
1 inch perf-board or PCB squares
SPDT switch
normally open button switch
paperclips
any wall plug @ 5v . 250 and above mA(pretty much any charger for phones in the past decade)
(http://dx.com/p/5v-1a-wall-power-adapter-for-scanner-surveillance-camera-more-us-plug-155640)
an opamp(I used an LM358)
and the key component (Piezo Vibration Sensor) found here: https://www.sparkfun.com/products/9196
OPTIONAL
---------------
20mhz crystal oscillator( I used the internal 8mhz)
piezio speaker for an alarm/testing
female and male connectors for interfacing with actual electronics possibly audio 3mm jacks/plugs
micro controller socket for easy removability
lithium polymer battery (https://www.sparkfun.com/products/731)
mini lithium charger (https://www.sparkfun.com/products/10217) be careful, you have to remove a surface mount resistor and replace it with your own to make the charger compatible with sub 500ma batteries.
I got most of my components from element14, shipping at cheapest option arrived in 3 days internationally.. I was pretty impressed. and the prices are the cheapest I've seen
Step 2: The Theory

Like I said in the intro, most masks try to flash lights at you randomly during the night in hopes that you are in rem sleep. this is not reliable, It has a very low success rate and it's more harmful to your sleep quality then good.
you have 4 stages of sleep: 3 stages of Non-REM sleep and 1 stage of REM sleep, this repeats through the night
Stage 1 occurs mostly at the beginning of sleep. If you are awoken here or stimulated at this point then you will wake up and feel like you haven't had any sleep at all.
Stage 2, occurs after and there is zero eye movement, this is where the mask gets it's default reading of zero eye movement. If you were awoken or stimulated here then you would wake up incredibly easily and be disoriented and groggy
Stage 3 occurs next and it is the deepest sleep, not much is happening with your body and brain.
stage 4 is REM sleep, Rapid-Eye-Movement sleep, this is where you dream the most vividly and actively.
____________________________________________________________________________________________________________
This cycle is repeated 5+ times during sleep. With REM sleep becoming longer each cycle until REM sleep reaches an hour+ in length.
With this device you can take advantage of that and trigger the wake up to happen at the last REM cycle to obtain the most vivid lucidity and REM time OR you can let it happen every REM cycle but when you awake you may forget most of your dreams and it may be confusing to recall everything. Still very amazing nonetheless
Step 3: How It Works. (The Menu)
It's a fairly simple circuit, a micro controller attached to 6 leds, 2 buttons, and a sensor. That makes up the basics.
the function of the mask goes through a few stages,
1) the settings/menu
When you turn on the device it instantly starts running the program. to get into the settings menu you hold down the main button and turn it on. It will blink a specific pattern and you will be in the menu.
holding down the main button will move from sub menu to sub menu with a flash on the led indicating the menu you are in
these are the particular sub menus
a) the brightness of the leds
b) the speed of the leds
c) the pattern display of the leds
d) the time before it turns on in hours
e) how many times a night you want the device to trigger
f) how many times per trigger you want the patterns to flash
tapping the main button cycles will move from led to led to show you your selection and tapping the second pad/button will save your selection to eeprom memory, (this is permenant memory storage that will persist even when the device is turned off)
when you turn on the device without holding the main button, the program will run and load the saved settings.
Step 4: How It Works(the Program)
I'll have to reiterate, I had no electronics/programming experience before this, and learned on the fly, this program is really rough and brutal because I had no programming experience before hand so be nice.
because I had no experience I started with an arduino and liked the arduino ISP so much that I used the AVR programmer in conjunction with the Arduino ISP to program.
Also If anyone can offer fixes/tips/advice/help to clean it up or make things less redundant please notify me, I'll add to the program and keep updating it here.
here is the link to the program(https://mega.co.nz/#!bMUw0A7L!S6SX6Fd3-RT88Aj1J4r7oH6YxGAKy3SUgL4sZCN1lGQ)
I'm still working on a better setup, so I'm putting the old version here temporarily just so i can finish the one I'm debugging now)
_____________________________________________________________________________________________________________
In basic sense here's what the program does.
Menu system > after an hour, find the default vibration data of the eyes, (no movement) > wait for program start > compare eye sensor data to default data and detect eye movement > if no movement go back to sleep for x amount of time > if movement, run preset pattern trigger > if conditions are met, listen for communication data > act on communication data > go to sleep till for x amount of time > and continue till the preset trigger amount is met. then sleep forever
Step 5: How It Works (the Hardware)


This pinout was incredibly handy to have printed out and referenced constantly. The atmega168 and 328 are identical in terms of pinouts so i used this.
______________________________________________________________________________________________________
before I get into specifics. If you plan to interface with a device(arduino or electonics) make sure you have a digital pin specified in the program code that handles your communication and interaction. Remember that digital pins are not the same as the pinouts. This is key to making sure you don't *** up. for instance, digital pin 8 is actually physical pin 14 on the chip. So be crystal clear which digital pins are hooked up to what.
I wont go into details on how to interface with electronics, The device is set up to send commands on the available 8+ I/O pins. So It's up to you to attach whatever devices you want to it. The sky's the limit.
I had connected VCC, AVCC togeather first. (pins 7,21,20)
Connected AREF to a voltage divider to force it to 1V (this makes the analog data very sensitive)http://www.electronics2000.co.uk/calc/potential-divider-calculator.php that is a helper for the voltage divider if you plan to use batteries or a different input other than 5
^^scratch that^^
you can internally set the AREF voltage by putting "analogReference(INTERNAL);" on an atmega328
just don't connect AREF to anything.
then I connected the grounds (pins 8, 22)
The reset pin needs to be held high in order to not reset itself randomly during operation, It also needs to be able to go low when uploading a new firmware so you need to use a pull up to hold high. I connected pin 1(reset) with a 10k resistor to high (pin 7)
I then connected the leds( my eyes measures 6cm from one eye to the other but after experimenting with the round shape of the mask I spaced them 7cm apart.
I then hooked up the resistors to the leds and connected all the negative leads togeather and then to pin 8(ground)
the output pins for the leds are going left to right (pins, 5,11,12,15,,16,17) leds 4,5,6 are on the same board as the micro controller so I attached those next to (pins 15,16,17)
I made 3 long wires from (pins 5,11,12) cross over to the left board and left them for now.
I then made wires for the analog sensor, the main button, and positive and negative to cross over to the left board I connected the positive wire to (pin 7) the negative wire to (pin 8) and the analog signal pin to (pin28)
I finished up the right board by attaching the wires for the button pad, one pad gets ground(pin 8) and the other pad gets attached to (pin 4) and a pull up resistor going from (pin 4) to (pin 7) this pullup resistor keeps the pad always high, so that no noise alters the signal and activates it by accident. ( it can be pulled down or pulled high It shouldn't matter, In this case keeping it High is better I believe as electromagnetic interference hitting the aluminum may pull it high by accident even if it is pulled down.
I lined up all the wires from the right board [ analog(pin28), power( pin 7), ground (pin 8), led 1(pin 5), led 2(pin 11), led3 ( pin 12),
and hot glued them to the board in an orderly fashion. This helped with making sure the wires were aligned when soldering on the other board. and also making sure that the wires didn't pull the boards together at an angle making the leds become misaligned
(*hint* make sure the board works so far as you'll have to rip up that hot glue like i did if somethings off -.-)
On the left board I positioned the switch, the button and soldered them in around the top of the board, they can go anywhere you like as long as it's accessible under the fabirc when you sew it up.
I attached the wallplug (5V at 500mA) to the board with the positive on the switch terminal, and the negative connected on the board seperatly with the (pin8 wire) connecting to it as well
I then connected the leds and resistors, and connected the negative leads together and connected that to the ground wire contact on the board. then connected the resistors to the led wires acordingly
I then connected the resistor to the main button to pull it down, (pin 4 wire) to one terminal on the button, and that was also connected to the resistor and that resistor was connected to ground. the other terminal of the button was connected to positive.
I then connected the neighboring positive terminal on the switch to the positive wire(pin 7)
As for the analog sensor, follow the attached drawing (do not solder the sensor, It will destroy it) so i had to make metal clamps out of female jumpers i had lying around) the other lead on the sensor needs to go to ground, but there needs to be a resistor in parallel so connect a 1000k ohm resistor between the two leads of the sensor to bring the voltage down to your usable 5V.. or else you will damage your components. The sensor actually creates large voltages when compressed and stretched.. far more than a MC can handle.
Step 6: Specifics
There are a few detailed points I have to make In order for someone to follow my steps exactly.
The most notable being that I used a atmega328 with an AVR programmer while using the arduino ISP.
It's quite the workaround but after having zero experience programming, It was easiest to pick up and learn, there are tons of guides and help for arduinos so using the arduino interface programmer was really the only option for me.
to accomplish this I ran into a few problems. The key being that the arduino ISP wont understand there is a AVR MKII hooked up with the drivers that install with it, so you'll need to uninstall the mkII driver from device manager and force install a new one, there is a blog post that i just found here(http://www.johndimo.com/2012/01/18/programming-your-arduino-with-an-avrisp-mkii-with-new-1-0-ide/)
second is that I'm using a ATmega328p with in sleep mode and without a crystal oscilator so I had to program the fuses in the micro controller to use its internal oscilator at 8mhz instead of 20.
If you are new to micro controllers, just understand that they have things called fuses and bootloaders. they are the deep instructions for the chips to run in ways that you can't write sketches/programs for. things like turning off timers/detectors/clock speed/handling the clock/memory management..and even interfacing with hardware like the arduino in which you would need a arduino bootloader for. If you buy a new chip then it will not have a bootloader and you will need to program it anyway which is not difficult assuming you have a AVR programmerhttp://www.raphnet.net/divers/avrprog/ispMKII.jpg
In the case of burning a bootloader, changing fuses and handling sleeping and running the chip on an internal oscillator I followed this guide http://www.sparkfun.com/tutorials/309
I'm sure you can find resources on the web about burning bootloaders and changing fuses and such without avr programmers I think.
heres a guide i found https://www.instructables.com/id/Bootload-an-ATmega328/
NOTE: If you plan to run this off batteries, you should NOT disable brownout detection
If you plan to just run it off a 5v wall plug then you don't need to worry about any of the sleep functions in the code. or disabling any fuses.
The brownout Detector just detects when the supplied voltage has dropped to far, form 5V down to around 2.8 or something around there and stops the program to protect the chip. Disabling brownout would be okay for most projects but it's very detrimental to permanent projects. it can corrupt the firmware or flash making the device unusable unless you reflash the chip and In our case it can corrupt EEPROM, eeprom is the memory that gets saved permanently when the device receives no power, So the device will continue to permanently malfunction each time the batteries run low. This could be fixed by changing what bytes the eeprom saves to in the code each time.. but thats a pain in the a** especially for a permanent project where you don't want to mess with the micro controller anymore.
another detail is the analog piezo film. It generates a ton of voltage from minute compession and elongation of the film. It can detect subtle vibrations from someone walking 10+ meters away, to get this sensitivity you need a 1M ohm resistor in between the leads of the sensor in parallel with the circuit it's on which will convert the voltage down to useable input for 5v power supply.
Another thing to note is that analog signals are quite susceptible to noise and interference. I would recommend shielded wires connecting all the parts of the sensor and connect both sides of the shielding to ground.
then on the AREF pin (21) this should be held down to 1volt(which you can do internally with code), to maximize the sensitivity. Instead of the limits being 0V and +5V it is now 0V and 1V. The AREF pin is the analog reference pin, It gives the analog readings a basis for what voltage it is dealing with.
to get the AREF pin down to 1V you can set analogReference(INTERNAL);in the setup() function, this will internally control the AREF voltage
lastly, because I plan to use a lithium polymer battery I wanted to measure the current usage of the device.
(I'll update this when I find my calculations page) but in the meantime I found that with a 40MA battery It would just barely cut it for one night, and with a 100mAh battery it would last long enough to just have to charge it for an hour before use each night, and if you never went to the menu to set the settings then you could use it for 5+ days.. the menu takes up the most power as the leds are on constantly
Step 7: Getting the Sleep Mask Ready


I found this at a store called Rexall but I'm sure any mask will do, this one had a spongy material in the center which helped a lot in the comfyness of the finished project.
the metal pads act as the secondary button, one is pulled high and connected to the input pin and the second is negative.
pulling high helps the input not float around due to electro magnetic interference or electrical noise in the input power. when the two are contacted power is instantly routed to ground because it uses the path of least resistance and the input pin turns low triggering a function. Which happens to be saving the menu option and as a reality check to tell if you are dreaming or not.
Step 8: Putting Everything Togeather


I had connected VCC, AVCC togeather first. (pins 7,21,20)
you can internally set the AREF voltage by putting "analogReference(INTERNAL);" on an atmega328
just don't connect AREF to anything.
then I connected the grounds (pins 8, 22)
The reset pin needs to be held high in order to not reset itself randomly during operation, It also needs to be able to go low when uploading a new firmware so you need to use a pull up to hold high. I connected pin 1(reset) with a 10k resistor to high (pin 7)
I then connected the leds( my eyes measures 6cm from one eye to the other but after experimenting with the round shape of the mask I spaced them 7cm apart.
I then hooked up the resistors to the leds and connected all the negative leads togeather and then to pin 8(ground)
the output pins for the leds are going left to right (pins, 5,11,12,15,,16,17) leds 4,5,6 are on the same board as the micro controller so I attached those next to (pins 15,16,17)
I made 3 long wires from (pins 5,11,12) cross over to the left board and left them for now.
I then made wires for the analog sensor, the main button, and positive and negative to cross over to the left board I connected the positive wire to (pin 7) the negative wire to (pin 8) and the analog signal pin to (pin28)
I finished up the right board by attaching the wires for the button pad, one pad gets ground(pin 8) and the other pad gets attached to (pin 4) and a pull up resistor going from (pin 4) to (pin 7) this pullup resistor keeps the pad always high, so that no noise alters the signal and activates it by accident. ( it can be pulled down or pulled high It shouldn't matter, In this case keeping it High is better I believe as electromagnetic interference hitting the aluminum may pull it high by accident even if it is pulled down.
I lined up all the wires from the right board [ analog(pin28), power( pin 7), ground (pin 8), led 1(pin 5), led 2(pin 11), led3 ( pin 12),
and hot glued them to the board in an orderly fashion. This helped with making sure the wires were aligned when soldering on the other board. and also making sure that the wires didn't pull the boards together at an angle making the leds become misaligned
(*hint* make sure the board works so far as you'll have to rip up that hot glue like i did if somethings off -.-)
On the left board I positioned the switch, the button and soldered them in around the top of the board, they can go anywhere you like as long as it's accessible under the fabirc when you sew it up.
I attached the wallplug (5V at 500mA) to the board with the positive on the switch terminal, and the negative connected on the board seperatly with the (pin8 wire) connecting to it as well
I then connected the leds and resistors, and connected the negative leads together and connected that to the ground wire contact on the board. then connected the resistors to the led wires acordingly
I then connected the resistor to the main button to pull it down, (pin 4 wire) to one terminal on the button, and that was also connected to the resistor and that resistor was connected to ground. the other terminal of the button was connected to positive.
I then connected the neighboring positive terminal on the switch to the positive wire(pin 7)
As for the analog sensor (do not solder the sensor, that will destroy it) I had to make metal clamps out of female jumpers I had lying around) the other lead on the sensor needs to go to ground, but there needs to be a resistor in parallel so connect a 10M ohm resistor between the two leads of the sensor to bring the voltage down to your usable 5V.. or else you will damage your components. you can take the opamp and make a voltage follower(http://people.senecac.on.ca/john.kawenka/EDV255/images/opamp27a.png) and connect the input+ to your sensor and Voutput can connect to (Pin 28 Wire)
The sensor actually creates large voltages when compressed and stretched.. for more than a MC can handle. (even with the resistor, I probably wouldn't bend the film back in forth through the fabric when it's on.)
at the moment Its got a wire leading to whatever devices I want to interface with and the wire for power.
I've ordered a lithium polymer battery and mini charger to add to the project to make it portable and chargeable. So I'll update the instructable when that arrives.
Step 9: Interfacing Electronics to the Device.


You can interface with pretty much any device as long as you have the inputs on the microcontroller.
In my case I'm leading up to an arduino hooked up with a wifi/ethernet shield to communicate online with devices and people.
at the moment I just have it hooked up to a IR stereo remote to turn on music when I want during my dream.
If you have ever had a song that you've imagined flying and soaring through the clouds to, this is the device for you.
I've tried sound effects like ocean ambient sounds or location specific sound and it really makes the dream feel incredibly real.
One thing that is pretty cool is that if you have sound effects of explosions.. your brain instantly tries to make a situation around why that noise happened. So without even thinking I'll see visuals of explosions and actual environmental reaction without any effort.
It really opens up the doors to playing around in your mind.
Step 10: Updates/prototype 2

So this is very much a work in progress, I only decided to upload this so far because of the 3d printer contest,
it works but there are some flaws namely the perfboards are vary hard, I could use more sponge but I'd like to experiment with flexable PCB's
The current program I'm running also have a ton of flaws, The overall device works but It's not detecting the commands properly once in a dream. so I'm just fixing that up in the next few days/weeks (opamp added and sensitivity fixed and updated in the instructable)
unfortunatley making flexible PCB's are costly and I'd need to order them on mass amounts from specialized companies so I've devised a way to make my own.
I'm essentially making the outerlayers of the pcb with paper, and the inside with copper wires.
step one, press the MC into the card paper,
step two, thread enameled copper wires through the holes and position them correctly,
step 3, place the two pieces of paper together with the wires in between
step 4, quickly and carefully solder the copper wires to the MC pins.
and there you have it, flexible PCB.
I'm just waiting for some more leds and resistors to ship, which may take a few weeks, but after that I'll finish this off and sew it together with a battery and charging port.

Participated in the
UP! Contest


