

Introduction: 2003 Honda Civic Head Gasket and Timing Belt Replacement


An Instructable for the moderately experienced, mechanically inclined Honda owner that doesn't want to donate a kidney just to keep his or her car on the road. These instructions are not a guide for HOW to replace a head gasket and timing belt...they are simply some helpful suggestions to make the job go smoother, especially in light of all of the half-baked information that can be found on the internet these days.
If such a project looms for you, I highly recommend purchasing the Honda Service Manual PDF that comes on a CD. It's about $35 and can be found on a couple of different sites. I put it on my laptop, and phone, and even gave copies to the kids, who all have similar models.
The process of actually replacing a head gasket can be found here:
Head Gasket Replacement on '91 Honda Civic
Step 1: Strange Cooling Problems...

From what I gather, the Honda "D17" engine is prone to an assortment of cooling problems that may, or may not, be related to Head Gasket issues. I haven't seen any Honda-published Technical Resolutions for known systematic issues related to the manufacturer-installed head gasket. If there is an issue, they're keeping mum.
In my case, the car was overheating 3 hours into a long highway drive in relatively cool weather in easy driving conditions (no towing, or AC, or refrigerator box on a roof rack). Steam was coming out from under the hood after the temperature gauge climbed steadily. Replacing the thermostat didn't do much as the problem returned shortly thereafter.
I even took the old thermostat, snipped out the center, and re-installed it, hoping that a clear coolant path would solve things. It didn't. Despite the absence of any tell-tale white tailpipe smoke, or oil in the coolant, I could detect a strong exhaust smell coming from the radiator refill.
While I was at it....
I figured it made good sense to do the timing belt, water pump, and belt tensioner, given the number of miles on the car. Did I mention that getting the digital service manual was a good idea?
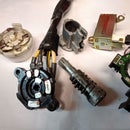
Step 2: Parts Removal

Most of the components are pretty straightforward to remove. Everything is accessible with a 10mm, 12mm, and 14mm socket wrench. Many nuts and bolts will require a breaker bar. If you've replaced alternators, thermostats, and other engine bay components, nothing here should give you much trouble.
However, the intake manifold was a PITA to remove. Rest assured, pulling off the head will require complete removal of the intake manifold from the engine bay. The center-bottom nut, located deep within a slot between two intake tubes, made using a ratchet impossible. You'll have to use a simple wrench to get in there and rotate a few degrees at a time, a few thousand times, to get that nut off. Let it drop for later retrieval.
Carefully pull the electrical harness from it's many sensors and carefully fold it out of your way. There are two parts to the main harness.
Step 3: Fuel Injector Removal


Disconnect from the harness, unbolt, and use careful leverage to pull them out; they'll come out with some difficulty. Balance their removal so that none are torqued to the breaking point. Once out, inspect the rubber gaskets and the injector ports; carefully fold the fuel delivery system to the side and out of your way.
Step 4: Intake Manifold Removal


Once the two bolts and three nuts are removed, the intake manifold can be slid back, rotated slightly then up, lifted a bit from the right, slid back some more to the left, rotated back slightly from the opposite corner, lifted end up a smidge, then rotated left a little and back down while pushing up in one smooth motion. Don't forget to disconnect the vacuum hoses under and behind, while doing all this.
Keep in mind that the "devious nut" will need to be re-installed at some point. Might as well start thinking about that little problem; it'll be upon you soon enough.
Step 5: Valve Cover Removal


Remove the valve cover.
Obviously.
Step 6: Head Removal and Gasket Inspection


Carefully inspect the factory-installed head gasket. It seemed to me that the gasketing material on top of the cylinders looked pretty chewed up. Perhaps this was the source of my problems? It's not a stretch to imagine exhaust gases blasting through the half-eaten gasketing and into the coolant ports.... at least at first approximation.
Unfortunately, inspecting the block itself (image 2) reveals nothing out of the ordinary.
Removing the gasket from the head (image 3), however, indicates something interesting....an oddly oxidized patch of aluminum at cylinder #2.
Image 4 reveals the source of the oxidation: a damaged seal allowing the passage of cylinder gases into the cooling ports, and subsequent suction of coolant past the same orifice. In other words, a blown head gasket.
Image 5 detail shows black gasket seal melted a wrinkled by hot exhaust gases. It even appears that there is touch of rust near the cylinder wall.
Step 7: Timing Belt Replacement


Now that the head is off, taking care of the timing belt should be a non-issue, unless you did it recently. I bought the kit that included the belt, water pump, and belt tensioner for about $170. While I was at it, I also replaced the alternator and power steering belts. The hardest part will be removing the crankcase pulley. It took two burley dudes some creative thinking and serious effort with breaker bars to loosen that bolt....and it wasn't even corroded. Expect at least 300 ft-lbs of torque; more than enough to bust an assortment of cheap tools. O'Reilly Auto Parts will rent you the Honda Pulley Tool that holds the crankcase pulley in position while you yard on the bolt itself.
Consider a tow to a garage that can use an impact wrench to get that bolt off, if you can't rustle up the muscle to do it yourself. The engine mount will also need to be completely removed; though getting it back in inexplicably required the use of a hacksaw.
When installing the new water pump, don't be shy about using Gasket Sealer and pay no mind to nebulous theories of ignorant nay-sayers. Follow the instruction manual to a tee when installing the new belt tensioner.
Step 8: Head Gasket Installation


Prior to installing your new gasket, you'll want to scrape off the old gasket crap from both the head and the engine block. Use a razor and do careful work: DONOT gouge the soft aluminum with the hard steel razor! Now is also a good time to check the surface of both the head and the block for straightness; use a good, shop-quality steel rule.
You may want to sacrifice a lamb to the gods and smear it's blood on the gasket surfaces to assure a long and prosperous future.... but I hear that Permatex works better and looks the same. I used it on a much older '91 head gasket, and has yet to fail me. 200,000+ miles and still going!
Place your new gasket on the block, then place the head on top. Install your crankcase bolts as per usual and proceed to next step.
Step 9: Finishing Up- Top Dead Center


Once the water pump and tensioner are installed, it's time to begin thinking about finding TDC (Top Dead Center) and aligning pistons and valves. Align the lower gear with the indicator arrow. It'll be difficult to do, especially if your lighting is poor. I had to wipe a bunch of gunk off the crankcase surface to find it, but it's there.
Once aligned, slip the timing belt over the lower timing belt gear and place the belt in a holding position....
Now align the valve gear with the edge of the upper head surface, making sure the center spoke is "up". I used a steel rule to help visualize alignment. Once aligned, slip the timing belt over the teeth and pull the pin on the tensioner. The belt will tighten nicely without moving the the gears past their markers. Use a 19mm socket and the crankcase bolt to move the pistons a couple of counterclockwise revolutions. re-check alignment; it should be the same.
I used this technique, and after complete re-assembly, started the car on the first turn of the key. Follow the service manual steps and you too will succeed!
Step 10: Radiator Replacement and Final Lessons


In repairing one set of problems, it's likely that you may uncover another set of problems. In my case, a new head gasket and water pump made it plain as day that my radiator needed replacement: the jackwagon who owned the car previously thought that modifying the radiator spout to receive an incorrect cap was a better idea than just getting the correct radiator cap to begin with! Be prepared for these new discoveries!
The radiator had to be replaced because when coolant got to the correct temperature and pressurized the system, hot coolant would simply rise and try to flow out of the plugged overflow tube. As a result, it would flow out past the imperfections of the upper lip of the radiator spout and all over the engine bay, in effect turning my entire cooling system into a one way valve: car gets hot, coolant leaves system, car gets hotter, more coolant leaves system until cooling system redlines .
The front bumper cover must be removed and the condenser coil pulled forward so that the radiator can be pulled forward and out. The new radiator does NOT come with a radiator cap, you'll have to find the proper cap. Refill with the blue Honda antifreeze, despite the fact that it may not be necessary now that your new head gasket does not have that cheesy plasticized surface. It's supposedly good for at least 100,000 miles and will not degrade into a caustic sludge.
Good Luck!
PS: Corrections, useful comments, and helpful advice are always welcome.


