

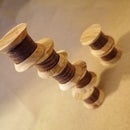
Introduction: 3D Photography With a Jig


I have a fairly important day coming up.. My wedding!!
I would love to have as many cool and interesting things associated with my wedding as possible. including 3D images of the celebrations.
As luck would have it I have helped artists to explore ways of creating 3D images and holograms ect before. I think I have created a jig which can allow anyone to create the raw images for a 3D image without haveing to have someone trained to show them how to use the tech. (Super simple)
Once the photos have been taken there is a quick and easy way using an image manipulation program to make anaglyphs (the red and blue type 3d which requires some retro 3d glasses) ..
(How cool would it be for grand kids to find an old wedding book with retro 3d glasses to be able to see granddad getting married on Halloween with a storm trooper in the background and great grandma welding a harry potter wand whist wearing fangs.)
I'm hoping this project will be nothing but win and will result in future generations wondering what exactly was happening in 2015 that there not doing now.
Step 1: Measure Up


Having previously lost the plate from my tripod I had a I bodged this together face plate to get approximate size reference. But i like to be through and my bodged together plate had a few things that I wasn't fully happy with. Starting from scratch lets me make iterations to this design.
Step 2: Mark Out Cut Out and Finness


Mark out your new face plate. Cut it out-I used a coping saw (Occasionally hand tools are faster than walking to the band saw)
I finessed the shape with a sharp chisel and created a rebate for the plate to lock into place.
I then cut out a gouge for the locking mechanism to engage.
After a little win and error I had an ideal fit.
Step 3: Mark and Cut Your Track


This jig works like a track. the movement should be around 6.5 cm or 2.5 inches (roughly the distance between the middle of your eyes)
With this measurement in mind and allowing for the size of your slider you should be able to work out how long and wide your rails should be and cut them out.
Step 4: Shaping the Railes


I used a chisel to make these cuts.. I could have used a plane to a nicer cut but my planes were upstairs and I was having a lazy day.
I cut the new face plate and shaped it into a trapezium before drilling holes for the bolt to hold the camera.
I cut the railed in order to hold the trapezium face plate and dry fit worked out if I needed to remove any extra wood.. It was a good job first time. (two thumbs up)
Step 5: Glue It Down


I glued the rails onto a thin sheet of plywood ensuring the face plate could move freely between the tracks.
I clamped everything down and then headed off for a cup of tea.
Step 6: Make It Look Pretty


I cut the assembly free from the plywood and marked a curve on the edges using a washer.
I used my sanding station to sand down to the curve.
I knew I might want access to the camera holding bolt in the future to I drilled an access hole
.
I glued on the face plate and held it tight with a couple of screws. After letting the glue cure I fitted onto the tripod and admired the aesthetic of it.
Once all else was done I gave the whole thing a spray with black paint.. (it just makes everything look a bit more classy)
Step 7: Set Up an Snap


I set up a test shot with a bunch of toys.
I focused in and then set the lens to manual before taking one picture on each side of the jig.
Step 8: The Photo Editing Bit


I am using an old version of Photoshop but i'm sure these techniques can be done in other programs.
I imported the photos
I then selected one and pasted it onto the other reducing this new lair opacity to around 70%.
I worked out which image was the taken from the left side of the jig and took away the green and blue channels from the lair style (This leaves red)
For the right eye I un ticked the channel for red leaving only blue and green.
I re positioned the lairs whilst wearing 3d glasses until I found an ideal.
I hope you have enjoyed this instructable.
If you have any ideas for my upcoming wedding or ideas which might help other instructable users interested in this project pleas leave a comment. If you give it a go yourself I would love to see your results.

Participated in the
Photography Tips and Tricks Contest


