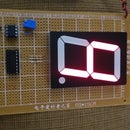
Introduction: 8-Digit Arduino Counter
In this project, you can use a breadboard for mounting the 8-digit seven segment LED display module and your Arduino Nano so that you can upload 5 & 8 digit counter code. That is, two different programs in a single project without soldering any wire.
An Arduino Nano in your breadboard will be enough so that you can manipulate a couple of 4-Seven Segment LED Display and with that a practical 8-Digit Arduino Counter. Although you will have available two programs, it will be your decision for using it as either 5-Digit Arduino Counter or 8-Digit Arduino Counter. For watching a video about, go to the following website:
https://www.youtube.com/watch?v=EpR6I9hHiP0
Step 1: Bill of Materials
What you will need:
1 Breadbord
1 Arduino Nano
7 Resistors of 220 ohm, 1/4 watt
1 Jumper Wire Kit
2x4 Seven Seven LED Display
1 USB-A to USB-B Cable, 3 to 6 ft
1 Multimeter
1 Breadbord
1 Arduino Nano
7 Resistors of 220 ohm, 1/4 watt
1 Jumper Wire Kit
2x4 Seven Seven LED Display
1 USB-A to USB-B Cable, 3 to 6 ft
1 Multimeter
Step 2: Project's Diagramhttps://www.instructables.com/gifts/
Follow the project's diagram carefully so that you can finish your project successfully. It's necessary that the project's diagram be followed in detail to avoid errors, and so you can uploading your programs without problem. Good Luck !!
Step 3: Installing the 2x4 Seven Segment LED Display
When installing the 2x4 seven segment display in your breadboard, it's vital that those be assembled by leaving enough space for the rest of components that you will install later. That is , the resistors and the Arduino nano will need a space in the breadboard also. The first step for this project is to install the Seven Segment LED Displays, but before that, you will need to verify the pins of those displays so that you make sure of the connections that you are doing and with help of your Multimeter you can verify each segment of the displays. However, remember that you should take one of the displays and counting the pins from left to the right and from bottom to above. Then, you should count the pins of your displays counterclockwise, or in a direction opposite to the rotating hands of o clock.
Step 4: Install the Resistors
When installing the resistors in the breadboard, you should leave enough space for installing the Arduino Nano later. Because you already have installed the displays, you will need to consider the space as for the resistors as for the Arduino Nano.
Step 5: Installing the Arduino Nano
Before installing the Arduino Nano, you should verify each of its pins so that you make sure that you are connecting correctly. That is, it's important that the Arduino Nano be installed once you know where is each pin of your Arduino that you are going to use and with it to avoid errors in your project.
Step 6: Complete Your Project
For completing the project, you will need to do the rest of the connections. That is, the connections among the components installed previously: displays, resistors, and Arduino Nano. Then It's very important that each connection be done according to the project's diagram to avoid errors. Please, follow the PROJECT'S DIAGRAM to work without errors.
Step 7: Uploading 5-Digit Arduino Counter Code
Once you have completed your project, you can upload the 5-Digit Arduino Counter code. Then it's necessary that the code be copied and pasted of the following link: http://pastebin.com/P2g9gYTQ
Step 8: Upload 8-Digit Arduino Counter Code
In the last part of this project, upload 8-Digit Arduino Counter code. Then it's necessary that the code be copied and pasted from the following link: http://pastebin.com/S5PUkGf7


