

Introduction: 5 Minutes Solar Mobile Phone Charger


Finally I made it. I've always wanted to make a solar powered phone charger. I'm really obsessed with renewable energy and feel that they are the real future of energy for the humanity.
So I wanted to try to make this solar powered phone charger with the minimalist components and steps.
It's not rocket science. I actually had the idea when I saw it on instructables.
The idea is very simple. You need a solar panel that converts Sunlight into Electricity. And you also need a constant Voltage source for charging your phone. This constant Voltage source is the car charger.
The charger here does some functions:
- Regulating charging voltage and current
- Voltage step up or Voltage step down. ( here I used a 6 Volt Solar panel - so I used the charger as a voltage step down circuit )
Here is my Channel on Youtube:
AeroArduino
Step 1: Components and Tools
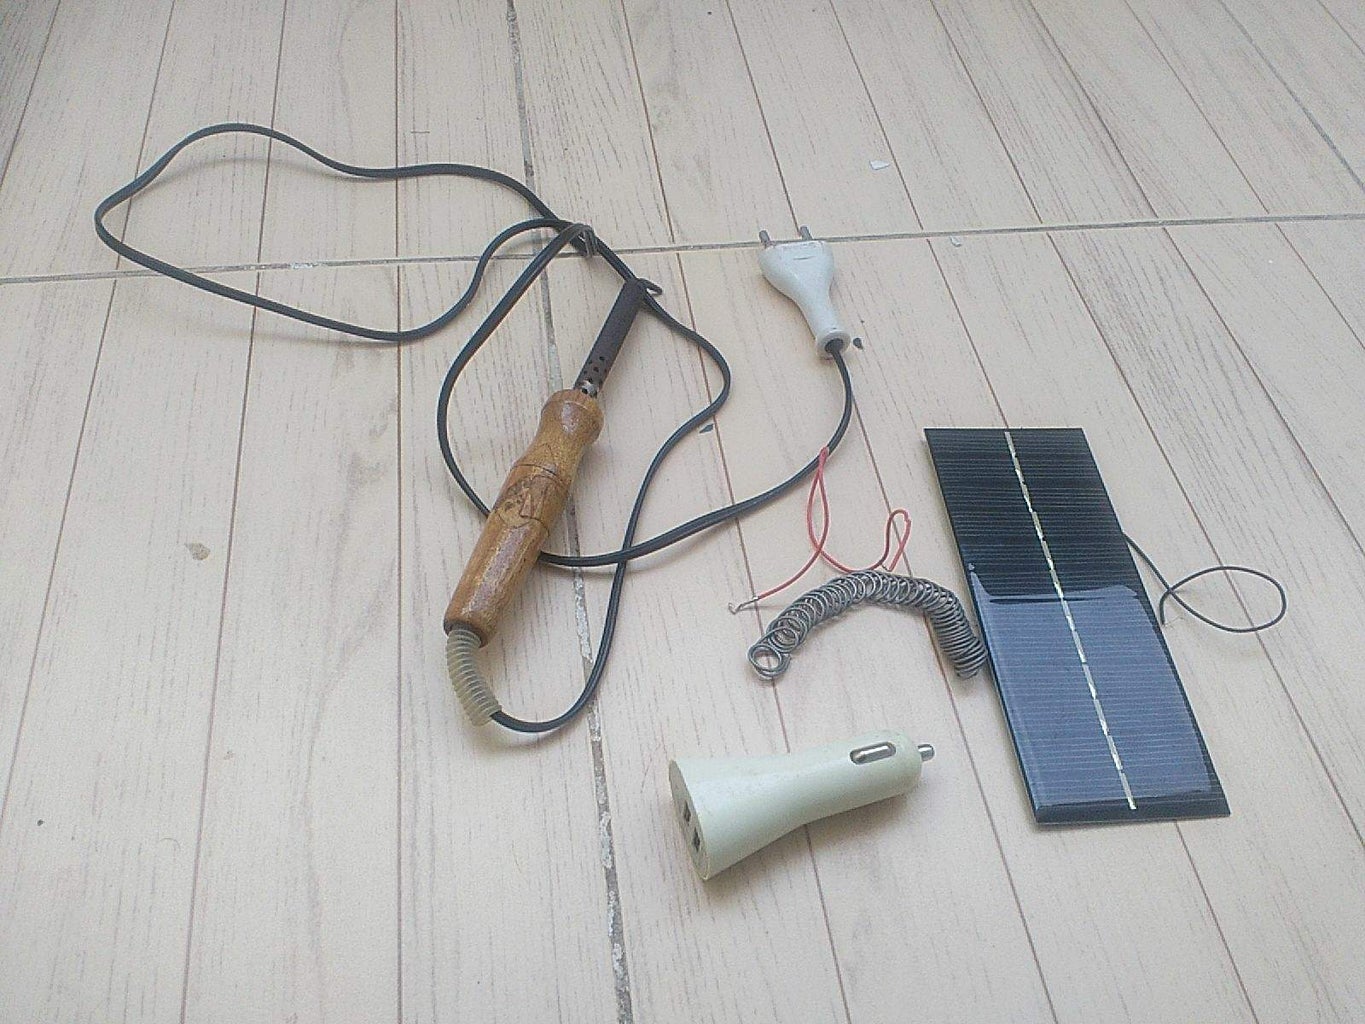
Here are the components and tools you are going to need:
Components
Solar Panel ( I had a 1.5 watt solar panel win 6 volt output ) ---- > Amazon or eBay , Aliexpress
Phone Charger for car ( I actually found this one but you can buy it ) ---- > Amazon US or eBay, Alixpress , Banggood , Amazon UK , Amazon DE , Amazon FR , Amazon CA , Amazon ES , Amazon IT
Some wires
Tools
Solder iron - to solder the wires into the solar panel ---- > Amazon or eBay , Aliexpress
Solder Wire - to connect the wire into the solar panel ---- > Amazon or eBay , Aliexpress
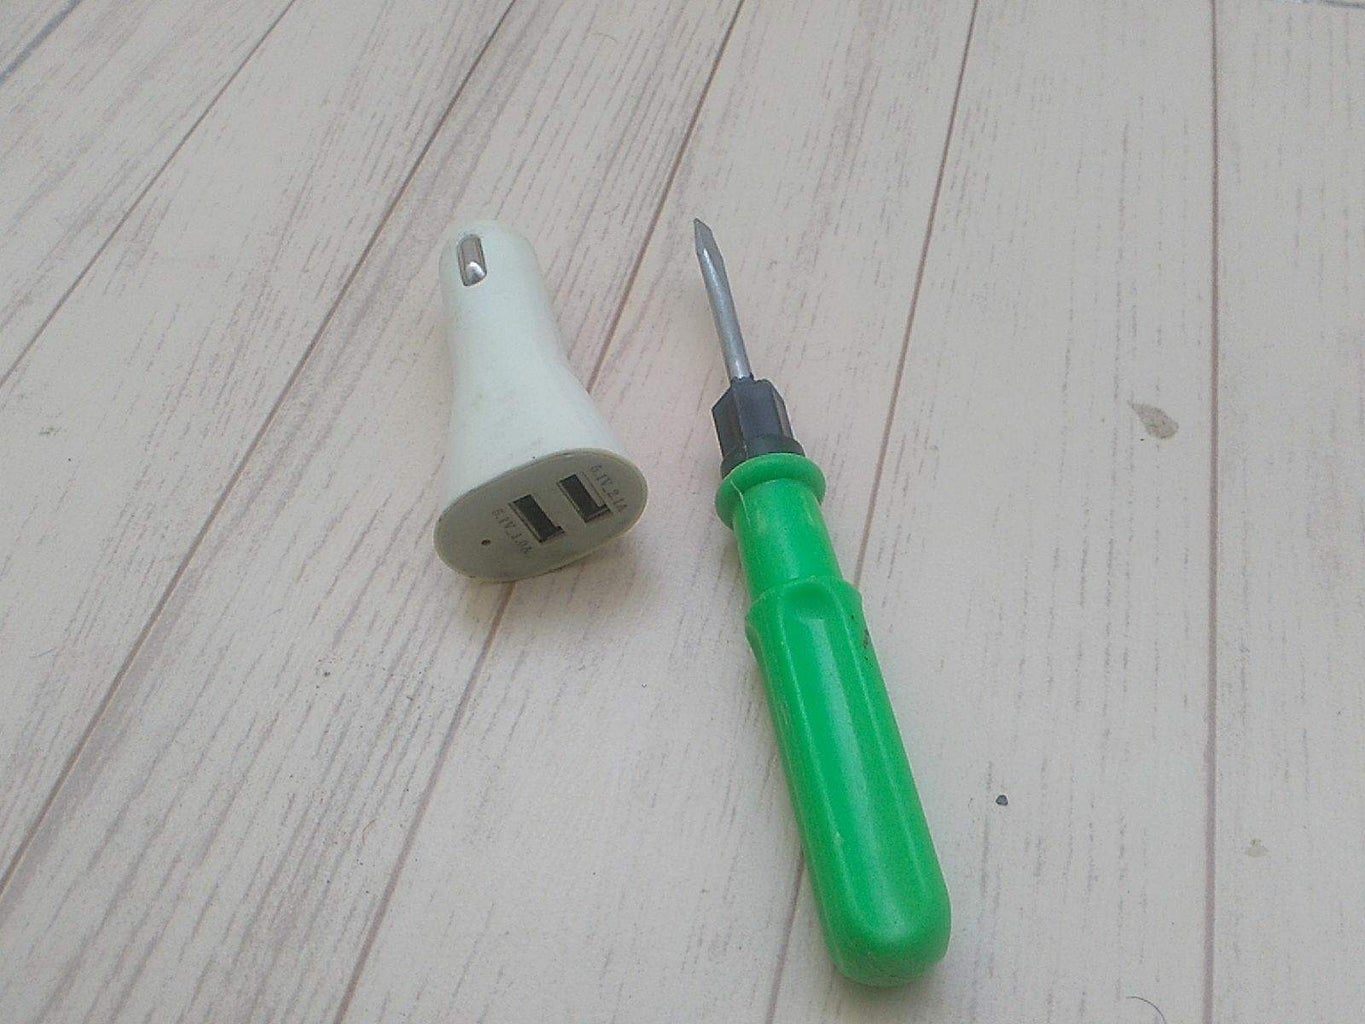
Screw Driver - I used it as a tool for opening the charger ---- > Amazon or eBay , Aliexpress
Voltmeter - I used it to test the solar panel ----- > Amazon or eBay , Aliexpress
Crocodile Clips - They are the handy connectors that you can rely on for connecting stuff -- Amazon or eBay , Aliexpress
Step 2: Solder Wires Into Solar Panel and Open the Charger


I had a Solar Panel with no wires connected to it. So I had to solder the wires into the back of it with solder iron and solder wire.
I used the Voltmeter to test the Solar Panel. The output Voltage is 6 Volt. with no load.
Then I used the Screw Driver to open the car charger to get its circuit out.
The car charger normally gets its input power from the 12 Volt lighter outlet in the car dashboard to output 5 Volts used for phone charging.
The connector on both sides of the circuit have the negative terminal while the single terminal at the end is the positive one.
Step 3: Connect and Test It in the Sun


Connect the phone charger into the Solar Panel using the Crocodile Clips as the following :
- Positive terminal of the Solar Panel to the backward of the charger circuit.
- Negative terminal of the Solar Panel to one of the side connectors on the charger circuit.
Put it in the Sun and test it using the your phone and USB cable.
Note that this type of phone charging with direct sunlight and without any battery takes long time to charge your phone due to relatively small charging current.
But finally, it works. If you find yourself in a place where you don't have any Electricity with plenty of Sunshine, give this one a try.
That's all. Thank you for reading.
Here are some of my latest books on Amazon.


