

Introduction: 6 Shot Arduino Rubber Band Turret (Wii Nunchuck + Arduino)


My intentions with this Instructable are more along the idea of giving other people a project idea, not so much laying out how exactly to do it, so bear with me, please =D
All credit goes to britknight for the idea (https://www.instructables.com/id/Wiichuck-Controlled-Turret/#step1).
I saw yours, was inspired, and thought I'd share what I did!
NOTE: I didn't have much time to put this Instructable together, and I won't have access to a computer until July 2015, so if you post questions, just know I won't be able to answer. =)
Thanks!
Step 1: Materials
The materials really depend on the person. I'm a Lexan and L-Bracket kind of guy, so that's what I used!
I used:
Three hobby servos (all continuous rotation - any brand)
10 x 10" plexiglass sheet
One 12 x 8" Lexan sheet
About 2' of 1 x 1 x 1/16" Aluminum L-Bracket
About 1' of 3/4" x 3/4" x 1/16" Aluminum L-Bracket
A bunch of 6-32 size cap head screws and nuts
An Arduino Uno R3
A half size solderless breadboard and jumpers
A Wii Nunchuck
A WiiChuck adapter
A 6V power source (I use a 4 AA battery pack)
Really, get creative with materials! I was using scraps from the high school robotics workshop I mentor at, so there is definitely room for improvement on the materials side of things!
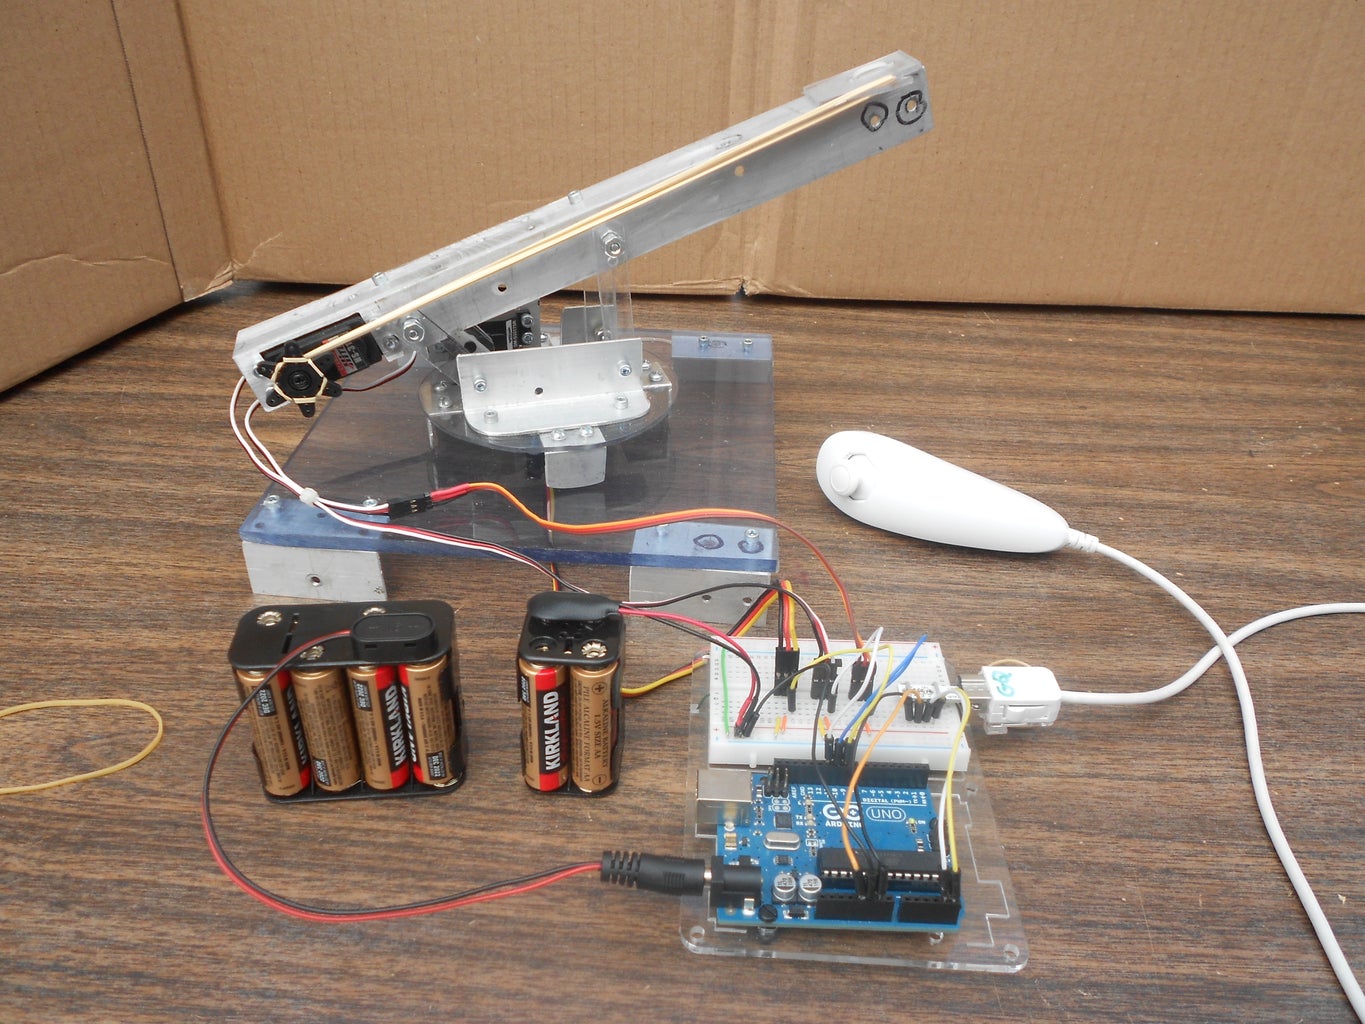
Step 2: The Mechanical


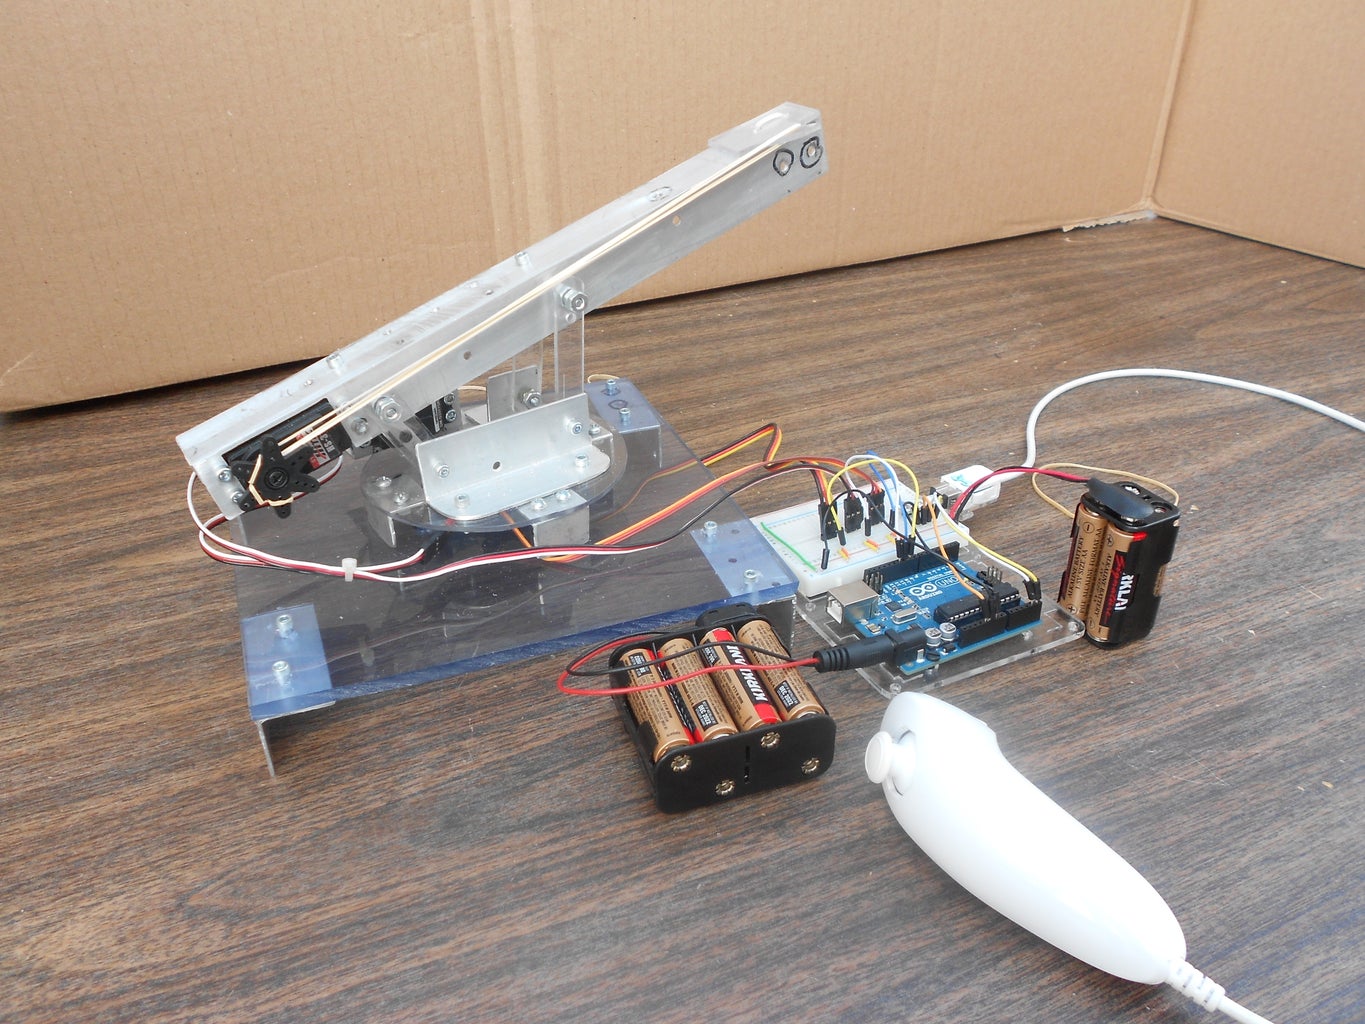
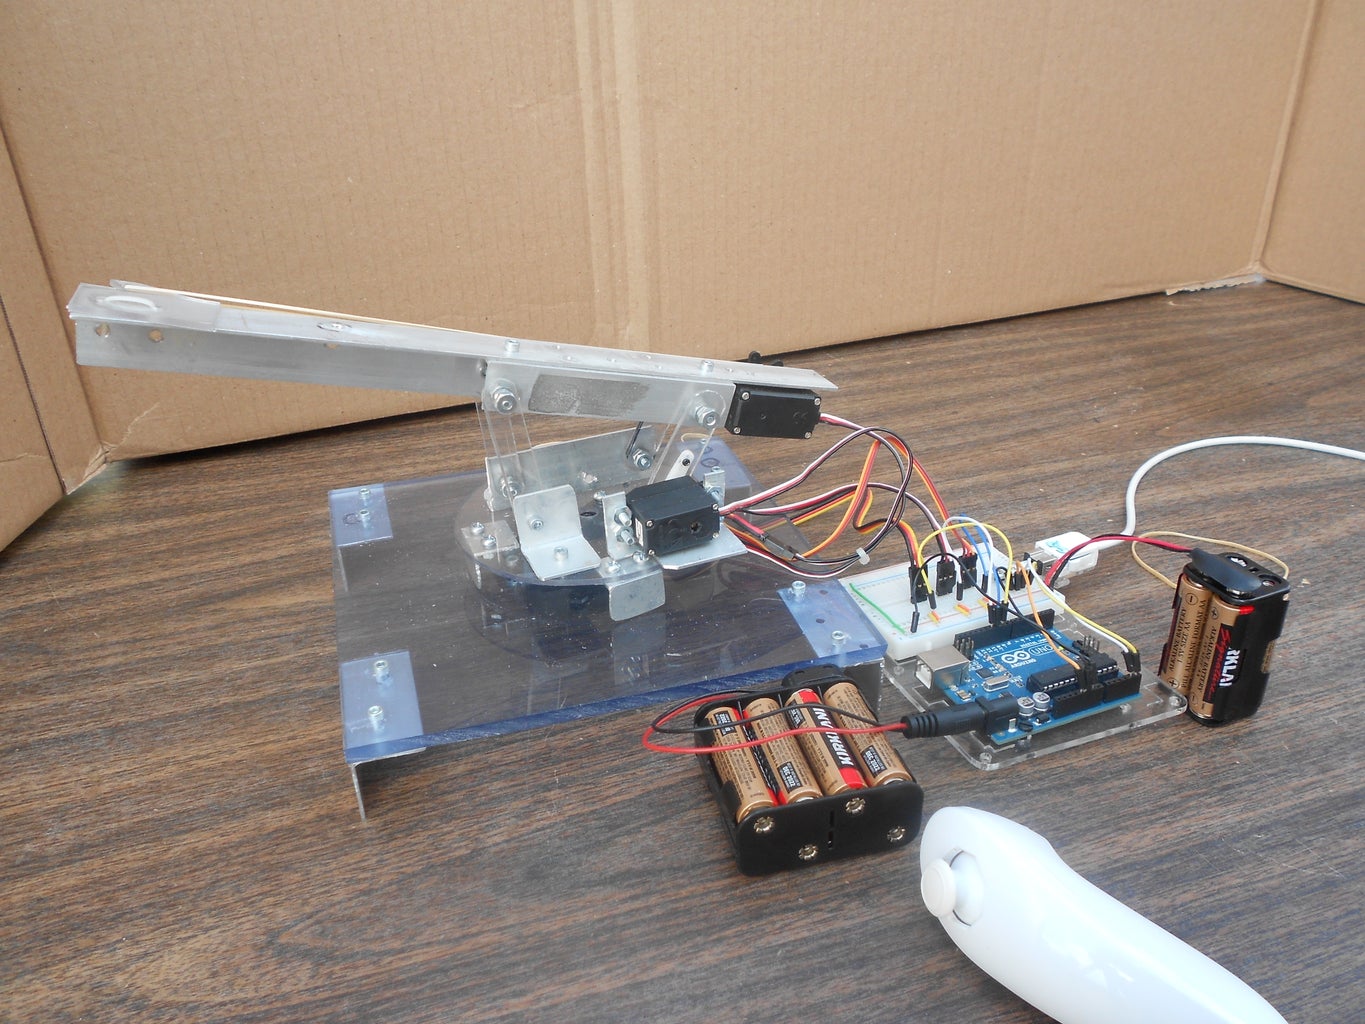
Well, hopefully these pictures will explain most things, but I'll talk you through as much as I can!
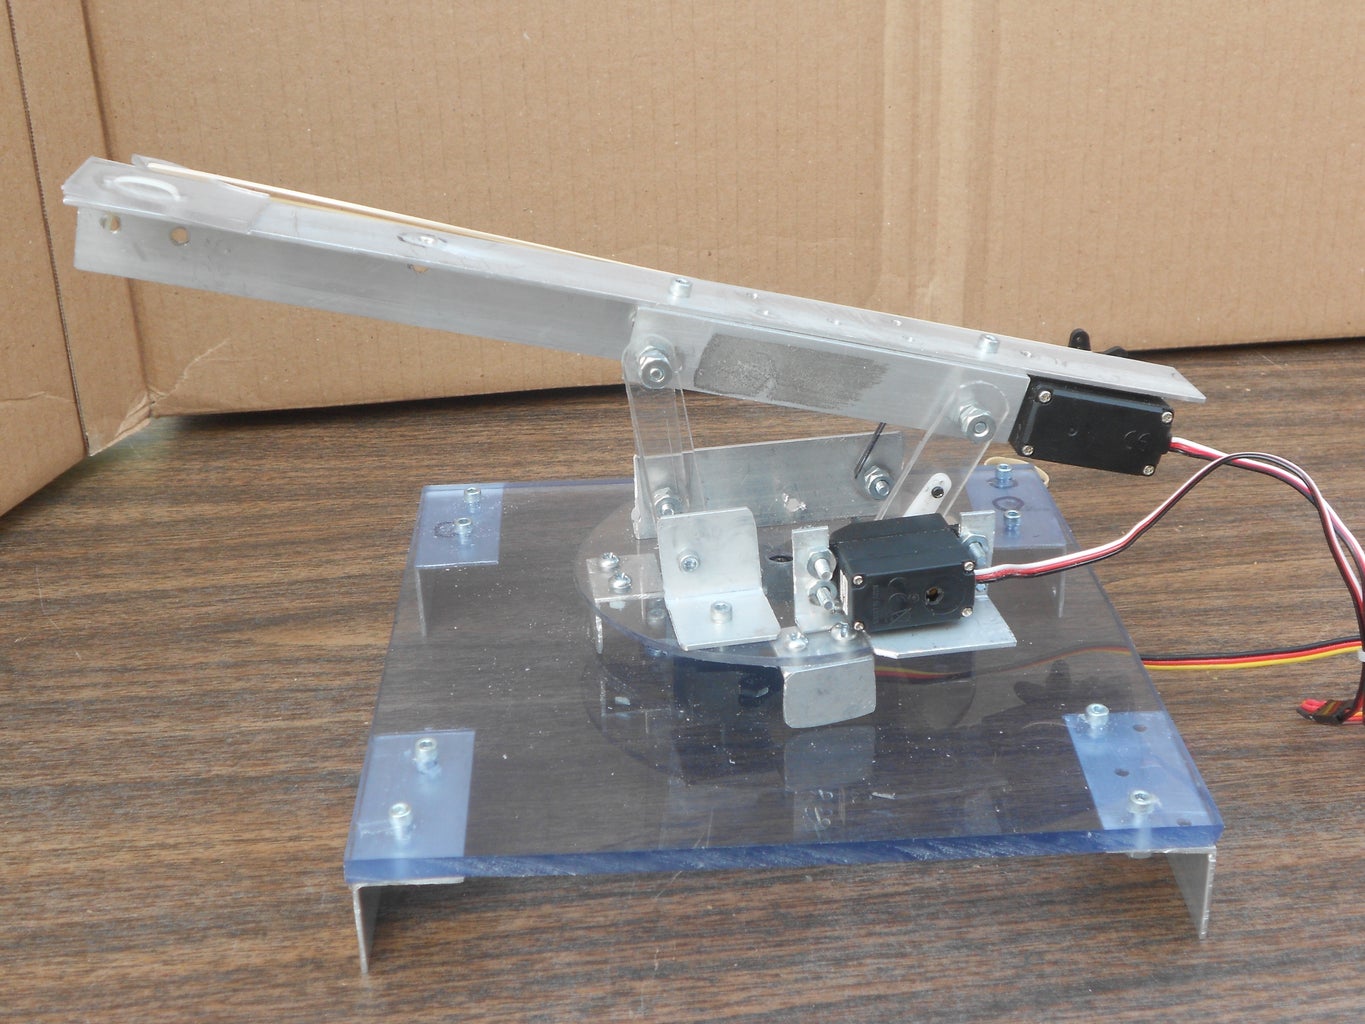
Have a nice, solid base that is off the ground far enough that a servo will be able to attach to it and not hit the ground.
Mount the Left-Right servo smack dab in the middle!
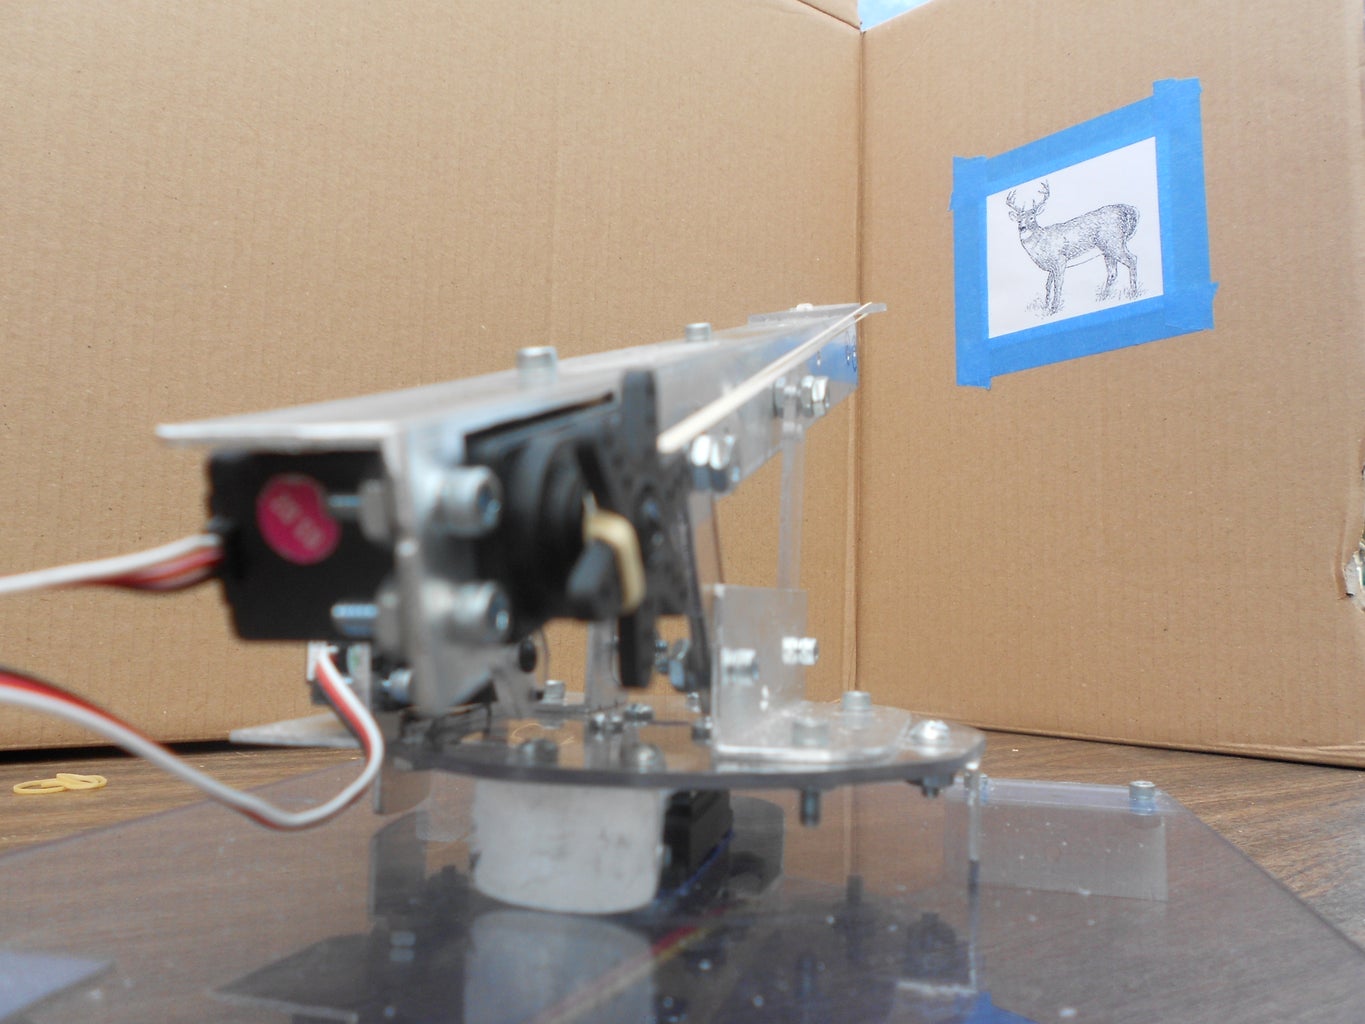
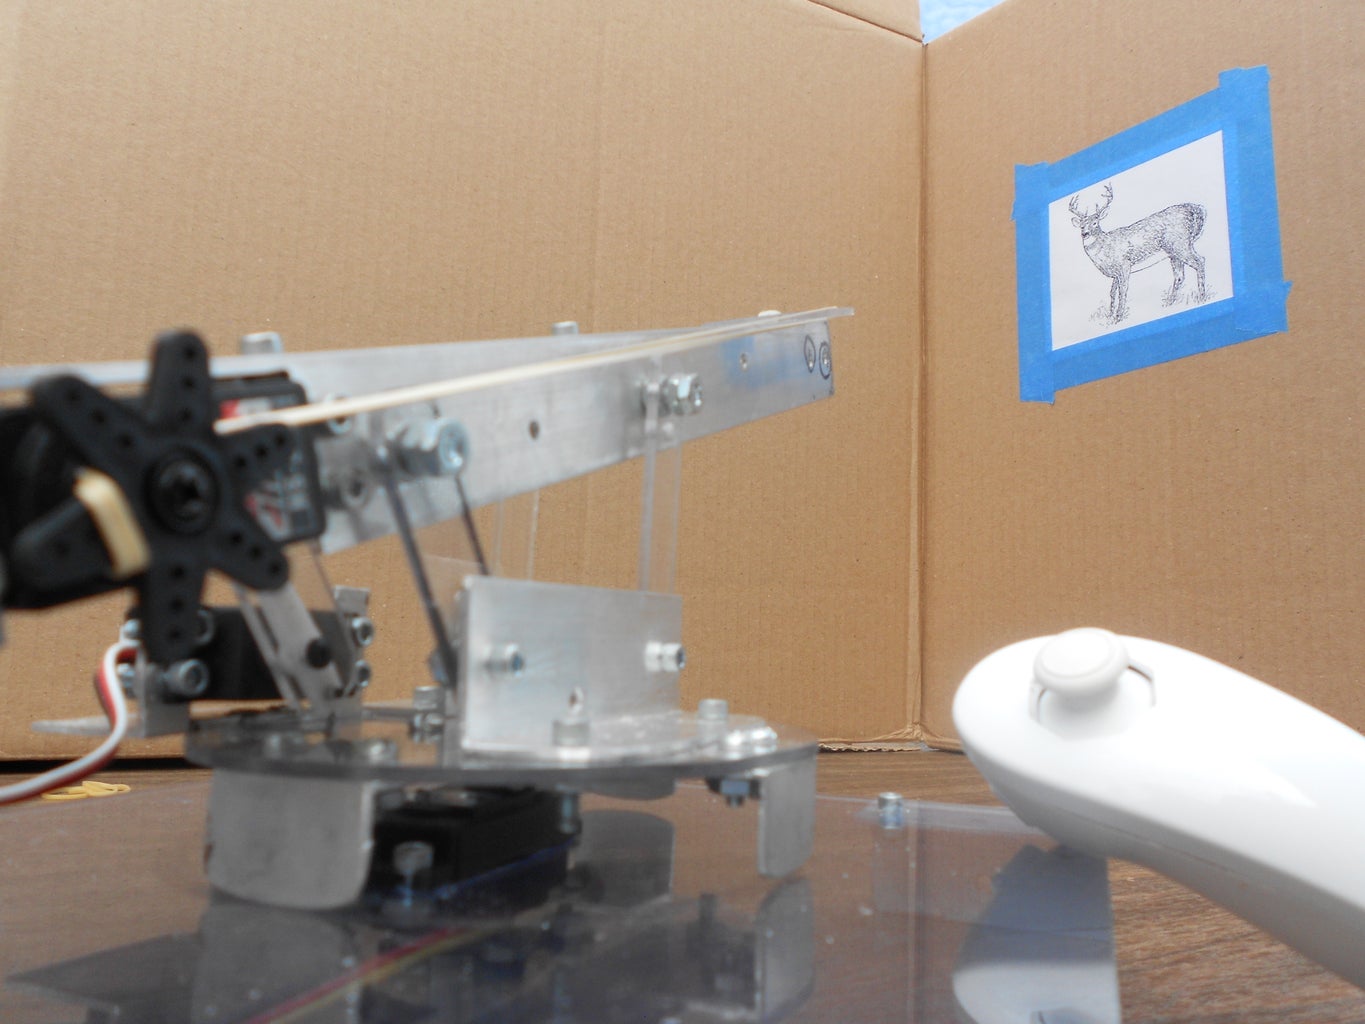
You can see here how I used a trapezoidal shape for the vertical aiming. Really, it just makes it look cooler!
A problem I had was with the Lexan that the Up-Down servo attached to. If you make it too long, the servo will struggle to adjust your turret.
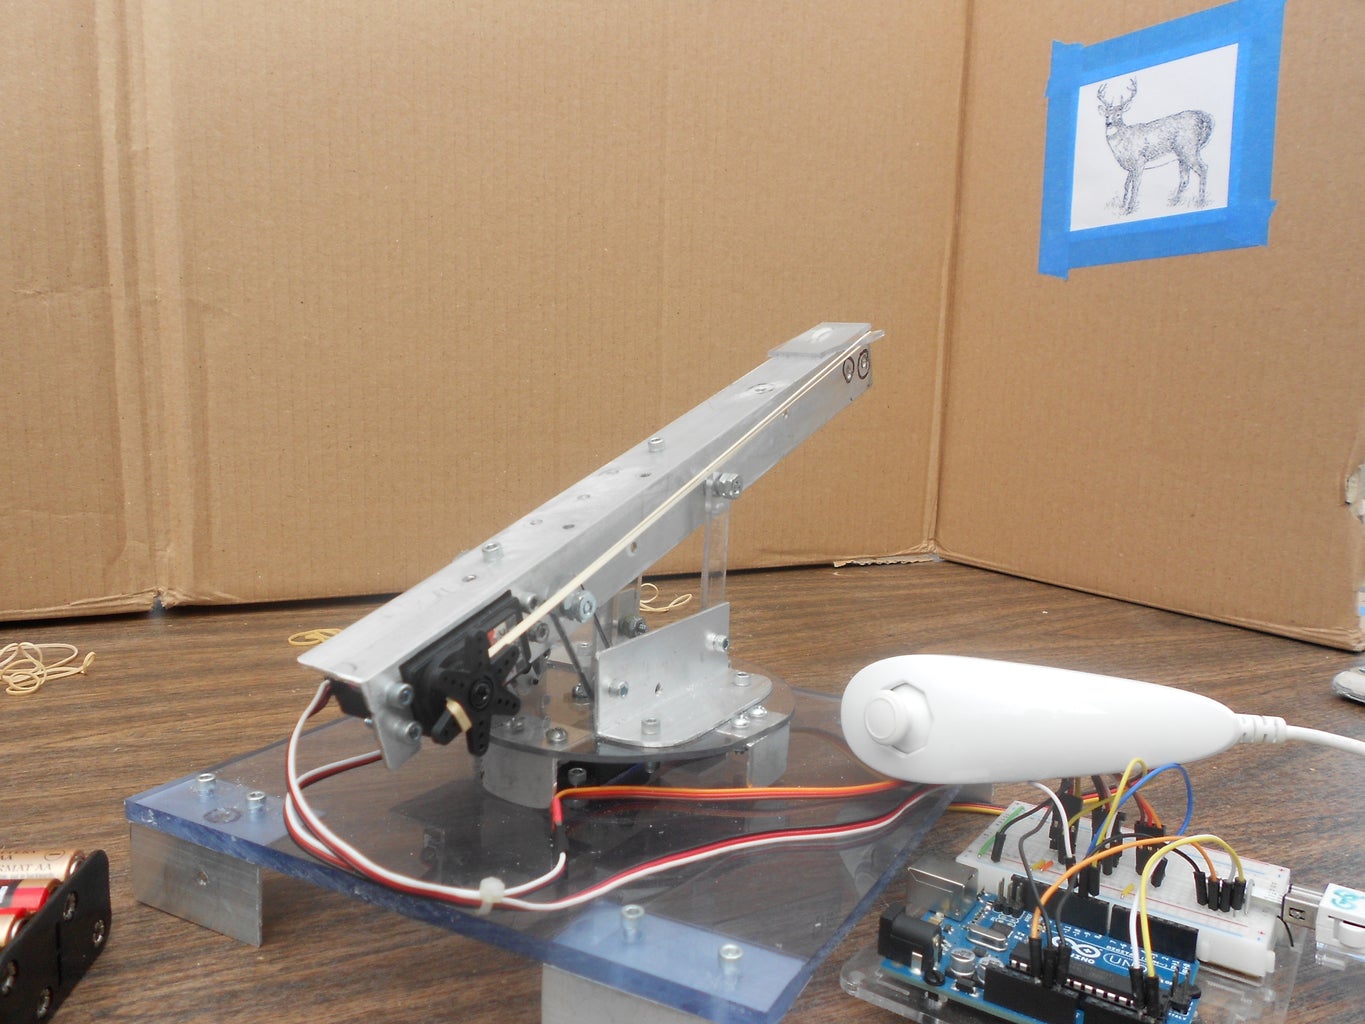
For the "barrel" itself, just make it look cool! The only functional pieces are where the firing servo attaches, and where the trapezoid connects. My advice, mount it so the center of gravity lies right over the Left-Right axis of rotation.
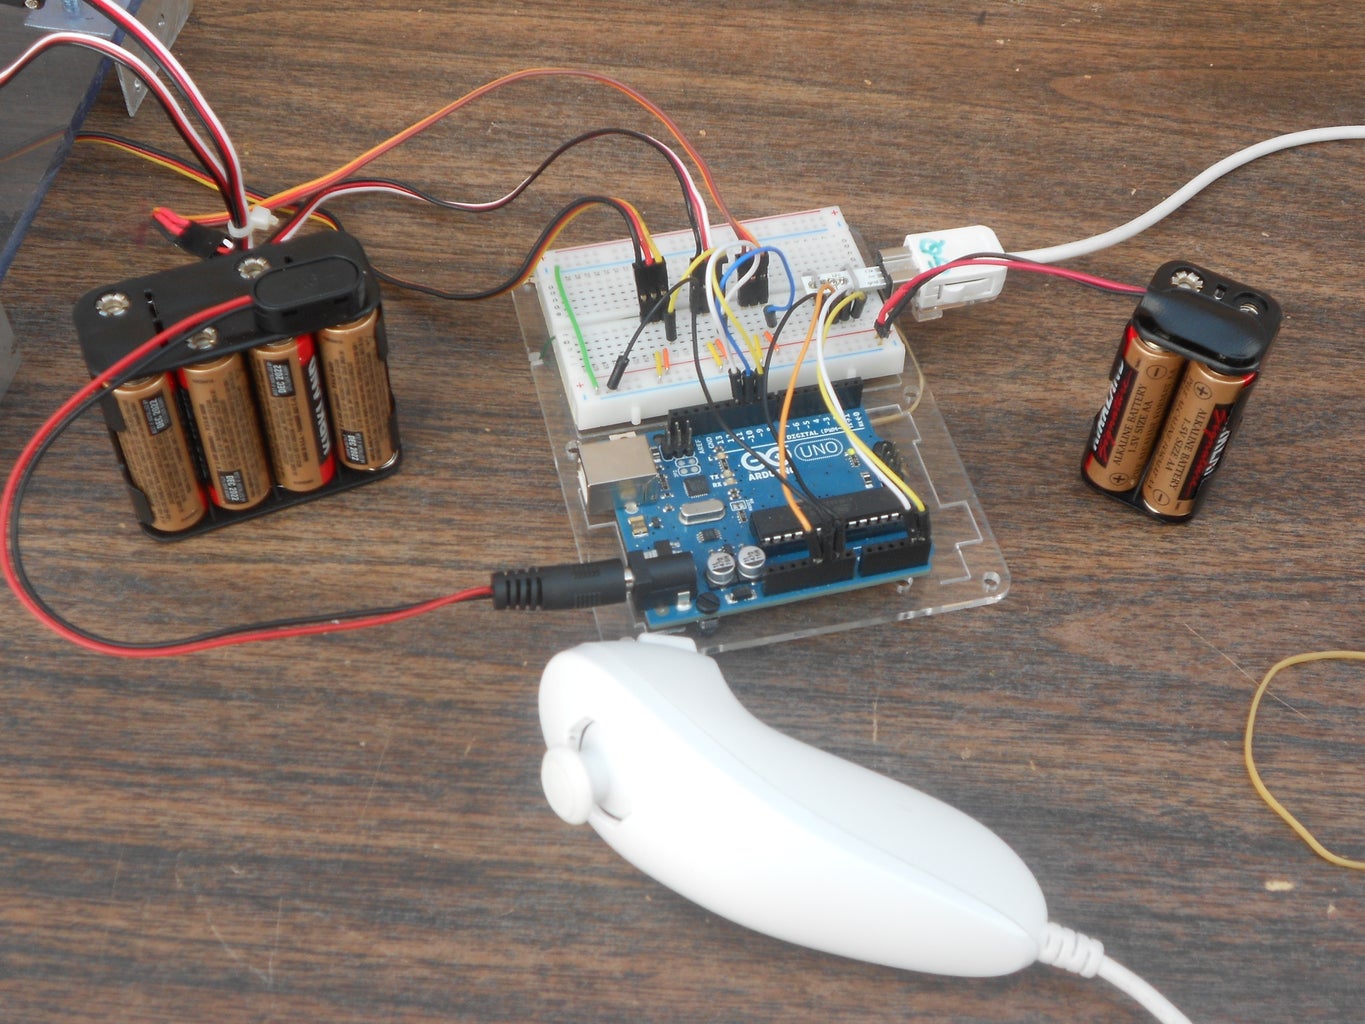
Step 3: The Electrical


The wiring is fairly simple. Three servos wired to three digital pins, and the WiiChuck adapter hooked up to analog pins 5 and 4.
I used the following pinout:
Pin 11: firing servo
Pin 10: Up-Down servo
Pin 9: Left-Right servo
Note for the firing servo: try to position it so it has a small amount of creep that counter-opposes the rubber bands.
Step 4: The Software

Now for the real fun: I2C communication!
Wii Nunchuks communicate through a language called I2C, which isn't insanely complicated, but we have an Arduino library to deal with that, the Wire library.
Here is my code, make what you will of it!
[[[[[[[[[[[[[[[[[[[[[[[[[[[[[[[[[[[[[[[[[[[[[[[[[[[[[[[[[[[[[[[[[[[[[[[[[[[[[[[[[[[[[[[[[[[[[[[[[[[[[[[[[[[[[[[[[[[[[[[[[[[[[[[[[[[[[[[[[[[[[[[[[[[[[[[[[[[[[[[[[[[[[[[[[[[[[[[[[[[[[[[[[[[[
#include //include the Wire library
#include
Servo LR; //servo for Left-Right movement
Servo UD; //servo for Up-Down movement
Servo bang; //servo for shooting rubber bands
char nunchuck = 0xA4 >> 1; //sets nunchuck address as 0xA4 (operationally 0x52)
uint8_t nunData[6]; //for storing data
int chunk; //for keeping track of the byte size chunks of data
int joyX;
int joyY;
int accelX; //make sure to add two bits because of the nunchuck's packaging protocol
int accelY;
int accelZ;
byte Zbutt; //isolates last bit of numData[5]
byte Cbutt;
void setup() {
LR.attach(9);
UD.attach(10);
bang.attach(11);
Serial.begin(19200);
Wire.begin(); //starts I2C communication
initialize(); //sets up the nunchuck
delay(100);
}
void initialize() {
Wire.beginTransmission (0x52); // transmit to device 0x52
Wire.send (0x40); // sends memory address
Wire.send (0x00); // sends sent a zero.
Wire.endTransmission (); // stop transmitting
}
void loop() {
Wire.requestFrom(nunchuck, 6); //send me that data!
chunk = 0;
while(Wire.available()) { //while there is data to send
nunData[chunk] = decode(Wire.receive()); //stores data to value 'chunk' of nunData, as well as decodes it
chunk++;
}
makeVars();
convert(); //package the sensor data
delay(50);
}
void convert() { //tells nunchuck to "package" the sensor data
Wire.beginTransmission(nunchuck); //tell nunchuck to listen
Wire.send(0x00); //sends zero
Wire.endTransmission(); //STOP
}
void makeVars() {
int joyX = nunData[0];
int joyY = nunData[1];
int accelX = nunData[2] * 2 * 2; //make sure to add two bits because of the nunchuck's packaging protocol
int accelY = nunData[3] * 2 * 2;
int accelZ = nunData[4] * 2 * 2;
byte Zbutt = (nunData[5] >> 0) & 1; //isolates last bit of numData[5]
byte Cbutt = (nunData[5] >> 1) & 1;
accelX = accelX + (nunData[5] >> 2) + 2 * (nunData[5] >> 3); //adds the two missing bits to each accel value (missing bits found in 6th Byte)
accelY = accelY + (nunData[5] >> 4) + 2 * (nunData[5] >> 5);
accelZ = accelZ + (nunData[5] >> 6) + 2 * (nunData[5] >> 7);
int horiz = map(joyX, 23, 230, 102, 78); //makes it so there is a small area in the middle where the joystick won't actuate anything (X direction)
if (abs(horiz - 90) <= 2) {
horiz = 90;
}
else if (horiz > 90) {
horiz -= 2;
}
else if (horiz < 90) {
horiz += 2;
}
int vert = map(joyY, 28, 231, 80, 100); //makes it so there is a small area in the middle where the joystick won't actuate anything (Y direction)
if (abs(vert - 90) <= 2) {
vert = 90;
}
else if (vert > 90) {
vert -= 2;
}
else if (vert < 90) {
vert += 2;
}
int shoot = 90; //creates shooting servo value
if ((Zbutt == 0) && (Cbutt != 0)) { //if Z is pressed, rotate shooting forward servo slowly
shoot = 95;
}
if ((Cbutt == 0) && (Zbutt != 0)) { //if C is pressed, rotate shooting backward servo quickly
shoot = 82;
}
LR.send(horiz); //send all the servo values
UD.send(vert);
bang.send(shoot);
}
char decode (byte x) { //decodes sensor value (referred to by an earlier statement)
x = (x ^ 0x17) + 0x17; //I have no idea what this means...
return x;
}
]]]]]]]]]]]]]]]]]]]]]]]]]]]]]]]]]]]]]]]]]]]]]]]]]]]]]]]]]]]]]]]]]]]]]]]]]]]]]]]]]]]]]]]]]]]]]]]]]]]]]]]]]]]]]]]]]]]]]]]]]]]]]]]]]]]]]]]]]]]]]]]]]]]]]]]]]]]]]]]]]]]]]]]]]]]]]]]]]]]]]]]]]]]]
Step 5: Let's Play!
Yaaaaaaaay.

Participated in the
Arduino Contest


