

Introduction: A Great Technique for Scanning Your Inked Drawings


This is a nice and quick way to get amazingly crisp and sharp scans of your artwork.
The scanning process itself is crazy fast and you'll end up with a perfect scan - no need to adjust levels or remove smudges, scratches and noise because of the texture of the paper.
And the best part, at least for me, is that the scan itself will be cut out from the background so you don't have to spend time removing it and can move straight on to colouring or whatever you'd want to do.
You can only use this procedure with white or, at least light, paper with sketches drawn using ink, felt tip pens, markers and the like.
It won't work as well when you've used a lead pencil or something else that leaves smudges and/or has a faint edge.
You need a scanner (duh) and Photoshop or similar graphics software like Gimp.
I used a semi-professional Agfa scanner but even the cheap ones will work, the only important thing is that it needs to scan at twice the resolution you want to end up with.
So if you want your finished artwork to be in 300dpi it has to be able to scan in 600dpi, this shouldn't be a problem since most modern scanners can do more than twice that.
In step 4 you'll find a quick rundown for people who know their way around Photoshop as well as some final notes and examples of the difference between this scanning method and the "regular" one.
Also, please note that it's important that you do all the steps in the exact same order I describe or you won't get the same results.
Step 1: Scan Your Drawing


The layout and terminology your scanner's software use often differs between model and maker but you should be able to figure out the settings to use from my screenshots.
I use an Agfa scanner with the included Scanwise application so, from Photoshop, I just choose Import->Scanwise from the File menu.
Unless it's done automatic, press Preview and select the parts you want to scan.
Set the original image type to Line Art or, on some scanners, Bitmap.
The other choices should be something like Colour and Grayscale.
As I said in the introduction you need to scan at exactly twice the resolution you need so, since I want my finished example to be 300dpi, I'm setting it to 600dpi.
See second attached screenshot.
Press Scan.
This should be very quick since it only scans black and whites, no grayscale or colour information.
Once it's done, quit your scanning application and go into Photoshop.
Step 2: Edit Your Artwork and Remove the Background

If your scanning application hasn't opened up your image automatically, do that now.
If you zoom in you'll notice it looks very crude and pixelated. Don't worry though, it'll disappear as if by magic in the next step.
But before we do that let's remove the white paper background and any obvious mistakes.
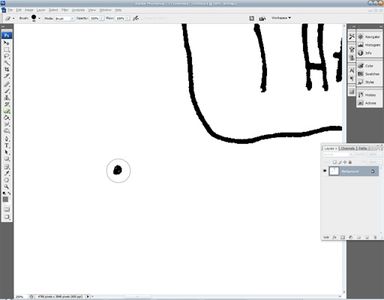
Rotate your image if necessary, select the Eraser Tool (press E on your keyboard) and remove any lines or things you don't need.
You don't have to go into the small details at this time so just give it a quick once over and save the image.
Now, since we scanned in Line Art/Bitmap we need to switch the mode to Grayscale, to do that just select Mode->Grayscale in the Image menu.
A dialog box will come up but just leave the setting at 1 and click OK.
Next, open your Layers palette (press F7 on your keyboard if it's not already visible).
You'll see the layer's name has a little padlock next to it so click twice on the layer's name (should be Background) and click OK, leaving the other settings.
Choose Color Range in the Select menu.
Set the Fuzziness to 0, click once in the white "paper" part of the image and press OK.
See second attached screenshot.
You'll see that all the white parts of your image have been selected.
Now hit Backspace or Delete on your keyboard, it'll be removed and replaced by a checkered grid, indicating that it's now transparent.
I recommend creating a new white layer behind your drawing so you can see it better.
Step 3: Scale Your Image


Time for the conclusion.
In the Image menu, choose Image Size (Alt+Ctrl+I), set the Resolution to half of what it is now and press OK.
See second attached screenshot.
Voila! Photoshop has added anti aliasing, a sort of precise and systematic blur, to the edges of your drawing and you're left with a neat and crisp image that you can now add colour to, or whatever you want.
Step 4: Quick Rundown, Examples and Notes


Ok, here's the rundown for the intermediate Photoshop users.
1. Scan your artwork in Line Art at twice your intended resolution
2. Remove any apparent mistakes
3. In Grayscale Mode, unlock your layer
4. Use Select->Color Range to select the white background, then remove it
5. Go to Image Size and set the resolution to half of what it was before
6. Done
If you often scan a lot of drawings in high resolutions I can recommend that you save them in the bitmap mode for later use and do the following steps when you need to, there's a huge difference to be made in file size in the long run.
The example drawing I made for this Instructable was maybe too simplified, if you do comics or more advanced inks by hand the improvement should be apparent once you try it.
Even though you might be able to get the same results by scanning in grayscale, adjusting the levels and removing any irregularities, this method will save you a lot of time.
I have a feeling you need to have tried scanning inked drawings in grayscale before to actually know how big of a difference this makes but check out the attached examples and compare yourself by switching between them.
Don't forget to note that the background in the grayscale example is in the same layer as the drawing.


