

Introduction: A Simple Watering System for a Chicken Brooder


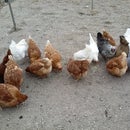


Say you decide that you want to buy some day-old chicks from a hatchery or a place like Tractor Supply. The very first thing you are going to have to figure out is how you are going to keep them in warm environment where you can keep them until they develop enough feathers to weather the environment of a chicken coop. My solution has been to put them in a large plastic tub with straw or pine shavings on the bottom to absorb their mess. If you do this, you are going to have to provide them with food and water.
Tractor Supply sells watering and feeding dishes that are designed to be placed in the bottom of the brooder so that the chicks can get to them. In the second and third photo you can see the base of a watering base and the base with a jar screwed into it. The threading of this base matches the threading on a small-mouth Mason jar. I can tell you that this is not the way you want to go. If you have pine shaving in the bottom of the brooder, the trough around the base will be filled with shavings within five minutes. Within a week the chicks will be able to jump up and perch on the top of the jar and aim their precious dropping down into the trough. You will be cleaning this out every couple of hours.
This instructable will show you a much better solution.
Step 1: A Hanging Water Bottle With Chicken Nipple

The solution is to attach a chicken nipple to the bottom of a water bottle and hang it over the brooder. If you go to Tractor Supply and ask for chicken nipples, they just don't know what you are talking about. I've even carried one into my local store and showed it to them but they didn't seem to be interested in getting them.
A chicken nipple is small valve that has thread on the top and a lever hanging down at the bottom. The idea is that when a chick taps the lever, a drop of water comes out. The nipple is usually red and the lever is silver. To find chicken nipples on the internet, I would suggest that you search for them on Amazon.com. There are a number of suppliers. One such source is
http://www.amazon.com/Threaded-Poultry-Nipples-Sanitary-Chickens/dp/B005X0EHF6/ref=sr_1_3?ie=UTF8&qid=1335106032&sr=8-3
You might think that this is a slow and odd way to give water to the chicks. In my experience, when I first introduced it to them, a chick explored it in about a minute and then started drinking. Within five minutes, all the chicks were using it. Three or four might gather around, all pecking simultaneously.
Step 2: Construction and Mounting


Choose some sort of plastic bottle that has relatively thick walls. One good choice is a water bottle that you use for bicycling. A plastic milk jug will not work because it is made of very thin plastic.
Drill a hole in the bottom of the bottle that is a slight bit smaller than the diameter of the nipple. I believe the recommended size it 11/32. This is a critical step because you don't want the nipple to leak. I have found that I had to make the hole just a little bigger because the threads of the nipple don't seem to grip at that size. You might want to experiment on some scrap plastic before start working with the bottle. I ended up using plumbers tape to make the hole leak-proof.
After you have mounted the nipple, drill two holes in the neck of the bottle directly opposite each other. In my case I used a pencil. A better option might be a wooden chopstick. Make the holes just large enough so that the pencil or chopstick fits snugly through. It will prevent water running along the stick and out the holes when you refill the bottle.
The final step is to find a board that you can lay across the top of the brooder to hold the bottle. In my case, I used a piece of scrap laminate flooring. I drilled a hole in the board just a little larger than the diameter of the bottle. Insert the bottle into the hole and fill it up and let the chicks start examining it.
Step 3: Other Considerations


I actually used two brooders to accommodate the 15 chicks that I had. You can see in the photo that I used a 1 quart yoghurt bottle for a second brooder.
The chicks double in size every week for the first month. That means that after the first week the chicken nipple is too low for them. My solution was to put my advanced university experience to use by stacking up old textbooks on either side to raise the height of the waterer. That seemed to work.
With each waterer holding about a quart of water, they had to be refilled a couple of times a day, especially after the chicks got larger. You might consider using a much larger container (say a gallon size) but you probably will run into logistics problems of how to support something so large and heavy. You could build a rig that stands above the brooder to support it but, if this brooder is only going to be used for the first six weeks of the life of the chicks, it may not be worth the trouble.
The solution presented in this instructable is the result of my experience during the previous year where I tried to hang the waterer from the side of the tub. That was not ideal because it tended to make the bottle lean at a slight angle and cause the lever in the nipple to hang on the same angle. When that happens, the nipple will constantly drip.
I extended this use of chicken nipple to provide water for the mature chickens in a large tractor coop (https://www.instructables.com/id/Large-Tractor-Coop/). In that instructable you can see that I put a large bucket on the top of the coop and ran a plastic line down to a PVC pipe that has four nipples installed in it. This has been in constant use ever since and works well. I only had to remove it for the winter because everything could easily freeze up.
Hope this instructable helps.


