

Introduction: ATtiny2313 Development Using Arduino

This is my first instructable, so bear with me. In this instructable, I combined all the resources to burn an ATtiny2313 IC with an Arduino Board. Follow the steps to get into this awesome tinyland.
Step 1: Requirements

ATtiny2313 (You can buy from element14.com or any local electronic shop at around Rs. 90)
Wires and Connectors
Arduino ( Uno or Duemilanove) (mine is Freeduino by Embedded Market, India)
LED and Resistor~220 Ohm for checking program
10 uF Capacitor
Breadboard
SOFTWARE:
You need to have Arduino IDE versions 1.0 or 1.5 are OK.
Download the core files for ATtiny here.
Attachments

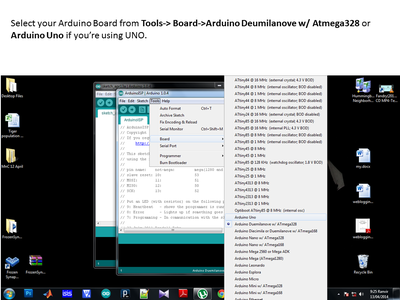
Step 2: Primary Software Setup


Go through the following screenshots. It's a kind of easy procedure.
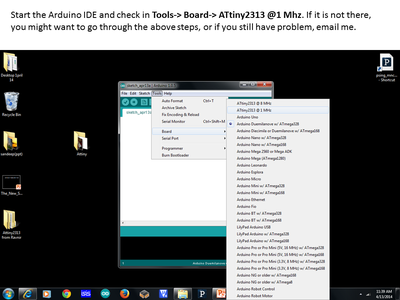
Step 3: Programmer Setup


Convert your Arduino IDE into an ISP burner. These 4 steps are quite easy to follow.
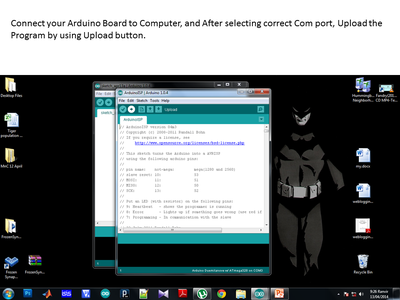
Step 4: Uploading a Program


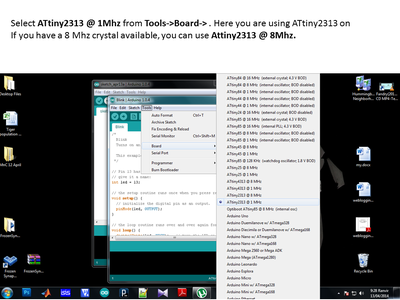


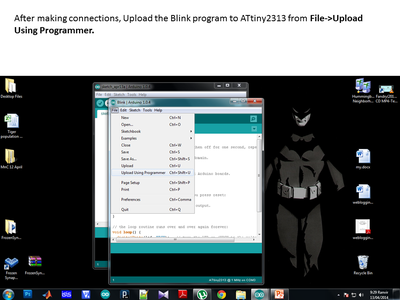
Upload your program by using following procedure, If your program doesn't get uploaded, you can drop me an email at ranvirdesainanded@gmail.com or just write your problem in comments, I'll try to answer it.
Step 5: Support


Ta Da !!
Your LED might be blinking now, if not, check some previous steps you could've messed.
Arduino can be used for the development of the ATtiny2313 limited to some functions:
PWM output, digital output, Serial Communication, Interrupts, Timers, etc.
ATtiny is very god option if you need to control a Servo or just Serial Communication is your aim.
Step 6: Thank You


Participated in the
Arduino Contest


