

Introduction: Acer Extensa Laptop 5620 Hotrod Overhaul Guide


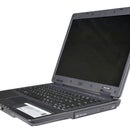

Our little Acer Extensa 5620 has been good to us these past two years, huh? It's a nice enough machine... but... you're feeling it too, right? Running a bit slow, hard drive making some noise, the battery lasts less than twenty minutes... is it time to finally cast our lowly Acer aside and buy new?
NAY! For less than the cost of a new laptop, we can make our current one shine again! Come with me as we do both routine and very non-standard upgrades to pimp out the budget Best Buy laptop we've come to know and love!
What- you don't own one?! Well, read on anyhow. A lot of what we cover here should work with other machines. Now, let's begin- and remember, laptops ARE upgradeable! Practice your evil villain laugh whenever someone tries to say they aren't...
Step 1: In the Beginning...

Let's take a second to look at the stock specs of an Acer Extensa 5620-6830:
T5250 CPU (1.5Ghz, 667Mhz FSB, 2MB L2 Cache)
1GB DDR2 RAM 667Mhz (two sticks of 512MB)
15.4" WXGA Crystal Brite 1280x800 LCD
200GB 4200rpm SATA 8MB cache HD
Intel 3945 802.11a/b/g Mini-PCIe Wifi
4000mAh Lithium Ion Battery
Yeah, that is a little dated. I did leave out the DVD Multi Drive (as that is still pretty standard) and the GMA965 / X3100 Intel videocard (which isn't upgradeable anyway). But everything else listed above? I say... eBay it! Seriously, I sold off all my old parts on eBay and Craigslist to help offset the cost of new components. Madness, you say? Maybe. But every item on that list can be seriously upgraded!
Bwahahahaha! ...sorry, mad scientist laugh.
Step 2: The Layout- Getting Familiar With the Landscape


The upgrades we plan will all pretty much be done within an inch of each other, and it's not nearly as scary as it seems. First off, unplug the charger and remove your battery! We don't want anything powered up while we're swapping parts. It's also a good idea to stay off carpets, touch something metal / grounded, yadda yadda. No one uses a grounded wrist bracelet anymore, but it doesn't hurt to be somewhat careful with delicate electronic parts and static.
Now turn your laptop over. Note the second picture- there is a plastic cover held on by seven Phillips head screws. Don't worry about them falling off; they're conveniently held in place on the cover even after loosening. Once they are all unscrewed, gently pry up on the indicated area, as shown.
Now you can study the internals (third picture)! I've labeled everything so you can refer back to it if you need to as we replace things.
Step 3: The CPU- Let's Think Big

That paltry little T5250 cpu... I think we can do much better.
To replace the cpu, first- choose one! I picked a T9500. Any Socket P cpu with a FSB of 800 or lower will work, but I felt that was a good choice. Here's how it compares to the old one:
T5250: 1.5Ghz, 2MB cache, 667Mhz FSB, 65nm core, 35W power
T9500: 2.6Ghz, 6MB cache, 800Mhz FSB, 45nm core, 35W power
Uh huh. The T9500 kicks the T5250's ass, all while doing the same wattage! Definitely a helpful upgrade. So let's get right to it.
Once you've taken off the cpu fan and heatsink, you should see the cpu itself. It's held in place with a ZIF (Zero Force Insertion) type socket, which locks using the little screw device next to the cpu. Looking close, you can see that it is currently set to the locked position. Using a small flathead screwdriver, turn it to unlock. Now you can lift out the cpu, and insert the new one. I recommend using a thin layer of Arctic Silver or some kind of thermal paste. To lock the new one in place, very gently hold the cpu while turning the locking mechanism back. REMEMBER- when putting the heatsink back on, do a little at a time on each screw, NEVER all at once. Better to be safe than sorry!
Step 4: Elephants Never Forget Because They Have More Than 1GB RAM

Seriously, 1GB of RAM? What is this, 2006? We've got to fix this. The good news it, it's pretty cheap.
I popped in 4GB (two 2GB modules) of PC2 6400. Now, a word of warning. Windows-based 32 bit operating systems will only be able to see and use about 3GB, even if you have 4GB installed. Also, the Intel GMA965 chipset we've got will only be able to run the memory at 667Mhz max. So why did I get 800Mhz? Well, a couple reasons- it's just as cheap (if not cheaper) than the slower stuff; if I ever upgrade to a new laptop and use this one for parts, the parts are better; the 667Mhz timing on these modules is a bit tighter than the actual 667 ones... and last but not least, why not? To use a car analogy, I'd trust a sports car to do 80mph more than I would a Yugo, even if both are capable :) I don't mind a better margin of error without extra cost.
Also, do yourself a favor and buy memory off NewEgg or someplace reputable. You're shooting yourself in the foot if you save $2 by getting off-brand maybe-not-so-backwards-compatible modules off eBay from China. Honestly. Plus it'll get to you a lot quicker.
Step 5: Hard Drive- Space Vs Speed

We could go two ways with the hard drive here. Sure, we can pop in a 500GB if storage is what we're going for... but I want speed too. To compromise, the purchase was a Fujitsu MHZ2320BJ-G2. Here's a comparison on old vs new:
Old: 200GB, 8MB cache, 4200rpm, SATA1 (1.5GB/s)
New: 320GB, 16MB cache, 7200rpm, SATA2 (3GB/s)
That's a bit better, huh? After formatting, it comes out to right around 300GB, giving lots more storage while being much speedier as well. The old drive was starting to get a little noisy, too, so this new quiet one is very welcome.
Step 6: Wifi - It's the N of the World As We Know It

I long ago swapped out the original Intel Wifi card with one more compatible with my chosen operating system. But even the replacement was a simple wireless-G. Now 802.11n is where it's at, so let's get there quick! And we can, because N is faster, see... so...
...Anyway, I chose a cheap used Dell 1505 card. Why? Because it works great, it was $20 shipped, and I don't need any drivers installed for it. I also still have yet to get a router with 802.11n, so this was more about future-proofing than a really important upgrade.
As described in the picture back in step 2, swapping out the wifi card is a piece of cake. Unclip the two antenna leads, unscrew two screws, reverse the process. Worried you didn't put the black and white wires where they go? Don't be. It works either way. Look, mine are reversed!
Step 7: What's Next? As Metallica Says, Battery!

At last! Time to free ourselves from the charger for longer than twenty minutes! Okay, maybe yours lasts longer than that. I used my laptop at work every night for months, and the combined hours of use and hibernation really took its toll on the original 4000 mAh battery.
We can replace it with another original lame one... or we can do one better, and upgrade it! There are aftermarket 5200 mAh batteries available that fit into our model; the only down side is it's two purchases in one. Let me explain...
The original battery was lower amperage, so the original charger is only 65W. If we toss in a better battery, it will need a better charger (90W) to charge it. See? So that's what I did.
I found an original new Acer / LiteOn PA-1900-05 charger for cheap, which perfectly runs the "Grape 32" 5200 mAh battery. The old charger becomes a backup- it still runs the laptop, but it can't charge the new battery.
Step 8: Nothing Else to Upgrade? Says YOU!

That last upgrade wasn't crazy enough, so now it's time to create my own! Mwahahahaha! Yes, more mad scientist laughter... and this time, I may deserve it.
This upgrade / modification was the result of various tests, experiments, and luck over the past month or two. It involves a bit more than the previous steps, but it will make your little Acer a truly unique one-of-a-kind Extensa :) Here's the low-down:
The GMA965 chipset / X3100 videocard can output higher resolutions than the stock 1280x800. If you remove the original LCD and hook up a WXGA+ (1440x900), WSXGA (1680x1050), or WUXGA (1920x1200) screen, those resolutions become available... however, the display looks garbled. Luckily, I figured out this is due to the LCD cable, and is completely fixable!
The Extensa WXGA LCD cable simply leaves out eight wires used for the secondary data channel, required by higher resolution displays. The solution is as simple as buying a similar used cable, unclipping eight of the wires from both ends, and adding them into the proper place on our original cable. Suddenly our little machines can handle some sweet screen upgrades!
From my experiments, I can say that any LG screen appears to work, even 17" ones (see picture- had a spare one sitting around). Though of course, for best results, choose another 15.4" LCD. The original inverter seems to work fine on them, too, though some have different backlight plugs. I ended up purchasing a new LP154WP1(TL)(A2) 15.4" WXGA+ Glossy LCD, giving me 1440x900 resolution. It had an alternate inverter connector, but I just changed the plug out and it worked perfectly. More desktop space, newer, brighter display, and much more crisp! I would have gone with a WUXGA, but can't imagine reading such tiny text... :)
The next steps will explain the process of changing out the screen and modifying the LCD cable.
Step 9: Display Upgrading - Getting at the LCD and Cable


To remove the LCD and LCD cable, we'll need to remove more screws.
Opening the lid of your laptop, you'll see eight rubber pads around the screen that cushion it when closed (see first picture). These are stuck on with adhesive and pull off with a little prying. I recommend sticking them all to a single plate or something while you're working, so you don't loose any of them. Behind these pads are more small Philips head screws to remove.
Before separating the lid's plastic, close your laptop and flip it over. There are five screws on the underside, directly beneath the hinge. The middle three are the only ones you need to remove; they hold the hinge cover / power button / light assembly in place. The easiest way to pop it off is by opening the screen, laying it all the way back, then carefully pry as shown in picture two. Once off, you will be able to see where the LCD cable plugs into the motherboard, on the left side.
Now pry gently between the two plastic halves of the lid. Everything clicks together, so it's a little unnerving to force them apart. Mine came apart and went back together without anything breaking, so I know yours can too :) You may have to push the clip release button to get the lid hooks out of the way as the plastic rectangle comes off. Once that's off, you can see the screws holding the LCD in place. Keep track of all these little screws, and take note on how everything comes apart! It's always easier to disassemble than put back together.
A few bits of advice: Always handle the LCD by holding the sides, never the top or by gripping the middle. They are slightly more durable than people think, but why take chances? When purchasing a replacement LCD, choose one without an inverter attached. We don't need (and there is no room) for the extra piece of metal that sticks down below the screen and holds an inverter in place. Our inverter is mounted to the lid itself- so you're looking for just an LCD. Every 15.4" screen I've tried has the side-holes properly spaced for mounting in our Acer. Some have different spacing in the holes on the bottom, but don't stress- the bottom bracket doesn't need to attach to the screen. It will remain stable and sturdy without those two tiny screws.
Step 10: The WXGA to WUXGA LCD Cable Mod PT1 - Seen Here First!


The LCD cable connects to (and must be unplugged from) the following places:
-The motherboard (40-pin plug under hinge cover)
-The LCD itself (30-pin flat plug taped in place)
-The inverter (5-pin plug on left side of inverter)
-The webcam (5-pin plug - actually USB)
The cable I purchased to use for parts was a used Acer Extensa 4120/4320/4420 LCD cable. It didn't have the USB webcam connector, but since we're not touching that part, who cares? We're only interested in the wires going from the 40-pin motherboard plug to the 30-pin LCD connector. As long as it uses the exact same plugs, we can steal the already complete wiring to mod our cable.
Why don't we just buy a "proper" dual channel WUXGA cable, you ask? Good question. Mainly because... there isn't one. LCD cables aren't standard, and vary quite a bit between manufactures and even similar models. A WUXGA cable isn't made for this model, because it was never sold with anything but WXGA displays. Even if we found a cable with all the proper connectors, there's a good chance it wouldn't be wired the same as ours. So instead of dealing with a complete rewiring headache, simply adding eight little wires to our existing (and properly wired) original cable is the easiest way to gain WSXGA / WSXGA+ / WUXGA capability.
The first thing we need to do is carefully unwrap the entire spare cable. All that shiny gray stuff is just metallic tape, folded over itself. Start at one corner, and peel it all back until you're left with only wires. It's somewhat slow and tedious, but we don't want to damage any of the cables. There's some smaller black tape to remove from near the plug ends as well.
Take a second to look closely at the 40-pin motherboard plug (first picture). See those 40 little plastic tabs next to each wire? If you pry up (or break off) the tab using a needle or pin, the wire and metal insert slide right out. The same goes for the 30-pin LCD plug (second picture). Once all the tape and plugs are off, you end up with stuff like this (third picture).
Step 11: The WXGA to WUXGA LCD Cable Mod PT2 - Seen Here First!

Now the fun part begins- adding wires to our original Acer LCD cable.
Here's the reasoning and explanation behind this mod. I give you the pinout for the standard 30-pin dual channel LCD connector:
1 ground
2 +3.3v
3 +3.3v
4 +3.3v
5 nc/key
6 DDC Clock
7 DDC Data
8 A D0-
9 A D0+
10 ground
11 A D1-
12 A D1+
13 ground
14 A D2-
15 A D2+
16 ground
17 A Clock-
18 A Clock+
19 ground
20 B D0-
21 B D0+
22 ground
23 B D1-
24 B D1+
25 ground
26 B D2-
27 B D2+
28 ground
29 B Clock-
30 B Clock+
The green highlighted connections are the ones used in our Extensa's WXGA cable, black are empty spots. As you can see, the entire B data channel is unconnected; hence the garbled display when trying to use anything over 1280 x 800 resolution. So we'll add in eight wires on the empty slots of 20 through 30. You should be able to see this pattern on your 30-pin plug, and count off the proper pins.
I chose not to unwrap my entire original cable; instead, I only removed or peeled back what I needed in order to access the connectors and hook in extra wires. The metal contacts slide in part way, then need to be clicked in the rest of the way using some pressure. I used a pin. There's no need to touch the plastic tabs on our original cable- we don't want to stress or damage them, as that's what holds the contacts in place. I then used some of the tape from the spare cable to keep the eight loose wires bound against the original, and re-wrapped the plug ends. Try to keep everything as flat as possible, since this has to go back behind the screen.
The picture shows a head-on view of the 40 pin plug; the lettered spots are currently empty on both plugs and need to be filled with wires jumping the following connections:
A: #12 (40-pin) to #20 (30-pin) = B D0-
B: #11 (40-pin) to #21 (30-pin) = B D0+
C: #10 (40-pin) to #23 (30-pin) = B D1-
D: #9 (40-pin) to #24 (30-pin) = B D1+
E: #8 (40-pin) to #26 (30-pin) = B D2-
F: #7 (40-pin) to #27 (30-pin) = B D2+
G: #6 (40-pin) to #29 (30-pin) = B Clock -
H: #5 (40-pin) to #30 (30-pin) = B Clock +
This completes the data connection, making our cable (and laptop) now truly WUXGA LCD capable!
Step 12: Finished Product!


So, was it all worth it? It was to me! Instead of buying another low-end laptop, I've extended the life of this one; keeping the good points I liked, and overhauling the outdated specs. The cpu seems to run much cooler; the battery lasts over an hour (hooray!); the hard drive is nice and quiet; the OS is now snappy and responsive as it should be. To recap, our new specs:
T9500 CPU (2.6Ghz, 800Mhz FSB, 8MB L2 Cache)
4GB DDR2 6400 RAM @ 667Mhz (two sticks of 2GB)
15.4" WSXGA+ Glossy 1440x900 LCD
320GB 7200rpm SATA 16MB cache HD
Dell 1505 802.11a/b/g/n Mini-PCIe Wifi
5200mAh Lithium Ion Battery
Now don't you feel smart that you bought one of these notebooks? Think about it. After using it for two years, I was able to reinvest about $400 and have a competitive machine again. Consider the sort of specs you'd get if you bought a new laptop with that budget!
And yes, I've said it before, but my operating system of choice that this machine runs so great... ? Well, that's for another Instructable :)


