

Introduction: Add Ethernet to Any Arduino Project for Less Than 10$

So you have a neat Arduino project going on. Wouldn't it be nice to add Internet connectivity and do it on the cheap as well? This Instructable will show you how to add Internet connectivity in the form of an Ethernet interface for a few dollars and in less than half an hour. More info at: http://hwstartup.wordpress.com/
Step 1: Order an ENC28j60 Ethernet Module on EBay

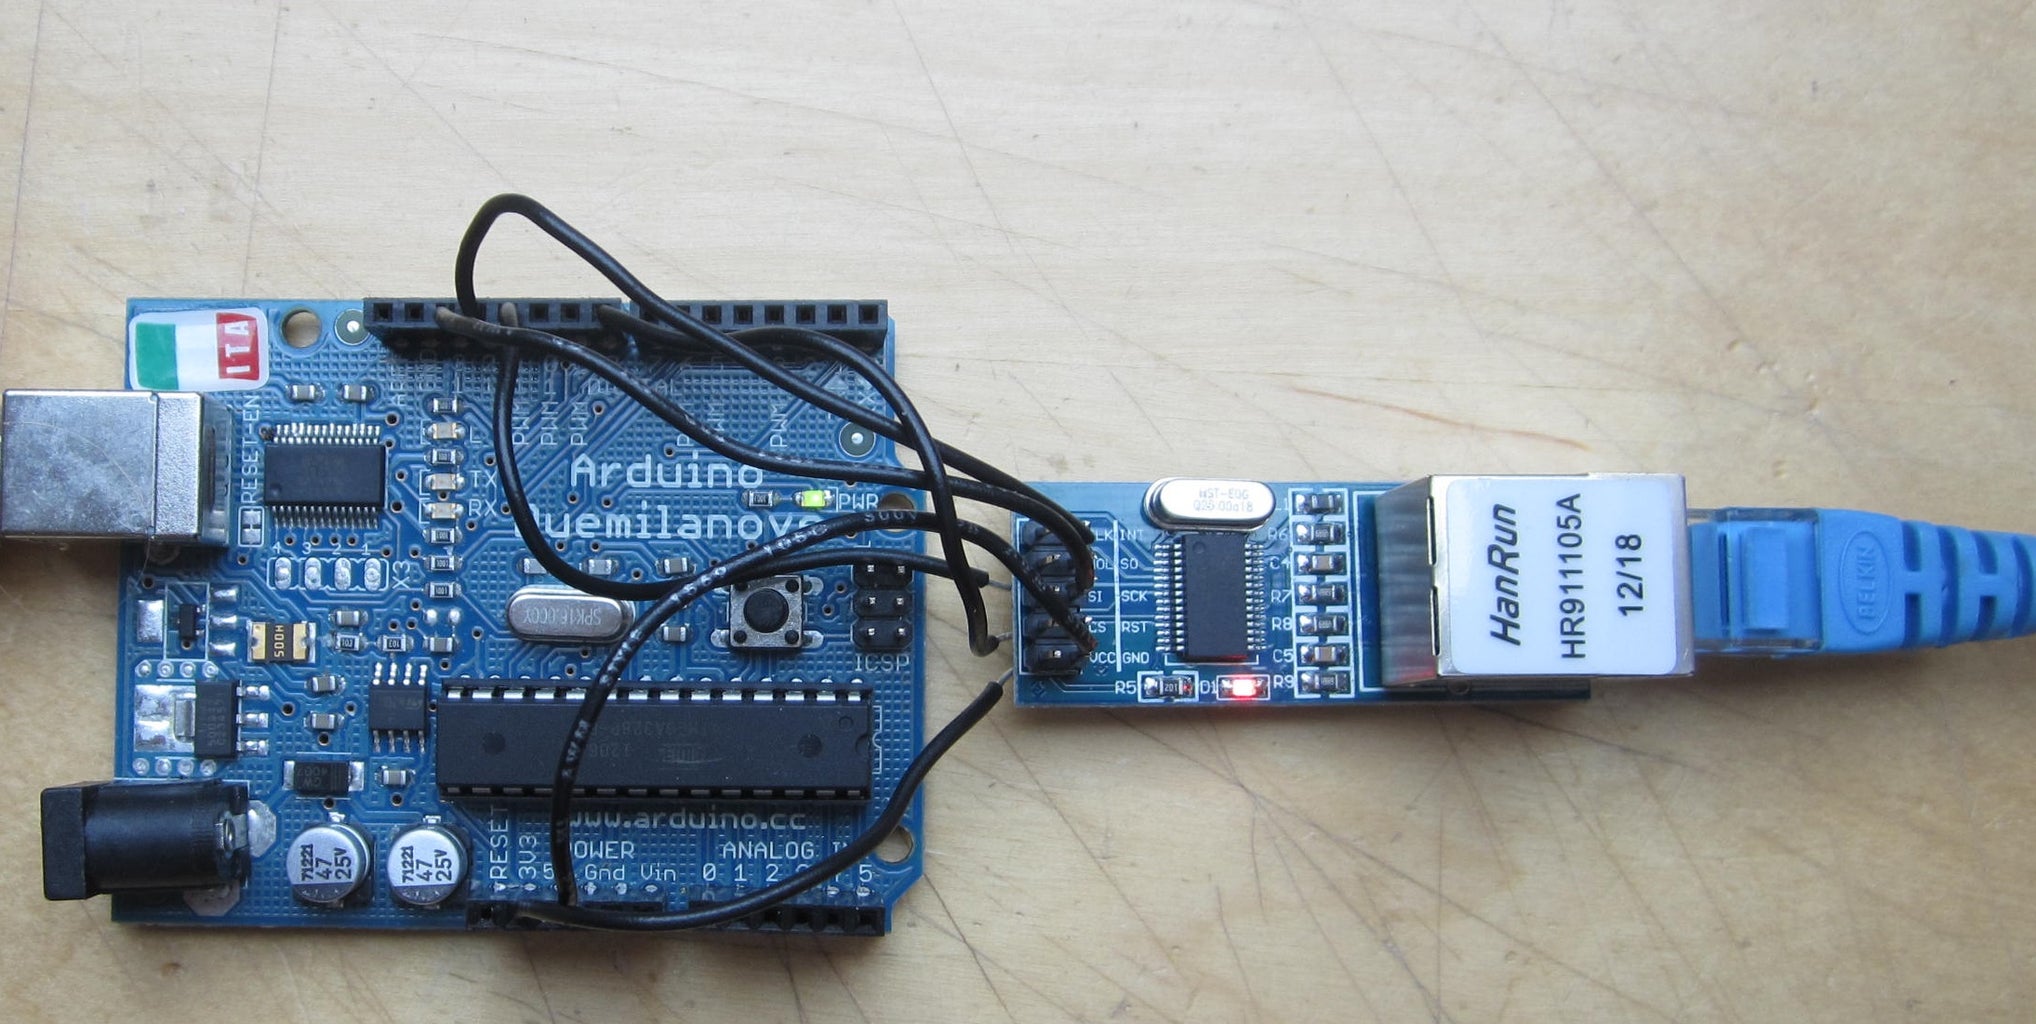
Apart from your Arduino, you need a read-made Ethernet module. You can easily get these on eBay for as low as 10$. Just search eBay for ENC28J60 module. In addition, you need to have a bit of electrical wire, a soldering iron and some soldering 'tin'.
Step 2: Wire Up the Ethernet Module
Now it's time to wire up the module. Either use a connector to put on the Ethernet module header or solder straight onto the pins (like I did). You will need just six wires, I used about 3-4 inches length, but this is not critical (as long as it's not a foot long).
Wire up as following (ENC = module side):
- ENC SO -> Arduino pin 12
- ENC SI -> Arduino pin 11
- ENC SCK -> Arduino pin 13
- ENC CS -> Arduino pin 8
- ENC VCC -> Arduino 3V3 pin
- ENC GND -> Arduino Gnd pin
Markings are on the module in white text. The result should look similar to the picture.
If you done this rigt, the LEDs on the module will light up when the Arduino is powered. Stick in an Ethernet cable and the LEDs on the Ethernet connector should light up, showing local Ethernet traffic.
Step 3: Arduino Code
Last step is to upload Arduino code to connect to the Internet. For the ENC28J60 chip/module, there are two Arduino libraries available: Ethershield (development has stopped) and Ethercard (the newest).
Load a Sketch that let's the Arduino act as a webserver, like this example:
// This is a demo of the RBBB running as webserver with the Ether Card
// 2010-05-28 <jc@wippler.nl> http://opensource.org/licenses/mit-license.php
#include <EtherCard.h>
// ethernet interface mac address, must be unique on the LAN
static byte mymac[] = { 0x74,0x69,0x69,0x2D,0x30,0x31 };
static byte myip[] = { 192,168,1,203 };
byte Ethernet::buffer[500];
BufferFiller bfill;
void setup () {
if (ether.begin(sizeof Ethernet::buffer, mymac) == 0)
Serial.println( "Failed to access Ethernet controller");
ether.staticSetup(myip);
}
static word homePage() {
long t = millis() / 1000;
word h = t / 3600;
byte m = (t / 60) % 60;
byte s = t % 60;
bfill = ether.tcpOffset();
bfill.emit_p(PSTR(
"HTTP/1.0 200 OK\r\n"
"Content-Type: text/html\r\n"
"Pragma: no-cache\r\n"
"\r\n"
"<meta http-equiv='refresh' content='1'/>"
"<title>RBBB server</title>"
"<h1>$D$D:$D$D:$D$D</h1>"),
h/10, h%10, m/10, m%10, s/10, s%10);
return bfill.position();
}
void loop () {
word len = ether.packetReceive();
word pos = ether.packetLoop(len);
if (pos) // check if valid tcp data is received
ether.httpServerReply(homePage()); // send web page data
}
With a bit of hacking, you can easily add code to display analog values read off the analog pins for instance.
Step 4: Done!!!
That's it, you just hooked up your Arduino to the Internet for less than 10$.
More interesting Arduino stuff at: http://hwstartup.wordpress.com


