

Introduction: Adding a Second Car Power Jack


You know when you have all of that crap in your car, and each needs a power jack of it's own? Well, even if you don't, I do. While splitters are available, they have a limited current (whatever the jack can provide). So if you need to run high-power devices like small-medium inverters, or things like mini-refrigerators, they don't play so well with other devices on a splitter. Using only a little wiring and cheaply available vehicle power-plugs (and of course some soldering skill), we can create another power jack.
WARNING: Modifying certain things may be against the law in your area. I really don't think this has any legal issues (even in up-tight Massachusetts), so you should be good.
Also, please note that access to wiring in your vehicle may not be as easy as mine. I drive a Dodge Neon, so all you have to do is reach under the dash, and wallah! Wires a-plentiful. Nicer vehicles, like Mercedes-Benz's or BMW's might actually do a good job preventing you from touching the interior wiring. You should have a pretty good understanding of vehicle wiring before attempting this Instructable, but I will cover the basics.
IMPORTAINT: You will be modifing your vehicles wiring. MAKE DAMN SURE you know what you are getting in to. Your vehicle may have extra wires like mine did, so this won't be a big issue, but it may not, in which case you will have to do a little more work.
Step 1: Gathering Materials
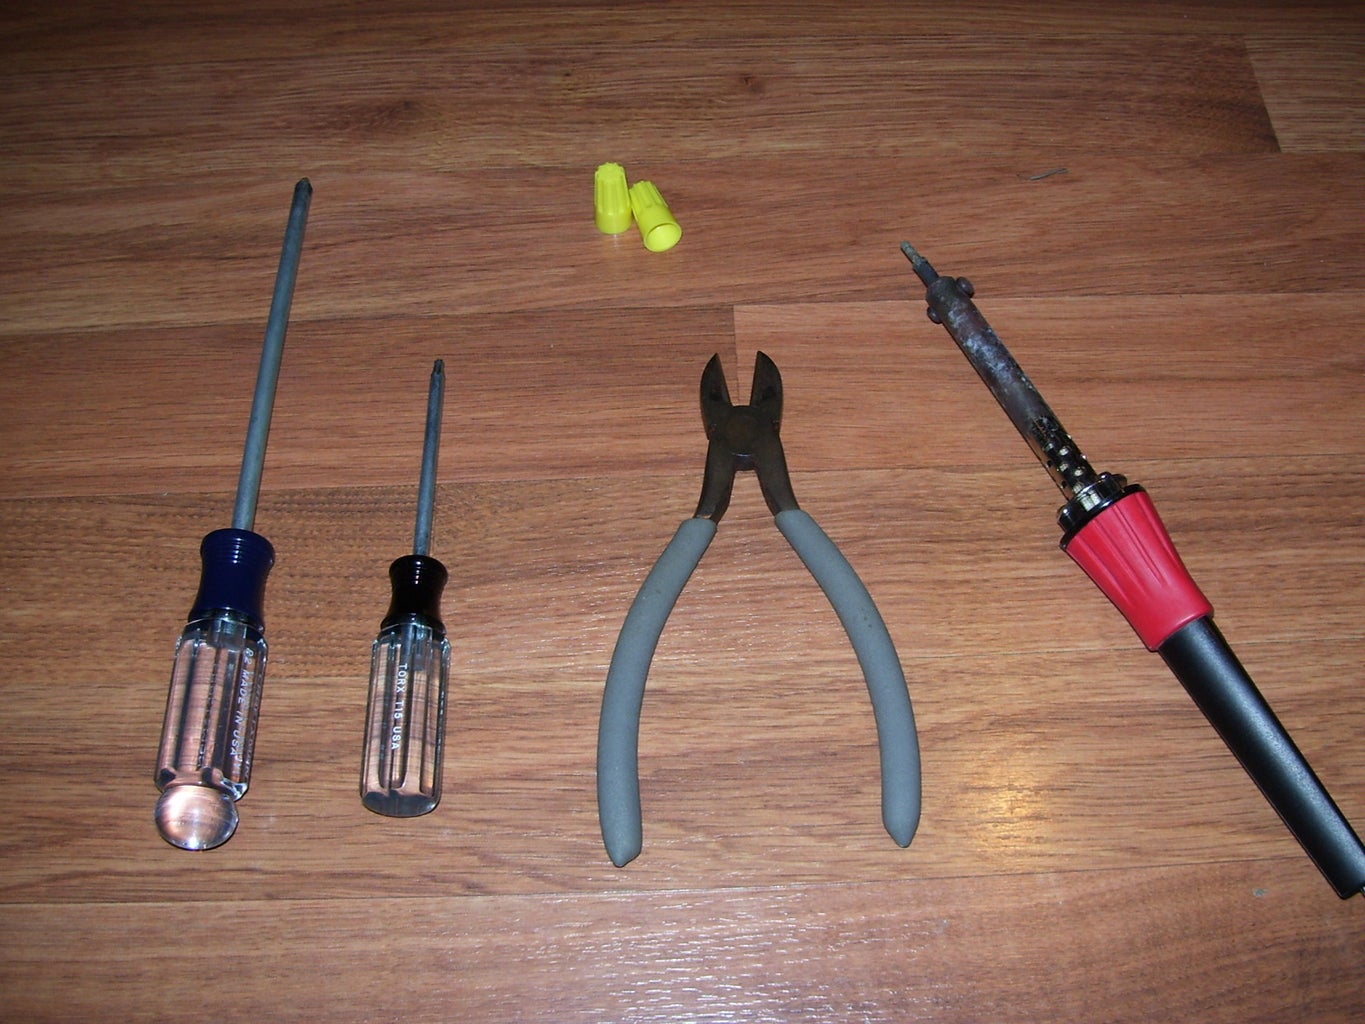
Okay, here we go. First, acquire some thick wire (12 gauge would be good). Great wire for this would be an old two-conductor extension cord. I had some black-and-red 14 gauge wire lying around, so I used that. You will also need a vehicle socket replication. I found mine on some GameBoy accessory, of which I had to remove the 20 gauge wire. I also like the All Electronics Corp. who have some great parts at good prices (allelectronics.com). The only thing I was able to find there was one with sockets on both ends of a wire (so you could have two!) at www.allelectronics.com/make-a-store/item/CLP-94/20-CORD-W/-CIG-LIGHTER-SOCKETS-BOTH-ENDS/1.html for $5.70 at the time of writing. Depending on what you chose to do, you will also either need wire nuts or crimp connectors or solder/heat shrink tubing. You will also, of course, need your trusty soldering iron and any screw drivers that your car may require. Usually, a Phillps-head is good enough, but Torx are also very popular in vehicles.
Step 2: Construct Power Jack
If you did not get a power jack prepped with wiring, or if the gauge of the wire was too small, you will need this step. The pictures I took are of the completed project, sorry.
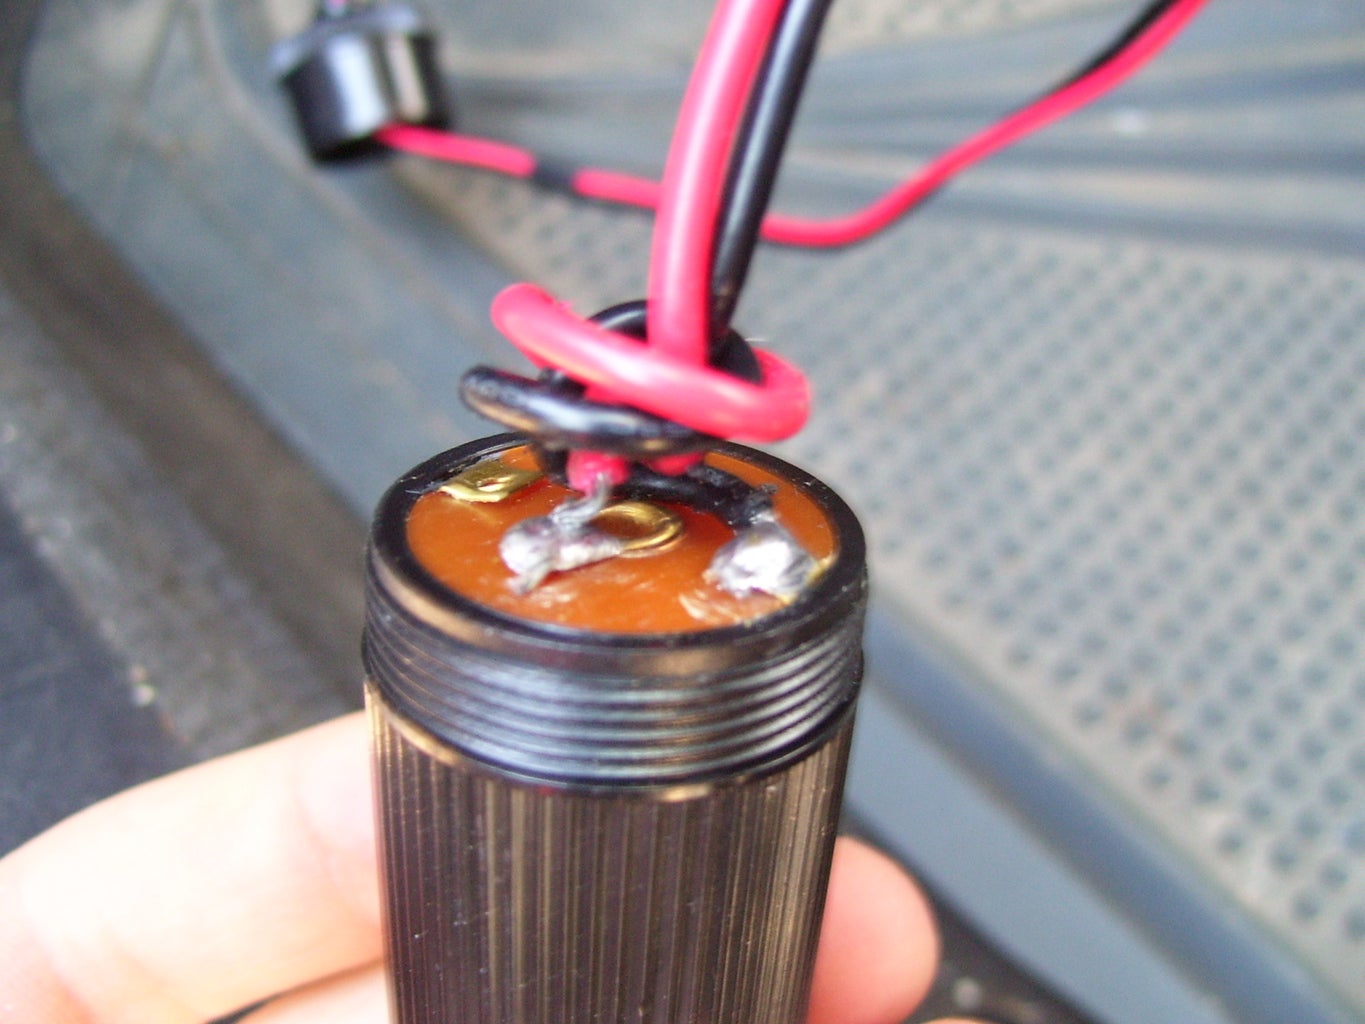
1. Unscrew/unbolt the back of the power jack to expose the wiring solder tabs.
2. De-solder the old wire off of the tabs.
3. Prep your new wires. You can pick any lenght of wire you want, so I recommend starting with longer wires, and then you can cut them down from there.
4. Solder the POSITIVE wire to the CENTER tab. This is very important, as most devices won't run if the current flow is in the opposite direction.
5. Solder the NEGATIVE wire to the OUTER tab.
6. Screw/bolt the back of the power jack back on.
You are now ready to begin the vehicular work.
Step 3: Finding a Suitable Wire


This is the most difficult section of the entire process. Every single vehicle is just a little different, so the method I describe may not work for you. I'll try to make it as general as possible. (I think if you can install an amplifier/suboofers in your car, this should be a breeze).
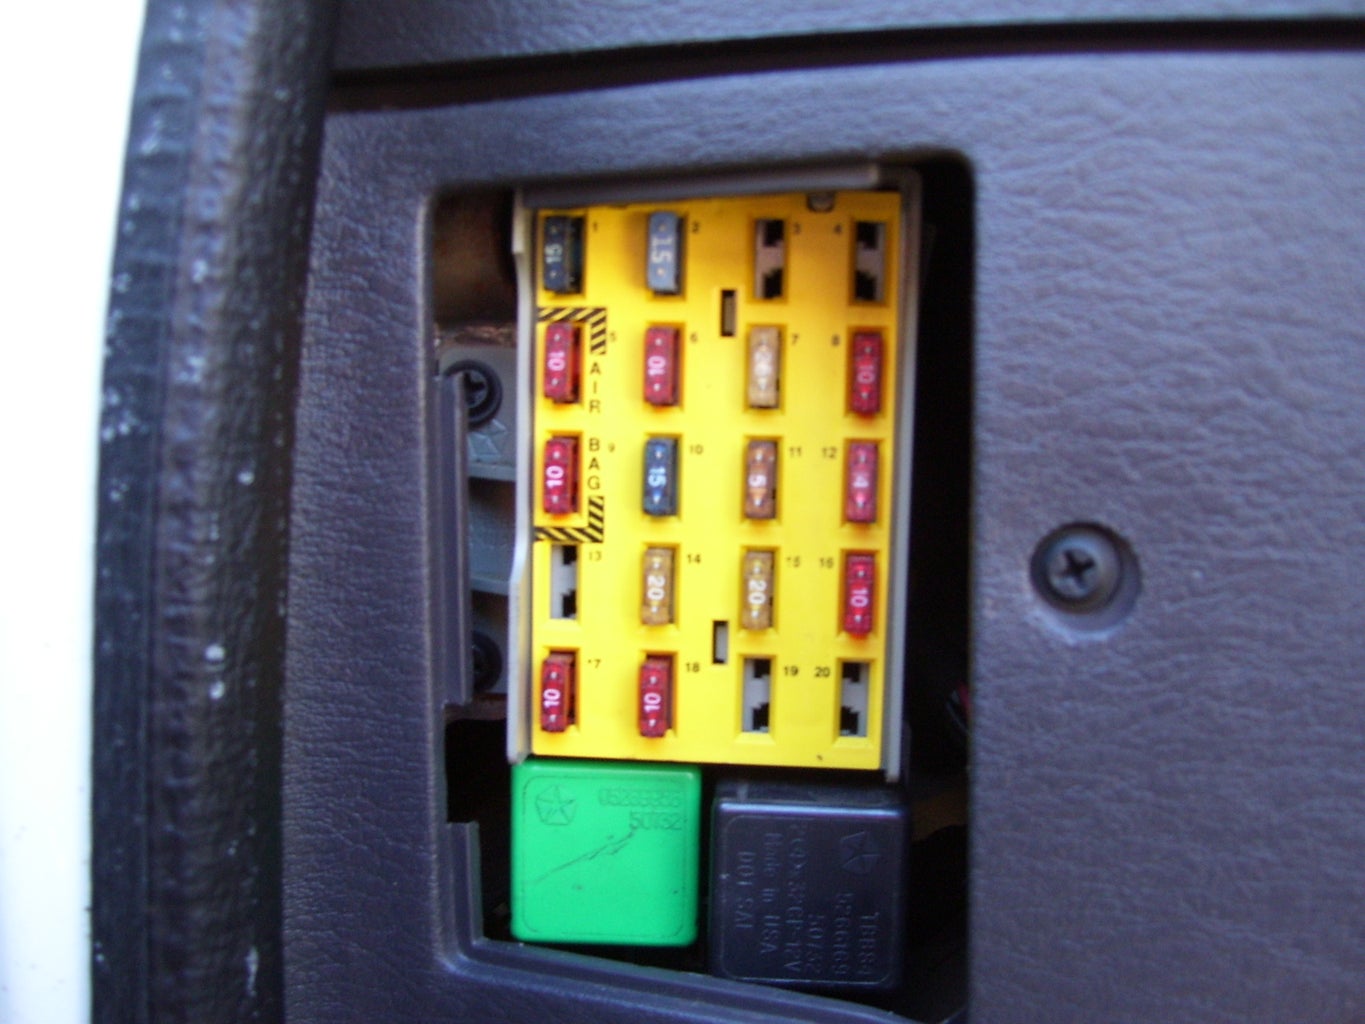
1. First, start by locating your interior fuse panel. Mine was located on the driver's side of the dashboard, immediately visible upon opening the door. Yours may be on the other side in a similar location, under the dashboard, or even in the engine bay. Your owners manual will tell you EXACTLY where it is for your specific vehicle, so if your not sure, read the manual. That almost hurt to say.
2. The door that covers the panel will tell you which fuse does what and what it's rating is. This is useful for replacing a blown fuse. But what you have to do is first look for a fuse that does not seem to correspond to your vehicle. In my case, I had a fuse that read "Moonroof", and I don't even have a manual Moonroof, so I know that this did not go anywhere.
3. If one is blank, and you look to the corresponding hole and there is no fuse there, this is an un-usable, empty hole. They do not put metal contacts in there, so unfortunately you can't use the empty spots.
Now, there are two directions we can go from here. If you do have a fuse for something that does not exist in your vehicle, go to step 4. If you can't find an un-used fuse, go to step 5.
Step 4: The Un-Used Fuse

Let's put the little bugger to work! Fortunatly, because it is un-used, you can change the value to whatever you desire, but I don't recommend going over 20 Amps. The average car power plug is rated at 10 Amps.
1. Find the wire coming out of that particular un-used fuse. In my case (and with any '95 to '99 Neon), there is a yellow wire with a red stripe that would power the Moonroof.
2. You may have to take the panel itself off of the car by un-screwing it. Make sure to keep track of all of the screws you remove!
3. Trace the wire. In my case, it ran up into the dash, but your particular fuse could be for anything. All you need is a fairly good length of it, not the entire thing.
4. When you have what you believe to be a suitable length of wire, cut it as far away from the fuse panel as possible, as this will leave you the most wiring.
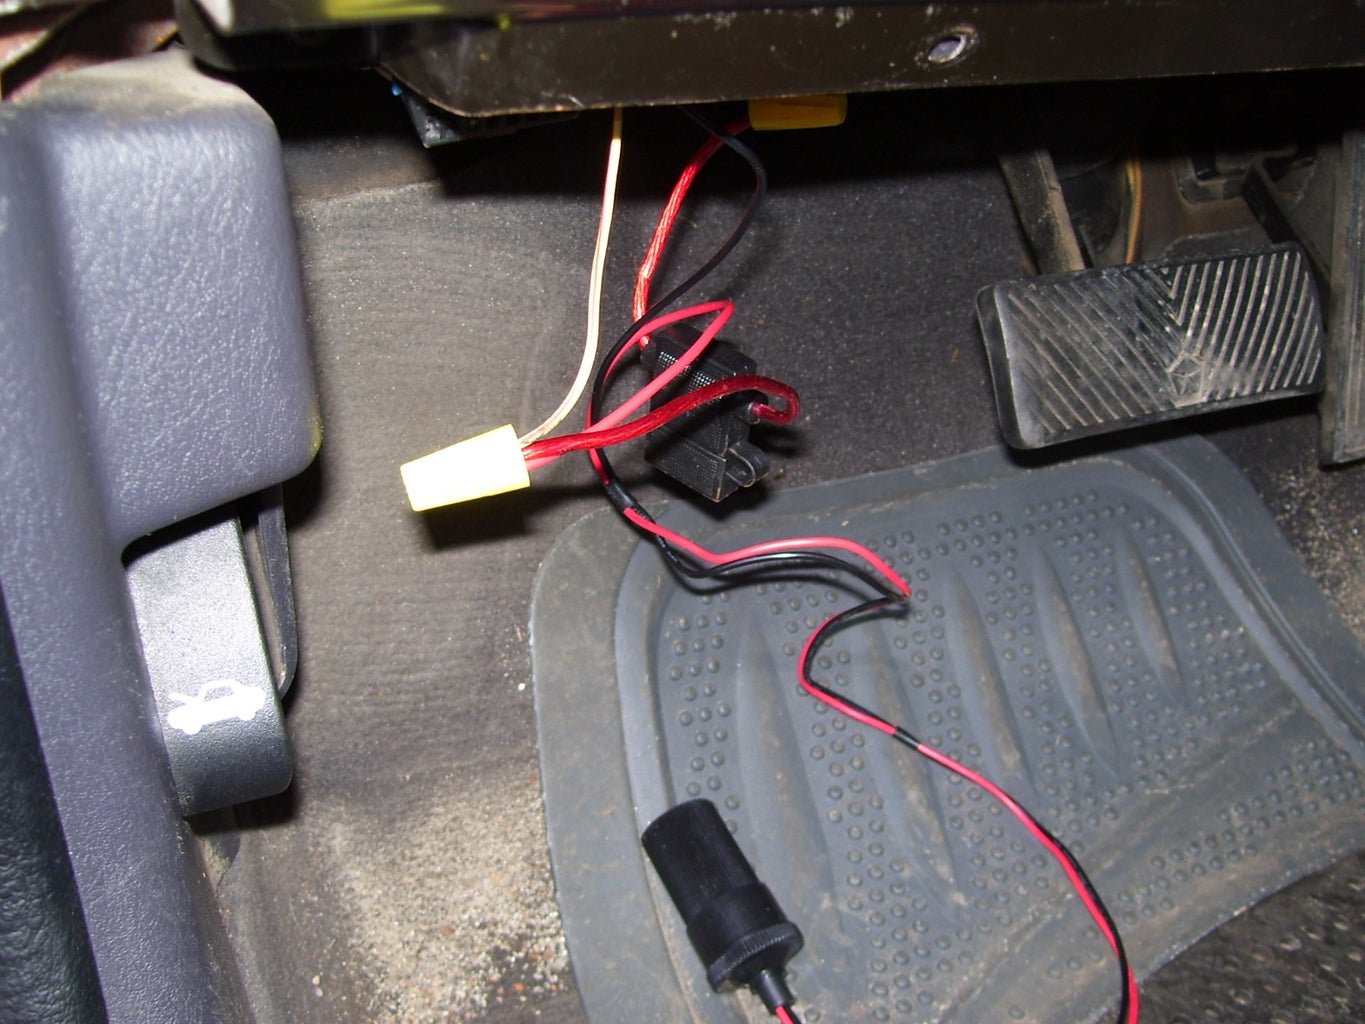
5. Allow the wire to come down below the dashboard, near the pedals.
6. Strip the end of the wire.
7. Attach the POSITIVE wire of your power jack to this wire.
8. You're ready to connect the ground wire. Skip step 5.
Step 5: A Used Fuse
This is for all of you folks out there who have a well made car that doesn't have extra crap laying around. I'm sorry, I don't have any pictures for this, as I did find an un-used fuse. If you have any questions about your car, post it in the comments or PM me, as I will be checking up on this Instructable more than my last one.
1. Okay, if we can't find an un-used fuse, we have to look for a lightly-used or infrequently used fuse. By that, I mean one that only has to carry an intermittent load. A great fuse for this is an interior lighting fuse, like the one for the dome-light on the interior roof of your car (the one that turns on when you open the door. Actually, I recommend using this one.
2. Average light bulbs self-regulate (and when they blow out, they don't draw any more current, as there is only one path for current to flow). So you can put a bigger fuse (nothing over 20 Amps, of course!) in it's place.
3. Locate on the back of the fuse panel, by removing from the car, the wire that is connected to the fuse you have chosen.
4. Splice the wire. What this means is, you have to cut it (at any point you think is easy to reach), strip both ends of the wire, then connect it back together WITH the POSITIVE wire of your power jack connected with them. There are also splicing kits out there which don't require you to cut the wire. One piece gets placed around the power wire, crimped onto it, and it provides a connector for a spade terminal (usually provided with the splice) which will slide into the splice (with the positive wire attached to it). I think even Wal-Mart sells these.
5. You are now ready to hook up the ground wire. Proceed to step 6.
Step 6: Ground

Well, the power wire was a pain in the butt. Luckily, the ground wire isn't nearly as painful to work on. If you may have noticed if you've ever looked under the hood of your car, the NEGATIVE wire is connected directly to the chassis of your vehicle. That being said, any metal point in your vehicle can be used to hook the ground wire up.
1. Locate any small screw connected to frame metal under the dash. I say small as I don't recommend un-screwing the large bolts that hold the car together :P
2. Loosen this screw, but do not remove it. Doing so will simplify the next step.
3. Wrap the stripped end of the ground (NEGATIVE) wire around the screw.
4. Hold the wire and slowly, carefully screw the screw back into place.
5. Try not to let any wire insulation get in the way of the screw, as this will hinder the metal-metal contact of the wire itself.
Step 7: Build Complete, Time to Test

Congrats! If you made it this far, you are done! Now, you just have to test it to make sure it works. (If you spliced the wire, in the case that you couldn't find an un-used fuse, also test whatever device you interfered with.)
1. Take a device that won't work if reverse voltage is applied. Cell-phone chargers are a good way to test the jack.
2. Turn the car on or just turn the key to the "ON" position.
3. Plug the device in. It should respond as it does to your normal power jack.
4. If it doesn't, reverse your NEGATIVE/POSITIVE wires either up in the dash or right at the jack.
5. If it still doesn't work, first check the fuse, then check to make sure your ground wire is making good contact with vehicle metal. If it isn't, try another screw.
6. If you have completed those steps and it still doesn't work, than PM me.


