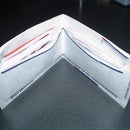
Introduction: Altoids Tin Wallet
This versatile candy tin can also be used as a wallet! In case you haven't already discovered, standard credit cards and ID's fit perfectly into the venerable Altoids tin. Check it out! This is super easy, and aside from taking time to eat all of the candy, this can take as little as 1 minute or up to several hours depending on how complex you want to get.
My idea contains no fancy construction, original ideas, MSG, or preservatives.
Customize it! Ladies, you can add a strap to carry on the town, or guys paint it matte black and add a custom hot rod emblem like I did.
Wallet challenge - looks like someone posted one while mine was in progress! Great minds think alike - oh well on with the instructable!
Step 1: Gather Your Items
You will need the following:
1. One Altoids tin, or several.
2. Rubber bands, paper binder, elastic hair ties, or a recycled inner tube to use as your binding mechanism ( or a million other combinations I can't think of. I can envision complex opening mechanisms and the like, led's or whatever.
3. Optional: Recycled plastic to create an ID holder for inside the lid.
3. Stuff to put in it!
Step 2: Bind You Items
Decide how to bind your cards, cash, etc. It can be simple or complex. For mine I used recycled motorcycle tire inner tube, cut to shape as a card protector and also a few bands from the tube to bind the stuff together.
The paper binder works really well, but I advise using something to protect your credit cards from scratching. I used some inner tube as my binder, since it keeps things nice & quiet inside the tin.
The paper binder works really well, but I advise using something to protect your credit cards from scratching. I used some inner tube as my binder, since it keeps things nice & quiet inside the tin.
Step 3: Place Items Into the Tin!
Everything will fit pretty snugly. If you decide to use some plastic for an ID holder in the lid, it is going to have to fit very tightly and is probably the hardest part of the whole project, as it is held in place with a friction fit in my example. I think an even better option is to use some type of tyvek or paper flap instead. When the lid is closed, it is very tight with the ID in the lid and the tin can pop open. I would suggest using some sort of securing method for the tin to keep it closed such as a hook & loop strap or simply a rubber band.
Step 4: Finished!
If you decide to paint your tin, you can mask off the edges where the lid friction fits to the bottom. Or like I did, just close the tin, and paint very lightly top & bottom. Make sure to lightly sand the tin and clean with alcohol or water to remove dust before priming and or painting to get good adhesion. There are several other instructables that can show you how to etch the lid, or line the inside with fabric and the like!
I can fit quite a few items in the tin, including a USB flash drive. I could see modifying to fit an ipod with a hole in the side for your earbuds.
You might also want to add several other items shown in other instructables, such as the nice coin holder.
A rubber armored tin using inner tube, recycled tire , old mousepad, or that cool "rubber tool handle dip stuff" called Plastidip might be fun to try. It comes in a spray can now!


