

Introduction: Amazing & Graceful Egg Drop Contraption


Recently my AP Physics class was assigned the egg drop project. After experimenting with a few designs I found one that works very well and looks good too.
Although some of the restrictions for the classic egg drop project vary, some of the same prinicples found in this design might be applied to your own device.
The winner for our competition was determined based on the highest P-score. Where the P-score is equal to the below equation (h being the maximum height survived, m being the mass in grams and V being the volume in cubic centimeters). I think my device ended up with a score of about 430 (more than four times the second place score).
Step 1: Materials

The materials I used to create my device:
2 toilet paper rolls
1 manila paper folder (any kind of thicker paper would work just as well)
5 yakitori skewers (long thin sticks)
2 straws
ziplock bag
some thread (optional)
tape
Tools:
hot melt glue gun (not totally necessary but helpful)
x-acto knife (again not necessary but helpful)
Step 2: Assemble the Body


Start by cutting the toilet paper roll length-wise. Then fit the other roll inside of the one you just cut. Tape it back together so that it is now slightly wider and can just fit the other roll inside.
Take the un-modified roll and cut it in half. This is easiest with an x-acto knife but scissors will work too. Make about 1 inch vertical cuts all the way along the perimeter of one of the halves. Leave about 3/4 inches of space between the cuts.
Step 3: Assemble the Rotors

Now find the other half of the roll you cut up. Poke a hole about half a centimeter from the end of roll (I found the x-acto knife worked well here). Make the whole large enough to fit one of the skewers through. Poke another hole directly opposite this so that the stick can pass all the way through the roll. Repeat this process four more times. NOTE: You will have to increase the distance from the edge of the roll for each skewer so that they can all fit.
Step 4: Cut Out and Attach the Blades


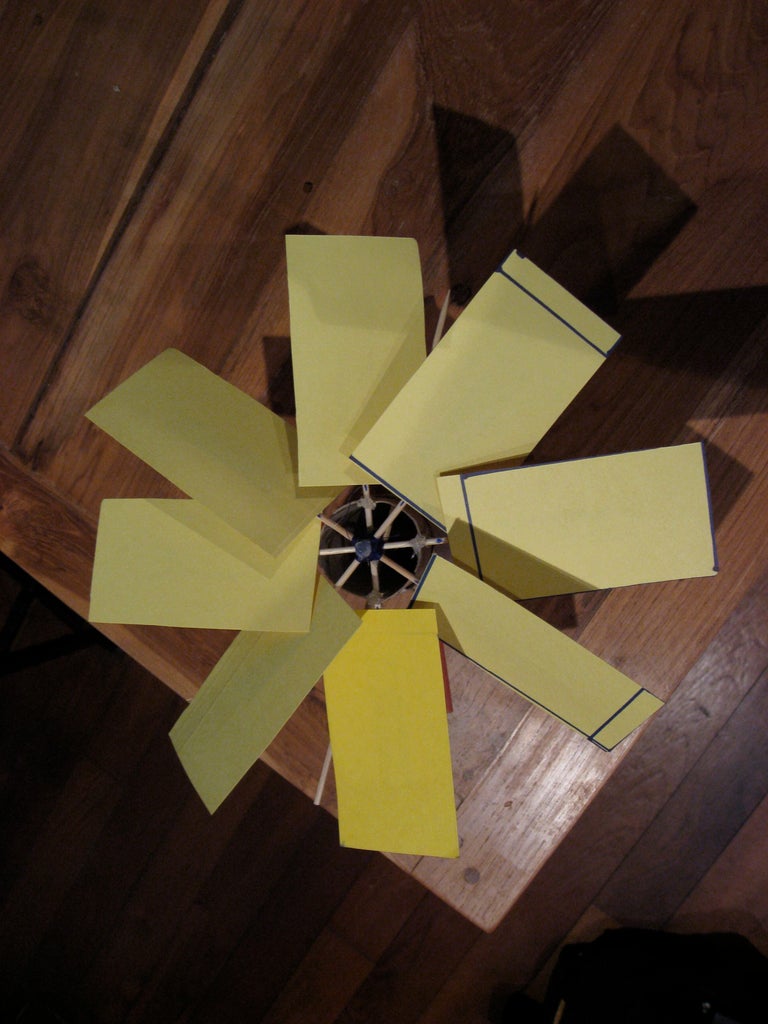
Cut out eight 11cm x 5 cm rectangles from the manila folder. You can of course alter the length of these blades. My project required that the device fit within a 30cm x 30cm footprint but if you're allowed to go bigger, the longer the blades are the more drag they will create giving a better chance of survival for the egg.
Once you have all your blades, attach them to the skewers at slight angles. I used electrical tape to attach mine to reduce weight but I'm sure hot glue or other kinds of tape would work just as well. Make sure all the blades are approximately equidistant from the center of the tube (this ensures that it is the most stable as it gracefully spins downward).
Step 5: Putting It All Together


Now all that's left is putting everything together.
Poke another pair of holes in both the bottom of the roll of the rotor assembly and top of the roll that was slightly widened. This attaches the propeller assembly to the base while also allowing you to easily take it off for transporting or checking the egg.
Create two more pairs of larger holes on the bottom of the widened toilet paper roll to fit the two straws through. Ideally they would be perpendicular to eachother but as long as it's able to support the egg it should be fine.
Insert the bottom half of the role (the one with vertical cuts) into the bottom of the widened tube. I didn't need to secure this because mine was a relatively tight fit but if it falls out when you hold it vertically you should use tape to secure it in place.
Step 6: Finishing Touches


It's almost time to test it....
First get a small ziplock bag and cut the top off (about one third down). Wrap your egg in the bag and insert it into the top of the device prior to dropping it. It should be a pretty snug fit. If it's not fitting make sure the bulk of the excess plastic bag is under the egg when you place it in and the egg is sitting vertically in the tube (eggs are much stronger in this orientation).
Also slightly curl out the bottom cuts so that when the device lands it acts as a sort of spring or shock absorber and spreads out.
You can also attach a thread to the top rotor assembly. This makes dropping the device easier. This is very helpful if you're not the one dropping it.
Step 7: Drop Time!

There you have the finished product! You may want to test it without the egg first to make sure it spins as it falls. If it doesn't check that your blades are all in the correct orientation.
If it's working well it should spin gracefully down and land lightly on the springy cardboard cuts.
That's it! Good luck with your egg drop.
Participated in the
Discover Green Science Fair for a Better Planet


