

Introduction: Annex, an Arduino Yun Garage Monitor


Left home and not sure if you’ve closed your garage door? With this Instructable, you can have peace of mind and manage your doors - anywhere, anytime!
This project will provide a web portal that allows the user to check on the status of their garage. If the doors are open, simply tap on the icon and close your garage door remotely.
Materials
1 x Arduino Yun
1 x 5V AC Power Adapter + MicroUSB end
1 x Breadboard or Perfboard (if you intend to solder)
1 x Webcam (optional)
Note: Video Feed only works on desktop - see Step 8
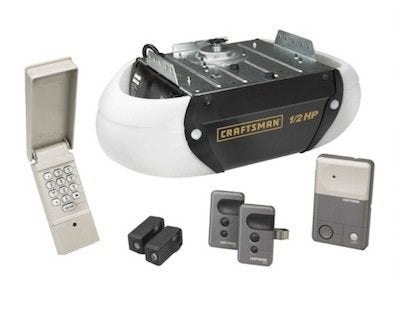
For each garage:
1 x NC (Normally Closed) Magnetic Reed Switch
1 x NPN Transistor (I have the 2N3417)
1 x 1N4001 diode
1 x 220 ohm resistor
1 x roll of wiring to run from garage door to your circuit
Jumper wires or wiring of your choice
1 x LED (to test the circuit)
Step 1: Setting Up a Workspace


Before starting this project, make sure that you have your workspace set up.
If you are working on a Windows computer, you will need to have PuTTy installed which can be installed here.
If working on a Mac or Linux, we will be using Terminal or your choice of a Terminal alternative. Also, if you are using a Mac, you should use this tool to format your SD card, not Disk Utility.
I'm not going to go into detail on how to set up the Arduino Yun. There are plenty of getting started guides and tutorials out there. For Mac and Linux, I recommend this one, as it covers out-of-the-box setup and SSH.
But at the bare minimum, your Arduino Yun should be configured and your memory card is properly formatted (FAT16 or FAT32). You may have to create a folder named arduino at the SD card's root directory to allow for programming over WiFi if the IDE does not do it for you.
Once you are able to upload the example sketch TemperatureWebPanel over WiFi and view the panel on your browser.
Finally, make sure that you can SSH into your Yun. You can find your local IP address by going to the <yourArduinoName>.local portal. Put that into the "Host Name" text box in PuTTy.
Login as root; your password is what you've configured in the .local portal (arduino is the default password).
Now, we can get started!
Step 2: Upload Code

First, download a copy of the code and files from here.
You will want to open the Arduino sketch. Select your Arduino Yun’s local address as your upload port and upload the sketch via Wifi. This will copy over all the files for the web portal, too. Once the sketch has been uploaded, verify that the web portal is being hosted on your Yun at/sd/annex-garage-monitor.
For example, if you had set up your Yun with the default settings, you should be visiting http://arduino.local/sd/annex-garage-monitor.
If all goes well, you should see the web page up and running!
At the same time, you can plug one end of your magnetic reed switch to pin 2 and the other end to GND. Since the switch is non-directional, you can plug any end into GND. Bring the magnetic end close to the switch and you should see the red garage icon turn green!
Step 3: Modify Code


The code is configured for two garages and a live-feed from a webcam. To modify the code to suit your needs, you will have to change the .ino and files for the web portal.
Arduino
Open annex-garage-monitor.ino in the Arduino IDE or your choice of text editor.
Go to line 14 and change the number of garages you wish to monitor.
At line 31 and 32, fill in the input pins you wish to use for monitoring your garage doors (sensorPins) and the output pins for activating the garage motor (motorPins).
Web
HTML
This section will go over how to customize the web portal for your own use.
Open www/index.html in your text editor. Starting at line 77, is where you'll want to make your changes. The original code will display 3 modules - two garages and one for a live streaming feed.
Here is a break down of the HTML for a garage module:
<div class="4u">
  <section id="sensor0" class="special box">
    <h2>garage 1</h2>
    <h3>open</h3>
    <div class="garage open" id="sensor0" onClick="garageClick(this)"></div>
  </section>
</div>
The first div element dictates how much of the page the module takes up when viewed on a larger screen. Once you've figured out the number of modules you want, you can refer to www/css/skel.css or the image attached for what class to assign the module to.
For example, if you only want 2 modules, you want each one to take up 50% of the page. Looking at skel.css, I would want to change the class to 6u.
<div class="6u"><br> ...<br></div>
Next, if you're adding a garage module to the page make sure you name the id attribute of the section and inner div. This identifies the module to the corresponding garage. It is a zero-based count, so Garage 1 will have the id sensor0, Garage 2 will have the id sensor1 and Garage 3 will have the id sensor2.
Finally, remember to change the label in the h3 element.
If you would like to setup a live feed, this will be covered in Step 8.
JavaScript/Jquery
Open www/js/garage.js and change the GARAGES variable to the number of garages you will be monitoring.
Also, since my garage motor does not have a terminal to let me know the motor is running, I'm using the script at line 24-26 to show when the motor is "running". It actually takes close to 20 seconds for my garage to close, but I've defaulted to the value 10000 (10 seconds or 10000 ms) for testing purposes.
Feel free to change this value closer to one that accurately represents your garage motor running.
Test
Upload your newly changed code by uploading the .ino via WiFi through the Arduino IDE. Once the upload is complete, refresh /sd/annex-garage-monitor.
Step 4: Make Your Yun Accessible From the Internet


Right now you can only access the web portal when connected to the same WiFi network. We will have to expose your Arduino to the worldwide web. As a disclaimer, this is no way built to be a secure system and was just a home project DIY. I’ve taken precautions to only allow the project to close garage doors (and check for that it is indeed open before sending a signal to the motor) but web dev is not my forte.
I have to give thanks and credit to this Roque Campos Parada for documenting this process.
Assigning a Permanent IP Address + Port Forwarding
For this, we will have to assign your Yun a reserved IP address. This is to ensure that no other device will be assigned the same address by your router. This part will require you to figure out how to access your router settings. For me, my router's local portal can be reached at 192.168.0.1.
After logging in, find the page where you can configure DHCP reservations. You may need to enter the info manually or find it on an existing DHCP table. If you need the MAC address, it can be found by logging into your Yun through the browser.
Next, you will have to assign a port to forward incoming requests to your Yun. Find the page where you can configure port forwarding and add a new rule. The application will be for HTTP, with a TCP connection and all public and private ports are 80.
You can Google "what's my ip address?" to find your public IP address. Try to access <yourPublicIPAddress>:8080 in a browser to make sure your changes have taken place. I had to use another network (my phone's data connection) to confirm that the changes worked. You should be redirected to your Yun's administrative portal.
Finally, confirm that going to <yourPublicIPAddress>/sd/annex-garage-monitor will bring you to the project page. I find that the Yun is kind of spotty at times and may take several tries before loading properly.
Using a DDNS Service
At this point, you're pretty much set up. If you're not a fan of remembering your public IP address, we can use a DDNS service to provide a more human-friendly web address.
Sign up for a free account at http://www.noip.com/.
Once you've logged in, you want to Add a Host.
You will be given a form to fill out. Fill in a hostname of your choice, select a domain from no-ip's list of free domains. Select Web Redirect and put in <yourPublicIPAddress>/sd/annex-garage-monitor as the address.
Give it 5-10 minutes for the changes to take place. Again, using a device on a different network, confirm that you can access your garage monitor with the new address.
Unfortunately, with no-ip's free account, the domain is only held for 30 days. You can either log in every month to hold down the domain or set up a script that will do it for you.
You can visit Roque Campos Parada's blog post for a PHP script to get you started.
Step 5: Building the Garage Control Circuit


Next, we will be building the circuit. Below is a diagram of the circuit that will be controlling the garage opener. You will have to build a circuit for each garage you want to monitor.
We will be using the NPN transistor as a switch. In short, when a voltage flows into the Base pin, the Collector and Emitter will act like there is a short circuit between the two junctions and complete the circuit.
If you have a different NPN, do look up the datasheet to see which legs are the Base, Collector and Emitter and adjust your circuit accordingly. The 1N4001 diode is to protect the Arduino from any reverse current from the garage opener.
In the next step, you’ll likely encounter a higher voltage or current than our Arduino can handle coming from the garage motor or opener. The Arduino Yun can only provide 5V and up to 40mA of current. The Yun’s I/O pins will burn out if it sinks anything higher than 5V or greater than 200mA. Our output pin will be connected to the Base pin of our NPN. When the output pin on our Yun outputs a HIGH value, current flows between the collector and the emitter, completes the circuit and will trigger our garage motor.
Refer to the breadboard diagram or schematic on how to hook up your circuit.
A list of precautions:
1. Make sure your 1N4001 diode is in the right direction. The silver band indicates the out flow of current.
2. Layout of pins on the NPN transistor - check your datasheet! In this diagram, they are laid out as E C B.
3. Make sure you have a row for GND. Every garage control circuit must share a common GND! This means your circuit's GND and the GND terminal coming from each garage motor.
1 garage control circuit? There should be 2 ends going back to the Yun's GND pin. 2 circuits? There should be 4 ends all going back into the Yun's GND pin!
Testing the Circuit
For this part, we will hook up an LED to test that the circuit has been built correctly. The LED will simulate the triggering of the garage motors.
Refer to the test circuit schematic or breadboard diagram. Since the LED is on for a short time, I didn't bother using a resistor and hooked it up directly to the 3.3V line. If you're afraid of burnout, feel free to use a current-limiting resistor.
Test the circuit by tapping on the corresponding icon on the web portal. Once the Arduino side has processed the command, you should see your LED light up briefly.
Troubleshooting
Circuit not working? Here are the most common mistakes:
1. LED anode and cathode ends are reversed. Make sure the anode end (usually the longer leg) is attached to the 3.3V and the cathode end is going into the Collector pin of the NPN.
2. The 1N4001 diode is reversed.
3. The resistor value may be incompatible with your transistor (not providing enough voltage to the Base pin). You can use this calculator to get a ballpark value of what resistor value you should use.
4. There may be a defective component in your circuit. It has happened! Trial and error + multimeter!
Step 6: Testing the Garage Control Circuit


Hacking Your Garage Motor
Next, we will have to hook up your garage opener to our circuit. Much credit goes to MegunoLink’s Instructable.
Option 1: Connect to the garage motor
You will want to grab your multi-meter and probe the two terminals leading to your wired controller. It will probably be the PB (push button) and GND.
Confirm that the wires going to your opener panel do trigger the garage motor by shorting them together. If you've activated the motor, then you can move on. Otherwise, look at option 3.
Option 2: Connect to the Garage Opener Panel
This is referring to the panel mounted in your garage. Use this method only if you have a basic panel (doesn't have an LCD screen); it should have the button to activate the motor, maybe one to turn the lightbulb on and off (if applicable) and perhaps a light sensor. An example would be this or this.
Remove the terminal from the wall and find the terminals that connect the wires from the garage motor to the opener. For me, I had to pry out the buttons on my opener, unscrew the drywall screws to reach the terminals on the back of my opener. A quick probe with my multi-meter read a voltage of 10V+.
Confirm that the wires going to your opener panel do trigger the garage motor by shorting them together. If you've activated the motor, then you can move on. Otherwise, look at option 3.
Option 3: Solder to Switch on Garage Panel
This is an option for people who couldn't connect to their garage motor with the first two options. My parents have a basic model where the motor inputs go directly into the garage panel. At my place, the motors are of a more premium model (LiftMaster Elite series) where the two wires going to the panel are used for power. The panel is more advanced and measures temperature, the motor status, etc. If I were to connect the circuit directly to the two terminals, I would only short out the panel.
Opening up the panel revealed two push button switches. Pressing any of them will trigger the motor, so I opted to solder one wire to each button. Using my multimeter to perform short circuit tests (the mode with a diode as a symbol), I probed to find which ends were not shorted together. After soldering a wire to each end, I powered on the panel and used my multimeter to find my GND wire. I labeled this so I wouldn't get it mixed up for the next step.
Connecting the Garage Control Circuit
For your safety, you should either unplug your garage motor or head down to your electrical box and flip the fuse to your garage. Press and hold the button to your garage opener to discharge any buildup current still in the circuit.
If you chose to do Option 1, you will want to add a wire to the PB (or equivalent) and GND terminal. If you chose Option 2, add your wire to each terminal on the garage opener.
Now, hook up your wires to your circuit and Arduino like the diagram shown below.
IMPORTANT: Remember to connect the GND of both the garage opener and your Yun together so that they share a common GND.
Go ahead and power on your garage motor and Yun. Once the Yun has finished booting up, go to the portal from a device or computer. Tapping on the red garage icon should trigger your garage motor.
You can see a video of the circuit test above!
All good? Time to mount the sensors and put in the final touches.
Step 7: Installing the Garage Monitor


Mounting the Sensors
Looking at how my garage doors open, I found that the best place to mount my magnetic switch would be the above the IR sensors that were already mounted. The standalone piece will be placed on the garage door and the one with wire end will be mounted along one of the brackets that fixes the door tracks. I used adhesive backing on the sensor and covered it with some additional duct tape to ensure that the sensor will stay even during the frigid winter.
Just make sure that the sensors don't get in the way of the garage door as it opens and closes.
I had some 3-stranded sheathed wiring laying around and used about 10 ft of it to run the ends each magnetic switch for it to reach my Arduino and circuitry. I stapled the wires (taking care not to puncture the sheathing). It's up to you how you would like to run the wires.
Mounting the Arduino
Since my parents' often move thigns around in their garage, I used a plastic housing from an old project to keep both my Yun and breadboard protected. It had a couple holes drilled into the sides already and cutouts the micoUSB cable for the Yun. I fitted some rubber grommets to protect the wires from the sharp edges. A couple more holes were drilled at the bottom of the case to mount the case onto my garage wall.
I used some double-sided foam adhesive to keep the Yun in place inside the case. I used the adhesive backing on the breadboard to do the same.
Completion!
Congratulations! You've built yourself a homemade garage monitor. A little on the pricey side for what you get, but I had a good time tinkering with it.
Step 8: Adding a Live Feed (Optional)
This part purely optional. At the moment, only desktop browsers are able to view this live feed.
I am still waiting for my Xiaomi Xiaoyi camera to arrive. A friend had told me that its firmware has APIs to access the camera’s streams via mobile devices. Once I've had some time to tinker with it, I may update this Instructable on how to set it up.
Anyhow, if you’d still like to proceed, follow the instructions below to make the following code changes.
Install Drivers
Adafruit has a very comprehensive guide on getting a webcam going, so I will redirect you to follow the instructions here.
Once you can confirm that you are able to take a snapshot, we can move on to the next part.
Start Webcam on Boot
I've found that the portal is sometimes difficult to load on a browser and that a reboot really helps. If we're rebooting remotely, we also want the webcam to start up as well. With mpjg-streamer, there is a simple way to do this.
SSH into your Yun. We will have to edit /etc/config/mjpg-streamer.
Using vi or your choice of in-line text editor and change option enabled to a value of 1. You can also change the default fps and resolution, but I find that the defaults work the best on the Yun.
config mjpg-streamer core
       option enabled          "1"
       option device           "/dev/video0"
       option resolution       "640x480"
       option fps              "5"
       option www              "/www/webcam"
       option port             "8080"
Now would be a good time to test the reboot function from the web portal at/sd/annex-garage-monitor/settings.html. Or you can unplug and plug your Yun back in. After it finishes booting up, double check that your webcam is working by viewing the stream at:8080/?action=stream.
Final Touches
Modify your HTML markup inwww/index.html to your liking.
The default code in www/index.html has the live feed set to snapshots that can be refreshed. If you would like a video stream right on the page, you can go replace the src attribute with the streaming link instead. Also, remove the img element for refreshing the screenshot.
Find a place to mount your webcam in your garage and monitor away!
Congratulations! You now have a monitor with a live video feed!

Participated in the
Make it Move Contest 2016

Participated in the
Full Spectrum Laser Contest 2016


