

Introduction: Arduino 101 and Visuino: Control LED From Smartphone With Bluetooth LE


Arduino 101 is a powerful microcontroller, that also comes with built in Accelerometer, Gyroscope, Thermometer, and Bluetooth LE (BLE). The Bluetooth makes it particularly good fit for IoT development, and remote control from Smartphones.
In this Instructable, I will show you how easy it is to program the Arduino 101 with Visuino to remotely control LED from a Smartphone.
Step 1: Components

- One Arduino 101
- One Smartphone with Bluetooth LE support
Step 2: Start Visuino, and Select the Arduino Board Type

To start programming the Arduino, you will need to have the Arduino IDE installed from here: http://www.arduino.cc/.
Please be aware that there are some critical bugs in Arduino IDE 1.6.6.
Make sure that you install 1.6.7 or higher, otherwise this Instructable will not work!
The Visuino: https://www.visuino.com also needs to be installed.
Step 3: In Visuino: Configure the Bluetooth Module, and Add Bluetooth Service Component


- In the Object Inspector expand the "Modules" property, then its "Bluetooth" sub-property, then set the value of the "Local Name" sub-property to "LED" (Picture 1)
- Type "blue" in the Filter box of the Component Toolbox then select the "Bluetooth Service" component (Picture 2), and drop it in the design area
- In the Object Inspector set the value of the "Advertise" property to "True" (Picture 3)
Step 4: In Visuino: Add Characteristic Element to the Bluetooth Service Component


Next we need to add a Digital Characteristic to the Bluetooth Service:
- Click on the "Tools" button of the BluetoothService1component (Picture 1)
- In the "Characteristics" editor select the “Digital” element, and then click on the "+" button on the left (Picture 2) to add Digital Characteristic (Picture 3)
- Close the "Characteristics" editor
Step 5: In Visuino: Connect the Bluetooth Service Component


- Connect the "Out" pin of the BluetoothService1 component to the "In" pin of the "Modules.Bluetooth" channel of the Arduino component (Picture 1)
- Connect the "Out" output pin of the "Characteristics.Digital1" element of the BluetoothService1 component (Picture 2) to the "Digital" input pin of the "Digital(LED)(SPI-SCK)[13]" channel of the Arduino component (Picture 3)
Step 6: Generate, Compile, and Upload the Arduino Code


- In Visuino, Press F9 or click on the button shown on Picture 1 to generate the Arduino code, and open the Arduino IDE
- Connect theArduino 101 with USB cable to the computer
- Select the board type as "Arduino/Genuino 101" and serial port
- In the Arduino IDE, click on the Upload button, to compile and upload the code (Picture 2)
Step 7: On the Smartphone: Download and Install the "nRF Master Control Panel (BLE)" App

Now that the Arduino 101 is programmed, it is time to power it up and start controlling it from the Smartphone.
There are many Bluetooth LT Apps that can be used. For my testing I used the "nRF Master Control Panel (BLE)" recommended on the Arduino.CC site, however other Apps probably will also work fine.
You can download the App for Android here and for iOS here.
Step 8: In the NRF Master Control Panel (BLE): Find and Connect to the Bluetooth LED Service


- Install and start the "nRF Master Control Panel (BLE)" on your Smartphone
- Click on the "SCAN" button (Picture 1)
- Once the Arduino 101 LED Service is found, click on the "CONNECT" button (Picture 2)
- Click on the "Unknown Service" (Picture 3) to expand it (Picture 4)
Step 9: In the NRF Master Control Panel (BLE): Prepare to Send 8 Bit Value to the Characteristic of the LED Service


To control the LED we need to send a UINT8 value of 0 (Turn OFF) or 1 (Turn ON). For this every time we need to follow these steps:
- Click on the "Up Arrow" button on the "Unknown Service" (Picture 1) (Please note that clicking on this button can be tricky - at least on my Android device it required few attempts to get exactly the small button :-( )
- In the popup dialog, click on the "Down arrow" next to the "BYTE AR..." (Picture 2)
- From the popup list (Picture 3) select the "UINT 8" (Picture 4)
Step 10: Turn the LED On


- Click on the "Write value" text box and type "1" (Picture 1)
- Click on the "SEND" button (Picture 2)
- The value of the Characteristic will change to 1 (Picture 3)
- The LED on pin 13 of the Arduino 101 will turn ON (Picture 4)
The Screen on Pictures 1 and 2 has the option to save the action for later, so you will not need to go through all the steps, but I will leave you to explore the App on your own ;-)
Step 11: Turn the LED Off


- Click on the "Up Arrow" button on the "Unknown Characteristic", and repeat the steps from "Step 9"
- Click on the "Write value" text box and type "0" (Picture 2)
- Click on the "SEND" button (Picture 3)
- The LED on pin 13 of the Arduino 101 will turn OFF (Picture 4)
The Screen on Pictures 2 and 3 has the option to save the action for later, so you will not need to go through all the steps, but I will leave you to explore the App on your own ;-)
Step 12: And Play...

Congratulations! You have completed the project.
On the Video you can see the Arduino 101LED being controlled from Android phone.
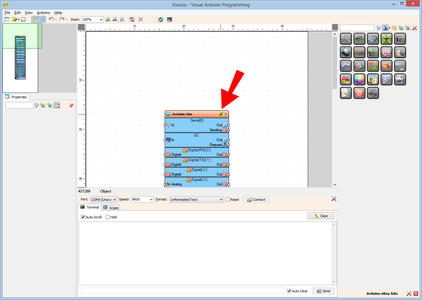
On the Picture you can see the complete Visuino diagram.
Also attached is the Visuino project, that I created for this Instructable. You can download and open it in Visuino: https://www.visuino.com


Participated in the
Internet of Things Contest 2016


