

Introduction: Arduino 3-axis Mini Lazer Paper-Cutter


Updated : 16/3 Add step 4, about using the stage.
Updated : 18/3 Add photos (cutting vinyl adhesive sheet)
Updated : 19/3 Add step 5, acting as pen plotter
Updated : 20/3 Add laser engraving video (Wood) and photo
Updated : 22/3 Add 2 drawings to show the structures of machine, also visit this link.
+++++++++++++++++++
I read many posts and now I had finished my first mini Lazer Cutter.
The design is simple and reliable ( u can see the video )
+++++++++++++++++++
It is using Arduino Duemilanove + GRBL (0.8c) + 100mW blue/ violet lazer with external battery power supply (5V)
Drawing program is inkscape + gcodetools, gcode sender is Unversai G Code Sender
++++++++++++++++++++
I want to share with u but it is really difficult for me to explain it in english...
I just want to share some experiences, or, may be u can ask me...
Also, most of the technical things (especially about GRBL) u can find in the following articles.
Step 1: Main Body...


I had read many GRBL lazer-cutter design (especially using CDROM as axis-motor)
most of them is beautiful but I can't made them.
It is because I did not have powerful tools to make them, even prepare a wooden board is difficult to me.
Since I think the axis-motor is running smooth, I use a metal frame together with few blocks to setup the structures.
I think u know how to build it by looking at the photo.
The tricky thing is.... u need to buy 3 small stages...
and all the stage/ metal frame are connected with a wooden block
the circuit in a small plastic box (photo) is a variable DC voltage supply, u can use any similar things instead.
Step 2: DIY GRBL Shield


I am using easydriver for controlling the movement of the stepping motor.
Some website said GRBL support not only Arduino Uno but also Duemilanove, nano.....
So I wonder I can make a shield for easily testing those arduino.
First, I screw the easydriver on a plastic stick, then solder them with wire.
Second, I allow the easydriver connect with arduino by pins (for easy configuration)
Third, I screw the plastic stick on a standard arduino shield and the whole things now can be plug and play with any arduino that come with GRBL.
I had soldered IRF510 for controlling the on/off of the lazer on the shield, together with power jack.
Step 3: Sharing...
1. I try to make 3-axis CNC miller first with CDROM.... however, the final product really big in size.... if u are interested please watch the video....
2. I make this 3-axis lazer cutter because I can still cut paper whatever the platform is not leveling. just repeat the gcode with different depth...
3. Grbl Controller 3.5 is great but if u are using Arduino Duemilanove, there might be some problems on communication. Also, Grbl controller may have problems in interpret G-code generate from inkscape. If so, please using other sender...
Step 4: About Using the Stage


The stage is tricky to use...
U need to drill holes by yourself. (Photo 1)
Also, the gap between the slide and base is little (Photo 2,3), so I drill one hole twice...
first, using appropriate drill size to drill a hole; and the second time I use a large one to make a hole for accommodate the screw head (Photo 4). So, it also the slider move without blocking by the screw head. (using flat-top screw)
For the stage, all the metal parts is not fix on the epoxy well (the epoxy is fragile), so the better way is using "wooden block" as medium (the epoxy parts are clamp tight between the wooden board and the screw). Also, if u using wooden board as medium, the holes you drill does not need to be very accurate, because u can make fine-adjustment (leveling) on the wooden board and the body frame.
Last but not least, the maximum movable distance is only achieved by applying object with similar width on the top of the slider (Photo 5), so, I can apply a larger working platform after I had added a wooden board (similar width) on the top of the slider.
Step 5: Acting As Pen Plotter

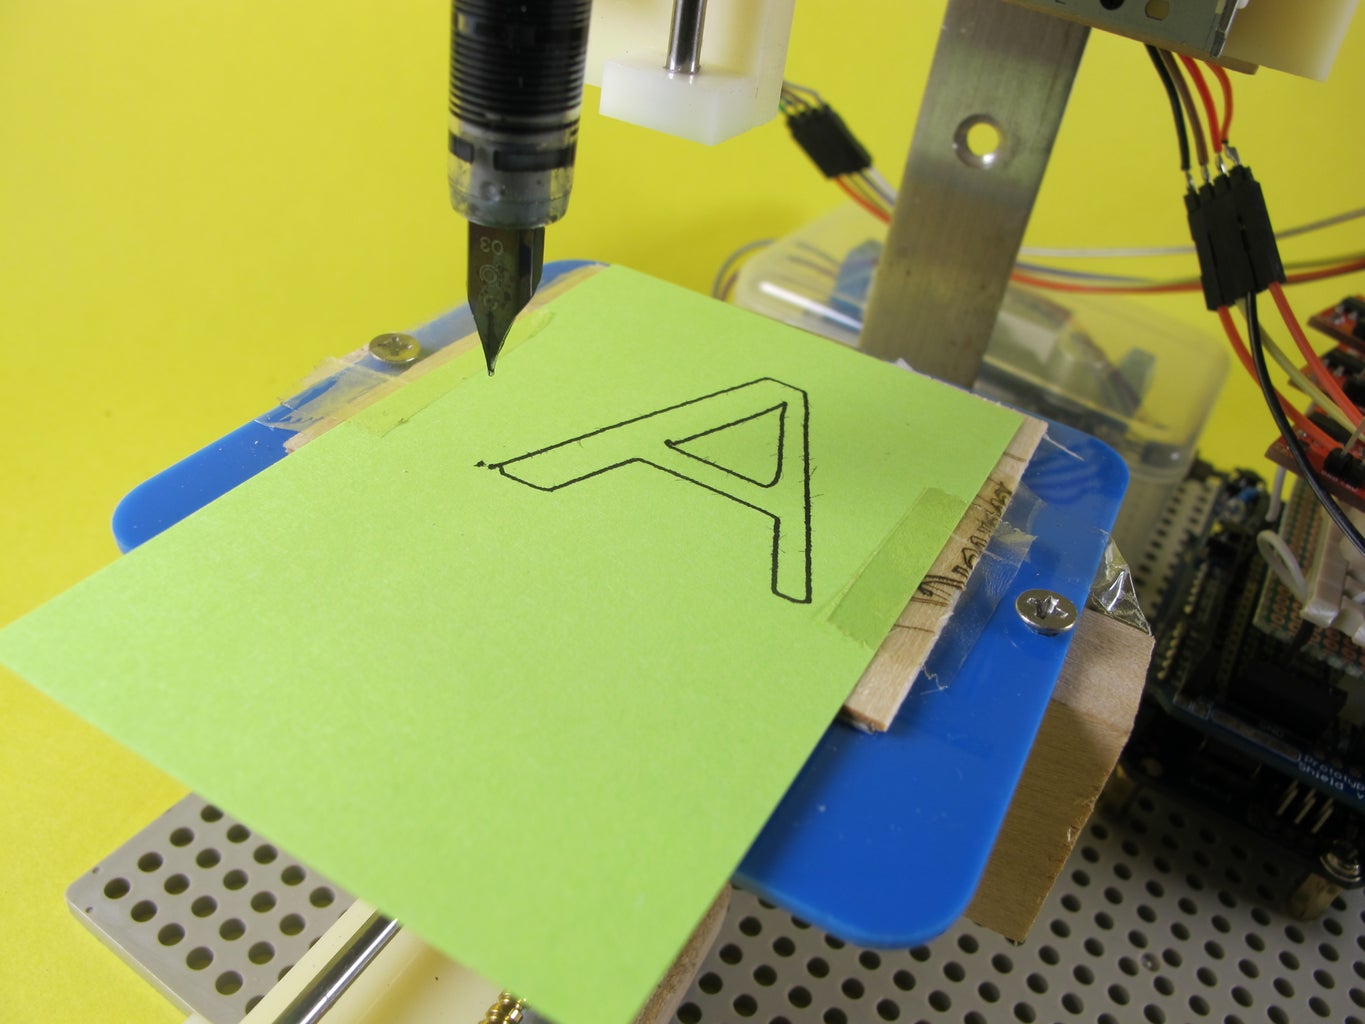
This project can convert to pen plotter by replace the lazer diode with writing instrument.
https://www.instructables.com/id/Arduino-Mini-Pen-Plotter/
Cheers

Third Prize in the
Full Spectrum Laser Contest

Participated in the
Arduino Contest


