

Introduction: Arduino Battery Checker


The Arduino Battery Checker is a battery voltage reader and categorizer built on an Arduino Uno.
Parts List:
Step 1: 3D Print the Case

The case is available on Thingiverse: https://www.thingiverse.com/thing:2565230
Step 2: Get Arduino Uno and Breadboard Ready

Step 3: Connect Power and Ground Rail to the Arduino
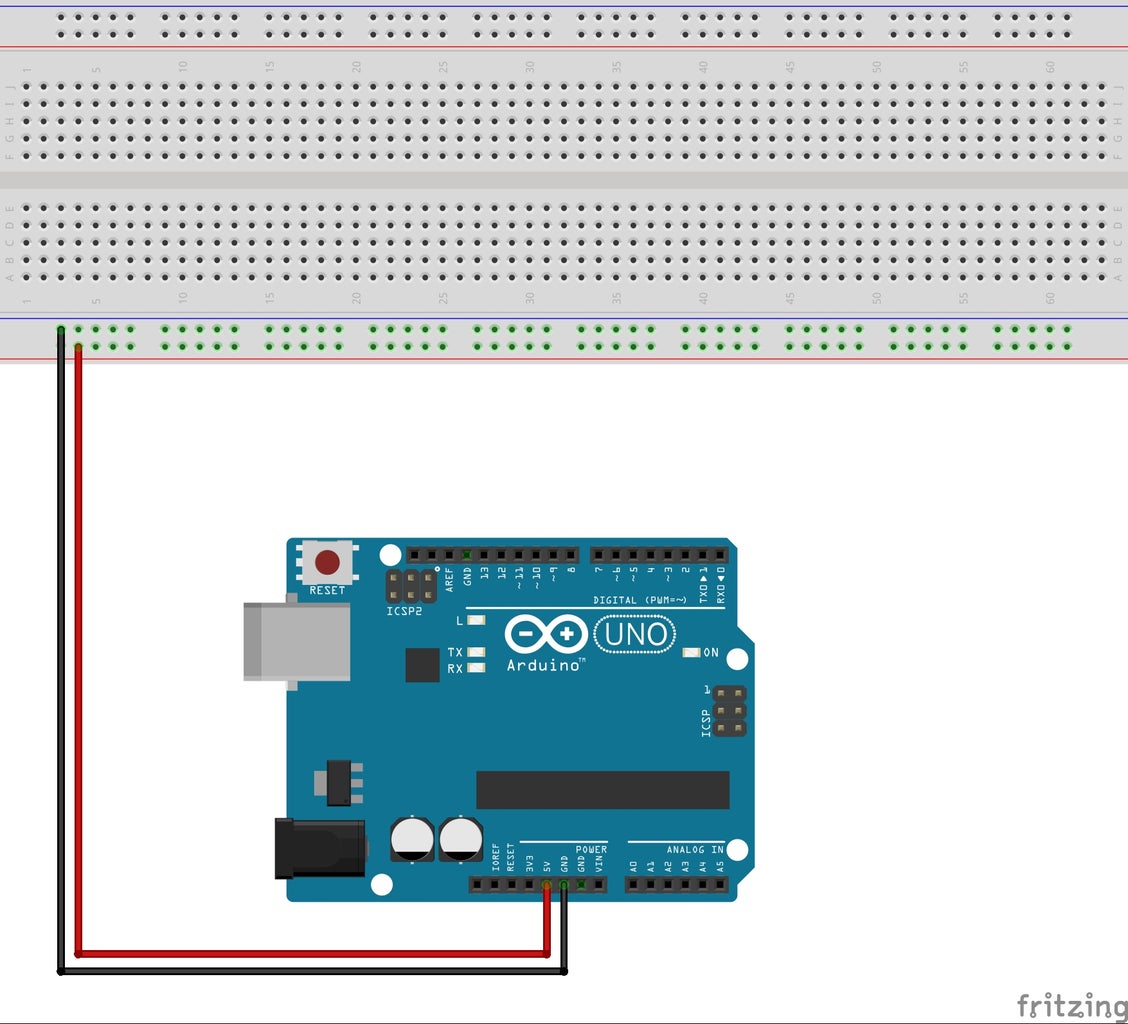
Connect the ground rail to the ground pin on the Arduino and connect the power rail to the 5V pin on the Arduino. You will only need the lower rails to be connected.
Step 4: Start Connecting the Voltage Detection Circuit

Place a 10kΩ resistor on the breadboard and connect one end to the ground rail and the other end to analog in pin A0.
Step 5: Add the Next Resistor to the Voltage Circuit

Connect a 100kΩ resistor to the same end of the other resistor that connects to the analog in pin.
Step 6: Connect Battery Test Leads to the Circuit

Connect the negative lead to the resistor array on the left side that is connected to ground. Connect the positive test lead to the far right side that is not connected to anything else.
Step 7: Connect the First LED

Connect the cathode or negative side of the LED to ground. Connect the anode or positive side of the LED to a 220Ω resistor and connect it to pin 13.
Step 8: Add the Other Two LEDs

Follow the same procedure to connect the other LEDs. Connect the red LED to pin 13, the yellow LED to pin 12, and the green LED to pin 11.
Step 9: Add in the Push Button

Connect one side of the button to a 10kΩ resistor and connect it to pin 6. Connect the other side of the button to the positive rail on the breadboard.
Step 10: Add the LCD Screen

Connect the VCC pin on the screen to the 5V rail.
Connect the GND pin to the ground rail.
Connect the SCL pin to analog in pin 5.
Connect the SDA pin to analog in pin 4.
Step 11: Code
Make sure you have installed the library for the LCD screen. Make sure to get the correct library for your model of screen, mine was listed at http://www.diymalls.com/0.96-oled-lcd-display.
Once the library has been installed, simply upload your code to the Arduino.


