

Introduction: Arduino Beginner and Basic Electronics Kit Primer


I learned that one of my nieces had an interest in programming. She was working with robotics at high school and has a summer internship where they had Arduinos. I think she was able to borrow an Arduino to experiment with at home but every Maker knows that is not the same as having a piece of kit that is yours to own...and possibly destroy, well, not intentionally, maybe, in some cases, never mind.
So according to the Good Book of Ibles and "The Unwritten Uncle Rules of Spoiling Your Nieces and Nephews Unless They are Brats", I should be putting together a kit to give to her to further her aspirations as a Powerpuff Engineer or Engineer Minion. Really, it doesn't matter who you are, especially young ladies, the world needs more thinkers and engineers to keep it running.
Putting together a beginner kit fror programming an Arduino is also putting together an intro kit to electronics. The programming of the Arduino allows it to interface with the real world by using electronic sensors or switches for input. It provides feedback by causing motors to move, sounds to emit from speakers, or causes LEDs to blink or turn on. Practical application of theory is always better to learn from.
This Primer will explain what it takes to put an Arduino Beginner and Basic Electronics kit together to get someone going. It may not be inclusive of everything but essentials to get started. Actually, this is all the extra stuff I had laying around to share. If you take a look at all of those beginner sets, they are kinda pricey and will probably be paying more just for the convenience.
DISCLAIMER: I will probably drop a lot of brand names in this ible. Any recommendation or opinion is based on my personal experience so YMMV. I don't get any kickbacks or anything...but it would be nice ;-)
I am not an electronics expert, but I do play one on Instructables. I know enough to be dangerous, the rest I google.
Step 1: Some Stuff Does Not Fall Off the Truck...

As a hoarder Maker, parts can be sourced from a lot of places. As a cheapskate frugal dad, it took a long time before I decided to pull the trigger and get an Arduino. Looking back, it's kind of like getting an ink-jet printer. Relatively low cost initially for the printer itself but the accessories/disposables, the ink or all those additional electronic components can add up. Yeah, just like those American Girl dolls too.
Sources
Part of the cost of a product is the support of the company once you get it in your hands. Electronic components do fail sometimes and it could be that way out of the box. It could be you only notice it acting wonky after you use it. Warranties and returns are honored by good businesses.
Get a genuine Arduino.
I always try to get two. One to use and a backup.
I got my Arduinos at my local MicroCenter when I saw them on sale...browsing with all the other geeks.
Some reputable places to get your Arduinos and electronic components are:
Adafruit
Maker Shed
Sparkfun
Mouser
Digikey
Jameco
RadioShack
and yes, that old guy on Canal St, NYC, tucked away in back of one of those tourist trap mini-malls.
McMaster-Carr , more for the mechanical type parts and materials
Dollar stores
Sniffing out bargains means that you will always find something that may be remotely useful in your projects. Deep discount or liquidation stores yield some unique items or stuff that begs to be hacked. I have gotten sets of LED candlelights to hack for it's flickering effect LED, bicycle safety flashers to gut for its LEDs and electronics, dome lights to make giant easy buttons, and cheap toys to hack.
ebay
I'll admit, I get a lot of stuff off of ebay because of the price. I haven't tried any outside of the US sellers or those dirt-cheap import electronic sites yet because I still don't trust my mailman to get the mail delivered across town, no wonder they are in such sad shape. If you have the patience to wait several weeks for delivery of a mystery package, then go for it. Know what you are getting into and have realistic expectations of the quality of the goods. I do have some stories about regular packages that were not delivered on time and took a diversion on the way.
Take the seller ratings with a grain of salt and read through the negative feedback comments to see if there really is a problem. Know how to scope out and price your goods. Buy in bulk if you need those items. Bigger lots work out to less cost per item. Know how to put in the bid at the last second. Become an ebay sniper to win auctions. Know when to "buy it now" to guarantee you will have the item. Look through the bid history to size up your opponents. Take up the "best offer" and place a reasonable amount. Don't forget to figure in the shipping costs or free shipping as part of overall what you will pay. It really helps to have a Paypal account set up for payments.
Alternate Sources
Hand me downs
I got me an ipod. Ipod Classic. Don't be afraid to try to fix up stuff. I find value in buying factory refurbished items.I look at it as a second factory check to make sure it is good to go.
Samples
I dunno, I guess you can sign up in places as a business that would evaluate the product but I don't know if the effort is worth it or that the selection of the parts you get would even be something you could use.
Scavenging, Salvaging, Scrounging, Harvesting...
I have put a lot of electronics out to pasture in the recycling bin. You can get some parts off of old circuit boards but you have to invest in the time to figure out what they are and then warehouse your parts so you know you have them. Larger components like motors, potentiometers or transformers I can deal with but unmarked resistors and capacitors are not worth my trouble. Clipped leads after desoldering are hard to work with and those surface mounted parts (SMT), good luck.
Step 2: Arduino

There are a lot of variants of your basic Arduino. Arduino is the trademarked name of the product but you will see other companies trying to market their copy under some -ino ending name to capitalize on its popularity.
Being an open source design there are many derivatives and plain outright "fakes" on the market.
Get a genuine Arduino (pronounced Ar-Dwee-no, Italian in word origin like its other models, Duemilanove(2009))
Trust who you can buy from and get it from some place that will support the product once it is in your hands. There are actually counterfeit IC chips out there and the quality of the solder work or component tolerances can vary enough to make your board wonky.
Quality control in electronics products can still sometimes miss the one you get or it gets damaged during shipping but is more questionable when you do not purchase a genuine Arduino. It is extremely frustrating to troubleshoot problems when it is hardware related and need the seller to replace it.
So which is the best beginner Arduino to get? Depends.
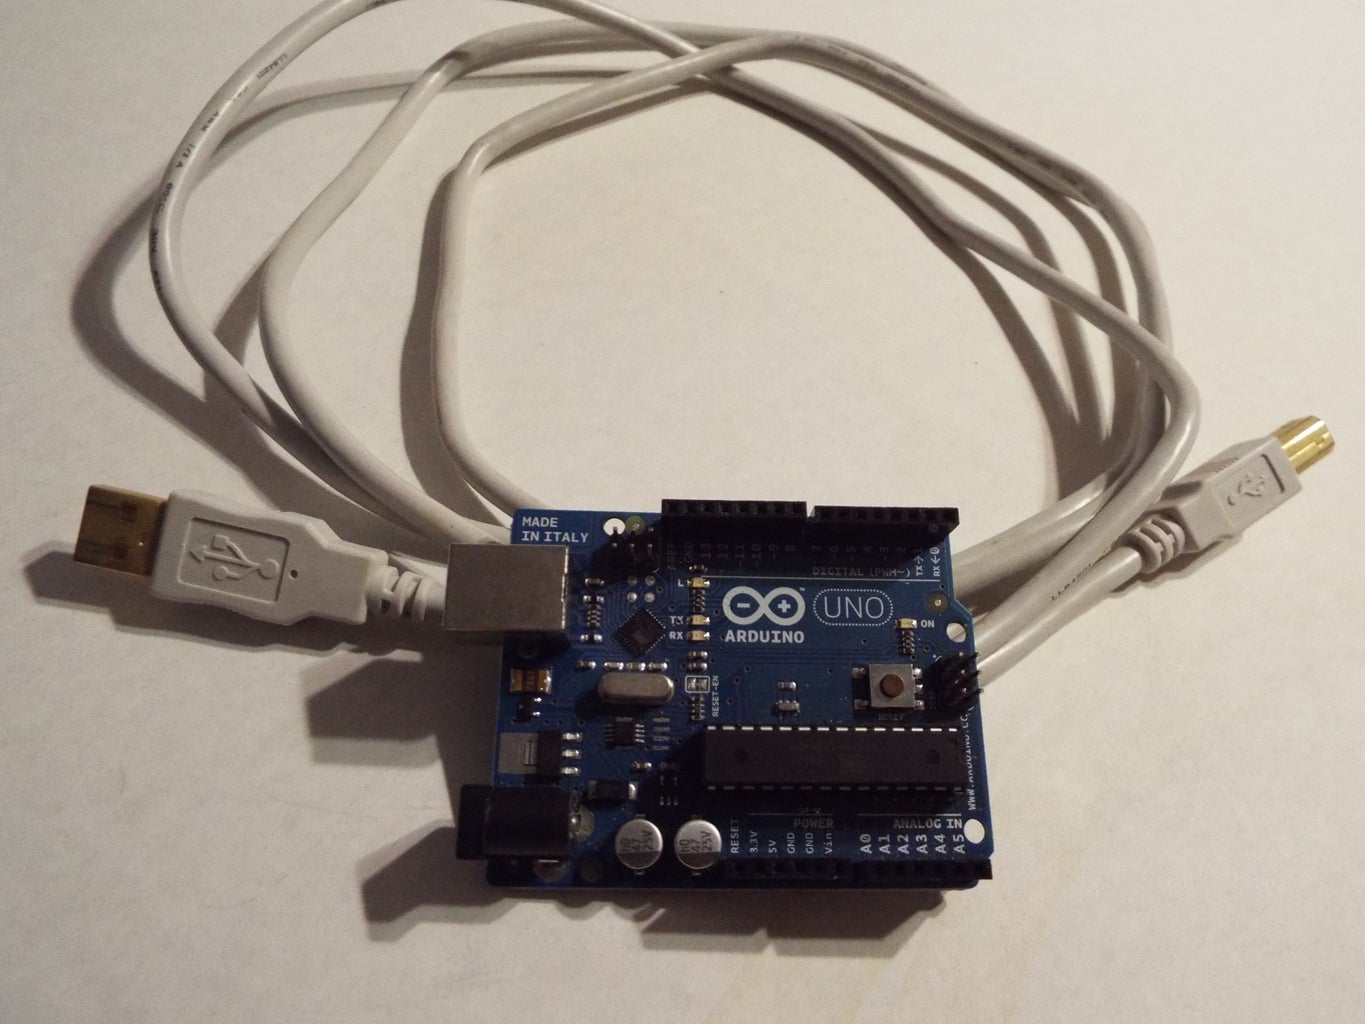
The UNO has been a good starter for me. It has enough input/output data pins for basic projects. It doesn't need an addtional FTDI adapter cable to communicate with the computer in order to program it. It can be powered directly through USB or a battery pack.
There is a lot of sample code and projects already out there based on it so it needs no modification to run. The MEGA version has a lot more I/O pins to use. There are other variants which try to repackage the Arduino into a smaller form factor. The UNO R3 (UNO Revision 3) is the most current version of the standard Arduino.
The newer "Leonardo" versions use a new main chip that combines the USB functions from another chip. The Adafruit Flora is based on that new chip and there are some quirks in using it.
There are also other microprocessors out there like the. PICaxe or STAMP. They have their own method of programming and use which may be a bit more complicated. There is also the ATTiny set of chips (ATTiny45, ATTiny85, ATTiny2313, etc.). You can use an Arduino to program these chips to function as a tiny Arduino albeit with some restricted functionality. It is a low cost alternative to replicating your project. Arduinos are based on the Atmel AVR chips.
Raspberry Pi and Beaglebone are other microprocessor boards you may have heard about. They are more full featured boards using a version of the Linux operating system. They should be considered if you are advanced and willing to deal with something more complex.
Step 3: Computer Before the Arduino...

How do you program the Arduino?
There is software, the Arduino IDE (Integrated Development Environment) that you download from arduino.cc There are many tutorials and examples of Arduino code on the site to get you started. The IDE is loaded with a bunch of sample code. Blinking an LED is probably the first thing you will do to confirm that your Arduino is working and you can upload a program to it. Arduinos usually have an onboard LED to blink(addressable pin number may be different) so you can do something right out of the box once it is connected to your computer.
The software allows to to create, compile, upload, and communicate with your Arduino through the USB cable.
The IDE runs on Windows and Mac. I think it may work in Linux but you have to research how to get that going and deal with the issues that come along.
"Processing" is the name of another IDE that is sometimes used in conjunction with the Arduino. I have it installed to run the graphical monitor which interprets my Arduino pulse sensor data coming through the USB serial port.
Advanced users can code in something else like C programming.
Some add on components may require you to load the associated libraries or code blocks needed to run the device such as a GPS module. Optional items may come on breakout boards(connection pins are extended on a tiny circuit board to make it easier to use) or shields(circuit boards with header pins to mate up with the Arduino board and stacking on top of it).
You may hear "Get it on GitHub". The GitHub website is a central repository of code, diagrams, and schematics. Open Source Software and Open Source Hardware are other concepts in the Maker world that you should read up on.
Step 4: LEDs


Blink and bling. A term not unlike the "shock and awe" used in describing the Arc Attack tesla coils.
Most people go for an arduino so that they can make those cool 3 dimensional LED cubes, drive LED signs or alphanumeric displays, or LED matrices. It's cool to see an arduino used for wearables like biking jackets with lighted turn signals or to control animatronic cat ears.
LEDs(Light Emitting Diodes) come in various colors, shapes, wire leads or surface mount type and brightness.
Usual sizes are 3mm, 5mm, and 10mm gumdrop size.
You can use sandpaper to scuff up the plastic housing or lens to diffuse the light coming out if it is not already frosted..
They can burn out if too much electric current rushes through the LED so you should always use them in conjunction with a resistor as the flood gate or flow restrictor.
Look up any online" LED calculator". They are handy widgets to give you a circuit layout when you input the number of LEDs you want to use, the specs of the LED like forward voltage(usually 3 volts) and power draw(usually 20 milliamps), and the power supply voltage (usually 5 volts if powering from the Arduino pins). The widget will calculate the value of the resistor needed to use with the LEDs. Round the value up to the closest resistor value that you have on hand and use that..There are some specs on the Arduino that you should limit the power draw (sink or source, I still get the terms confused and it depends on what the device is doing) on each pin or else you fry the microprocessor.
Usually LEDs will emit one color of light. RGB LEDs are capable of producing three colors, red, green and blue. Think of it as three different LEDs combined in one RGB LED which is really different. Like the old CRT TVs. by varying the output of each color, it combines into different colors that we see.
LEDs have a polarity associated with them. One lead must be connected to the positive POS + power and the other to ground GND -. LED throwies consist of a LED wrapped around a 3 volt coin cell battery. The output of a battery is slightly less than its stated voltage so you can chance it without a resistor. It is also a good way to test your LED to figure which lead is which if you do not know how to look inside the LED to determine the polarity.
RGB LEDs have 4 leads coming out of them. One is either the common POS + (common anode) or common GND - (common cathode). You can read up on the differences of each configuration and how they would fit into certain circuit designs.
There are other specialty LEDs like ones that emit infrared light for remote control, UV light for glow effects, can light in two colors for indicator status or can blink for candlelight effect. Be safe in using any kind of LASER diodes.
When you want to make a light matrix or make 3 dimensional LED cubes, you need to learn about multiplexing and charlieplexing, methods to address the LEDs with a minimal amount of data control pins.
Step 5: Other Little Bits...and Bytes


Once you have a schematic on paper or on your screen, how does that get into physical form?
Breadboards, Protoboards, Perfboards and Circuit Boards
A breadboard is the basic tool for laying out your components and lets you wire things up without soldering. It is where you can experiment and do your protoyping.
Inside the perforated board where you plug in the components are wire rails that connect the holes. There are 2 parallel rails that go lengthwise the long way up and down the board so you can get convenient power takeoffs when a power source is hooked up.
The other rows are connected internally across so every 5 holes in a row will be connected. The one in the picture has a big split down the middle of the board. The board is laid out according to industry sizing so you can plug in an integrated circuit chip to straddle the middle gap and then have all of the pins broken out to the connected holes in the rows.
Breadboards come in several sizes down to small experimenter sizes when you use only a few components.
To connect the holes or make your circuit you need jumper wires. You can buy them with shrouded plastic and stiff wire ends which plug in neatly in the breadboard. If you don't need to be fancy, just cut off a length of wire and strip the ends a bit. I threw in the kit a few rolls of different color 20 gauge solid wire and nice pair of wire strippers. Stranded wire does not want to be stuffed into the tiny holes. Besides, stripping insulation off of different sized wires is a skill to be learned.
When you want to transfer the circuit to something more permanent, you need to get perfboard. Perforated circuit board. You can wire the components directly to each other or find the perfboard with copper pads or traces around the holes to help you solder parts on. You bridge the holes with solder to get a connective trace. I have not seen locally a place that has "veroboard" which is perfboard with pre-etched copper traces that emulate the breadboard rows and columns. You cut the copper traces where you need a breaks in the circuit..
Advanced electronics people may want to try their hand at printing their own circuit board. There are some free programs to design your circuit board like Eagle or Fritzing. There are many ibles on how to transfer that design to mask the circuit board and then etch the excess copper off. It's a cool thing to try but disposal of the spent etching chemicals is such a hassle. There are some circuit board fabrication places like OSH Park where you can send your design to be made in small lots.
Headers and connectors
Electronics is all about connecting one component to another, chaining them up in series or parallel to make a circuit.
Headers are the plastic connector plugs and come in female and male versions. You can guess why they are called that way. Buy headers in bulk so you can make your own cable harnesses. The male headers are made so you can snap them off in the number of pins that you need to use. The female headers need to be scored first at the next unused pin and snapped off to separate them. You need the extra long pass through headers if you want to make your own stacking Arduino shields. I improvised a bit with regular male headers to make my ATTiny programming shield which only needed pins to go out the bottom. They didn't stick out on top of the perfboard and covered the bottom copper pad so I think I had to flood the hole with solder from the top to connect a wire.
Wire
You can buy spools of new wire to hook up your electronics. Most Arduino projects are not high power so you can use very thin gauge wires. Repurpose the wires from sets of dead earbuds or headphones. Spare ethernet LAN cables yield 8 strands of nice hookup wire. Clip off the power cord from appliances that are being recycled. I bought a few feet of multiconductor ribbon cable to use. It is flexible and you just peel off the number of strands you need to use.
Tools
You might be tempted to go with those tools from the dollar store or reuse some stuff from the handyman weekend warrior tool box. Precision electronics demands precision tools.
You need a nice pair of wire cutters. You need small ones that can clip the excess lead off of a circuit board or to cut the red wire of the bomb you are defusing. Sometimes referred to as "dikes", from the term "diagonal cutters". No smirks or I'll pluck that nosehair with some needlenose pliers.
You are working with fine wires so there are wire stripping tools too. Get a nice solid one with readable markings on it, don't bother with the one from that crimper/wire connector assortment dollar store kit. I've never found an automatic wire stripper that really worked. Then again, I've never wanted to pay as much for a real Paladin tool.
You need various needlenose pliers. Electrician pliers are for work on house wires.
Build up your collection of screwdrivers. You need long ones and short ones. Bits of all sizes. Get a set of tiny precision screwdrivers. That safety lockout screw on toys usually strip and then you need some screw extractors - bits with a left hand turn cut to grip when you turn the other way.
A flashlight and a magnetic pickup tool are helpful for finding that tiny screw that dropped in the case or flew out on the ground in the other direction where you saw it fly out or expected it to fall.
Get one of those three pronged claw retriever tools to extract parts out of tight or inaccessible spots. I think they are also used as gherkin pickle picker upper extractors to get it out of the jar or the tool that the Terminator uses to pick that thing out of his nose. Remember, you can pick your friends. You can pick your nose. But you can't pick your friend's nose.
They have magnetic pickup tools too. Make your own pickup tool with a broken extendable TV antenna and attach a supermagnet on the end. You can also just wad up some tape and stick it on to the end of your pencil.
Soldering
One day you will want the wires to be permanently stuck together and connected reliably.
Soldering electronics is an art.
A soldering iron for electronics is not the same for what they use for plumbing or making stained-glass windows. A 30 watt soldering iron is good and even better if it is temperature controlled. Mine is set at 685 degrees F. I got my soldering workstation on sale at Radio Shack but other good ones are the Weller or Hakko.
You have to experiment with your preference of soldering tip shapes that you like to use. I have a pointy point that is for tiny spots but I think I am going to switch out to a bigger chisel shape so I can tin wires better.
It helps to have "third hand" to hold your work while you solder. I find that the alligator clips on those things need to be wrapped with electrical tape or heat shrink tubing so it doesn't cut the insulation when if grips finer wires. Even fill the end of the alligator clip that goes into the mounting arm with something solid like a bamboo skewer since it gets crushed with the set screw and falls out of the mount.
The magnifying glass on the third hand is kinda small and awkward to use since it gets in the way of soldering and when you are trying to dodge the smoke coming off of your work. It is top heavy and tips over easily. I think I need to make one with those larger plastic fresnel lens page magnifiers on a more flexible gooseneck lamp arm.
Surface mount technology (SMT) parts are tiny. They are difficult to handle with normal soldering tools. It is a fascinating process on how they do it though. Solder paste is applied to the circuit board similar to silk screening where a cut mask of the circuit design covers the parts where there it is not soldered. Pick and place machines use tiny vacuum arms to place the components. The populated circuit board then goes through the reflow oven to melt the solder. There are hot air soldering machines to do this for point soldering. The reflow soldering process has been attempted DIY with toaster ovens, fry pans and griddles.
When in the dollar store, make sure to browse the ladies makeup section. No, not for that. It is the goldmine of precision tools where you can get real cheap fine tweezers. There is even one that is a reverse tweezer which I use as a spring clamp. That dental kit has an assortment of picks and an inspection mirror to use. Nail clippers are great for trimming nylon tie-wraps. You might have to browse the tool guy at street fairs to get hemostats - locking scissors type clamps.
That cheap digital multimeter from the dollar store actually works. Harbor Freight seems to practically give them away as door prizes (around $5 on sale)and they always have a 20% off coupon in the paper. They are great for basic readings and to experiment and learn with.
Switches
Switches come in lots of sizes and types. Used to break or make a connection in your circuit.
There are momentary contact normally open or normally closed switches.
They may be single pole or double pole, etc to connect multiple circuits independently of another at the same time.
And then there are various combinations to satisfy different circuit needs.
I had a package of tactile switches on hand. You need to test with multimeter to figure out which legs are internally connected so you wire it up to your circuit correctly.
There are various styles too, slide, toggle, illuminated, arcade button, round, square, magnetic, roller, latch, etc, etc.
Step 6: And Even More Parts...


Resistors
Resistors are one of the basic components to modify the flow of electricity. They come in various resistance ratings in ohms as indicated by the colored bands on the resistor. Use a resistor calculator to decipher the color code. I bought a huge assortment off of ebay (1000 resistors for 10 bucks shipped) but note that these cheaper "import" components have extremely thin wire leads which are flimsy to stick in circuit boards or breadboards and the color bands were hard to tell what color they were. I couldn't really read the scribble on the paper strip with what value they were so they needed to be verified with a multimeter. Still a good deal for experimenting with electronics though.
Variable resistors are components called potentiometers or "pots". The ones I have are really trimpots meant for use on circuit boards and can be adjusted with a screwdriver in the wheel but the bigger ones are the normal ones attached with knobs like you see on volume controls.
Capacitors are another basic component. They store electrical charges and are measured units of farads, usually in the microfarad range. You might need them to suppress electronic noise or interference or smooth/level out the power. I did not have any spare capacitors since I only get the values I would need for a circuit that I am building.
When you get advanced or move on to bigger projects and you need more data pins for input or output, there are various specialized integrated circuit chips for the job. Op amps, 555 timer chips, shift registers, multiplexers, transistor arrays, resistor arrays, etc...
Sensors
There are many electronic sensors that are available to get data from the real environment and translate that into electronic digital form.
Distance: I had bought a bunch of HC-SR04 ultrasonic range sensors. Great for robotics.
Motion sensing: I had a PIR(passive infrared) sensor to detect warm bodies moving
LIght: I had a couple of photocells LDR(light dependent resistors) to provide variable input depending on how much light shines on the sensor.
There are other modules out there. GPS, compass North sensor, accelerometer, pressure and bend sensors, color sensor, luminosity sensor.gas sensors...the list is ever growing. Since they are usually on a small breakout board, solder headers to it first and then make a cable connector to your Arduino. There are usually tutorials to implement these products like on Adafruit's Learning System on its website. You can also search instructables to see where they were used. Learn about I2C( I squared C) and SPI as the methods to hook up the add-on components to communicate with the Arduino. ICSP is also that set of pins used to program the Arduino directly. Note that depending on the chip, compatible products use 5 volt or 3.3 volt logic to communicate. There are methods to adapt but know what you are hooking up so you do not damage the microprocessor.
Can you hear me now?
The Arduino is capable of making sounds. The Pulse Width Modulation(PWM) signal comes out as sound to a speaker or piezo buzzer. Refer to it as theremin-like since there are true theremin purists out there that will focus their scorn on you like the brightness of a thousand Suns. I had scavenged my piezo buzzer from a retired carbon monoxide detector. It does not have a good tonal range and is low in volume. I think that piezo buzzer was meant to be driven by 9 volts instead of the 5 volts of the Arduino output. Get a small amplifier like you would attach to an mp3 player or use your amplified computer speaker setup. You will have to learn about line level input and impedance to get it all working right.
Motors and Servos
There are different kinds of motors out there. There is the standard DC hobby motor. Because they suck up a lot of juice when they are powered, there is an H--Bridge circuit needed to isolate the motor to keep it from damaging the Arduino. There are several motor controller shield designs out there and used for robotics.
Stepper motors are controlled a little differently and are capable of precise positioning or movement. They are used in 3D printers to accurately position the print head just like in inkjet printers.
Servos are more intelligent devices. They contain a motor, gearing and some control circuitry. Used extensively in remote control model airplanes, they have a high torque to move things attached to the control arm like wing flaps.
To wrap it up
You need to be sure shorting wires are prevented or else your circuit will not work properly. Wires or contact points can be insulated in various ways.
At the dollar store get an assortment of heat shrink tubing. A small heat gun is nice to use to heat the heat shrink tubing. Since no one really makes a specific heat shrink tool, people improvise by using a match, lighter, roasting over the gas flame or heating element on the stove, hair dryer,etc. Be safe, it is hot after heating.
Electrical tape is the standard. Get a roll of good quality that adheres well. They have liquid electrical tape which is similar to that plasti-diip stuff. It has toxic fumes though.
Any kind of tape you have will do in a pinch. Cellophane tape or packaging tape. I like to use masking tape because it conforms to the odd wrap better and you can write on it afterwards to identify the wire or what it is connected to.
Get a huge assortment of nylon zip-ties. They are good for most any situation where you want to secure things. You can chain them together by feeding the free end of one into the lock mechanism of the other to make a longer zip-tie. Snip off the excess when all is cinched down and tight.
Wire loom looks like thin vacuum cleaner hoses split down the middle or a long plastic tube cut in a spiral. These are meant to gather larger cables together to make a neat wiring harness. They also have velcro tie wraps.
Step 7: Atomic Batteries to Power...

No one really takes a look at datasheets, at first.
And important stuff like this doesn't get printed on the box, which you ripped apart threw out already.
Arduinos can be untethered off the USB cable which provides 5 volts. The USB connector can be the regular size, mini or micro.
Arduinos can be powered by battery with 4.5 volts(3 AA or AAA or coincells) to 9 volts. Most Arduinos have a power regulator on board.
Use a 2.1 mm Size M barrel plug wired up to your 9 volt battery clip or battery pack of choice. Ring or outside barrel for GND, tip or inner for + power.
For the Adafruit Flora, that white battery plug is a JST-PH connector. They sell extension cables so that you can place the battery pack further in your pocket. Note that there is an onboard tiny slide switch for power on that only works when a battery pack is connected. Also be sure to make sure the power switch is on if you have a switch in your battery pack too.
Figure out how many milliamps or even amps your Arduino and stuff will need to power it up.
Not enough power to the circuit will cause it to behave unpredictably.
Look into making a benchtop regulated variable voltage power supply. Nothing like finding a bunch of dead batteries or not having the PC fired up to supply power through USB. Look for the many ibles on converting a spare PC power supply to a standalone power supply unit.
Although, I have used the tiny wall wart for my cell phone to tap into the USB port there to get power.
Look into joule thief circuits which can collect every last bit of juice in a battery to power something like LEDs.
Note that lithium-ion and lithium-polymer batteries need special consideration so that they are controlled by some circuitry. It needs to prevent rapid or full discharge and monitor or regulate the optimal charging rate so that they do not overheat and possibly explode.
.
Step 8: Get It Together

Shoeboxes are fine.
Then you need a TARDIS.
Step 9: Wearables


Unwearables...wait, underwearibles?
The Arduino can be embedded in garments or articles intended for wear.
You may see those small round circuit board Arduinos, the Lilypad or the Adafruit Flora. Adafruit has announced the Gemma and Trinket, smaller ATTiny85 based boards for wearables. Lilypad has it's mini version also. The wiring holes on the connection pads are larger than on standard circuit boards so that you can pass conductive thread through and wire up your "soft circuit". There are wearable accessory components for these boards like GPS modules, light sensors, color sensors, pulse sensors, LED boards. You can adapt most components that you would usually use with a full sized Arduino.
There are several more wearable electronics products out there to add blink and blink or functionality to your clothing.
Conductive thread is silver coated traditional fiber threads or made from spun stainless steel fibers. Metallic sparkly looking threads are usually not conductive and you can test for its resistance or conductivity with a multimeter.
Conductive threads are more flexible than regular stranded or solid pure metal wires which break with excessive flexing. The disadvantage of conductive threads is that they are not insulated and you must plan the traces so they do not touch and short out. The silver plated threads do tarnish and age to become less conductive.
For me, everything is a prototype, so I wire up with traditional wire which I can solder to. Nothing mil-spec yet in DIY wearables. I do have a couple bobbins of conductive thread but I may use them come time to mod the brat's prom dress.
Step 10: Instructables and Ible'ing

Documenting your work is good practice.
There are many stories of people using ibles as a reference for their accomplished projects to apply for college or work.
Youts can have a supervised account.
Instructablize all you do. Share. Be nice...well, not to SPAMMERs.
Develop your own style of ible writing.
Use the Instructables Featuring Checklist as a start.
Good clear pictures are important.
Learn how to use the macro setting on your camera.
Figure out how to get the best light in your pictures.
Use a plain piece of posterboard or bedsheet as the backdrop to your pictures. The carpet is never a good choice as complex shaped objects just get camouflaged in the carpet texture.
Including videos is a good idea to show your project in action.
Animated gifs sometimes work on the site depending on its mood at the time.
Sign up with a free youtube account to post your videos. Only use that as a depository. Don't bother with the antics there.
Try to use correct punctuation and grammar. Unless, you have already proven you can use correct punctuation and grammar. Only then can you can spelt it anyways you want.
Comment on instructables and forum topics.
Any feedback is appreciated.
Even if this...
"You can make a DIY version using instructions provided by Instructables user caitlinsdad. I don't know who this Caitlin person is, but I'm sure she's mighty proud of her dad, despite his unusual obsession with sci-fi-themed ladies' undergarments. Everybody needs a hobby."
It is great to see where your ibles get spammed propagated to.
The internet is such a wonderful place.
The audience here is diverse, international, and varied.
If you are going to be funny, make sure you are funny...most of the time.
If you are going to be punny, make sure at least one other person might get the joke or be offended.
If you are going to draw cartoons or make videos...wait
If you see something, say something.
There are no stupid questions...only st.. wait
Ask random questions...get random answers...nevermind
The folks that lurk around instructables sometimes have a day job as small particle physicists, teachers, well ex-teachers, engineers, programmers, hackers, amateur and professional craftspeople, townsfolk, jesters, ordinary fools, etc.
Comment on their instructable or private message (PM) if you have a specific question.
Enter into Instructables contests. Enter for the fun or a chance at the cool prizes. If you do win, make another ible to pass the time waiting for that prize to show up.
Work you way to lifetime Pro membership by accumulating Pro memberships from ibles getting featured, put in newsletters, or by winning contests. Become a philanthropist by passing on Pro memberships to budding Makers.
There is much to learn, if you want to.
Step 11: Test Pilots, Crash Test Dummies and Safety

Take the lessons learned from Apollo I.
I hope that no one will come near anything that catastrophic but be safe in everything you do and try to make your work environment safe.
Mains or electricity from the wall is dangerous.
Anything that is connected to the wall is just as dangerous.
Battery powered stuff can also deliver lethal shocks.
Be careful around capacitors and try not to lick batteries.
Electronic components can get really hot when they are shorted. Blue smoke, flashes or an ozone smell is never a good sign.
Don't plug powerstrip upon powerstrip to overload them because you ran out of outlets.
Soldering irons and hot glue irons are hot.
Freshly soldered joints and surrounding parts are hot.
Wear safety glasses.
Make sure you have a stable soldering iron holder. Be sure to have a stable hot glue gun holder.
Use a fume extractor or solder in a well ventilated area.
Use RoHS certified lead free solder.
Melted plastic, ground plastic dust and fumes are not good for you.
Hot glue sticks to your fingers and stays hot. Keep a damp rag or bowl of water around to take the sizzle out.
Epoxy glue fumes are not good for you.
Superglue can react with cotton fiber to spontaneously burn.
Perfboard is slippery, score carefully with a utility knife and then snap over a sharp table edge.
If cutting with a hacksaw, make sure it is securely held in a vise or clamp, don't suck in the dust, especially if you sand the cut edges smooth
Clipping solder tails or excess leads can send little bits flying. You're gonna put your eye out!
Stepping on those little bits may be just as bad as stepping on a Lego brick in the middle of the night.
If you make a mess in the kitchen, you clean it up.
Above all, have fun.
Did you spend more than 10 minutes reading through this instructable or get lost by linking to my other instructables? Brain a little bit warm? Rate and subscribe! No, don't do that.
Don't be afraid to jump into the world of Arduino or electronics. Encourage and empower young minds. Good luck.

Participated in the
Weekend Projects Contest

Participated in the
Arduino Contest


