

Introduction: Arduino Ethernet Shield Tutorial


The Arduino Ethernet Shield allows you to easily connect your Arduino to the internet. This shield enables your Arduino to send and receive data from anywhere in the world with an internet connection. You can use it to do fun stuff like control robots remotely from a website, or ring a bell every time you get a new twitter message. This shield opens up endless amounts of possibility by allowing you to connect your project to the internet in no-time flat.
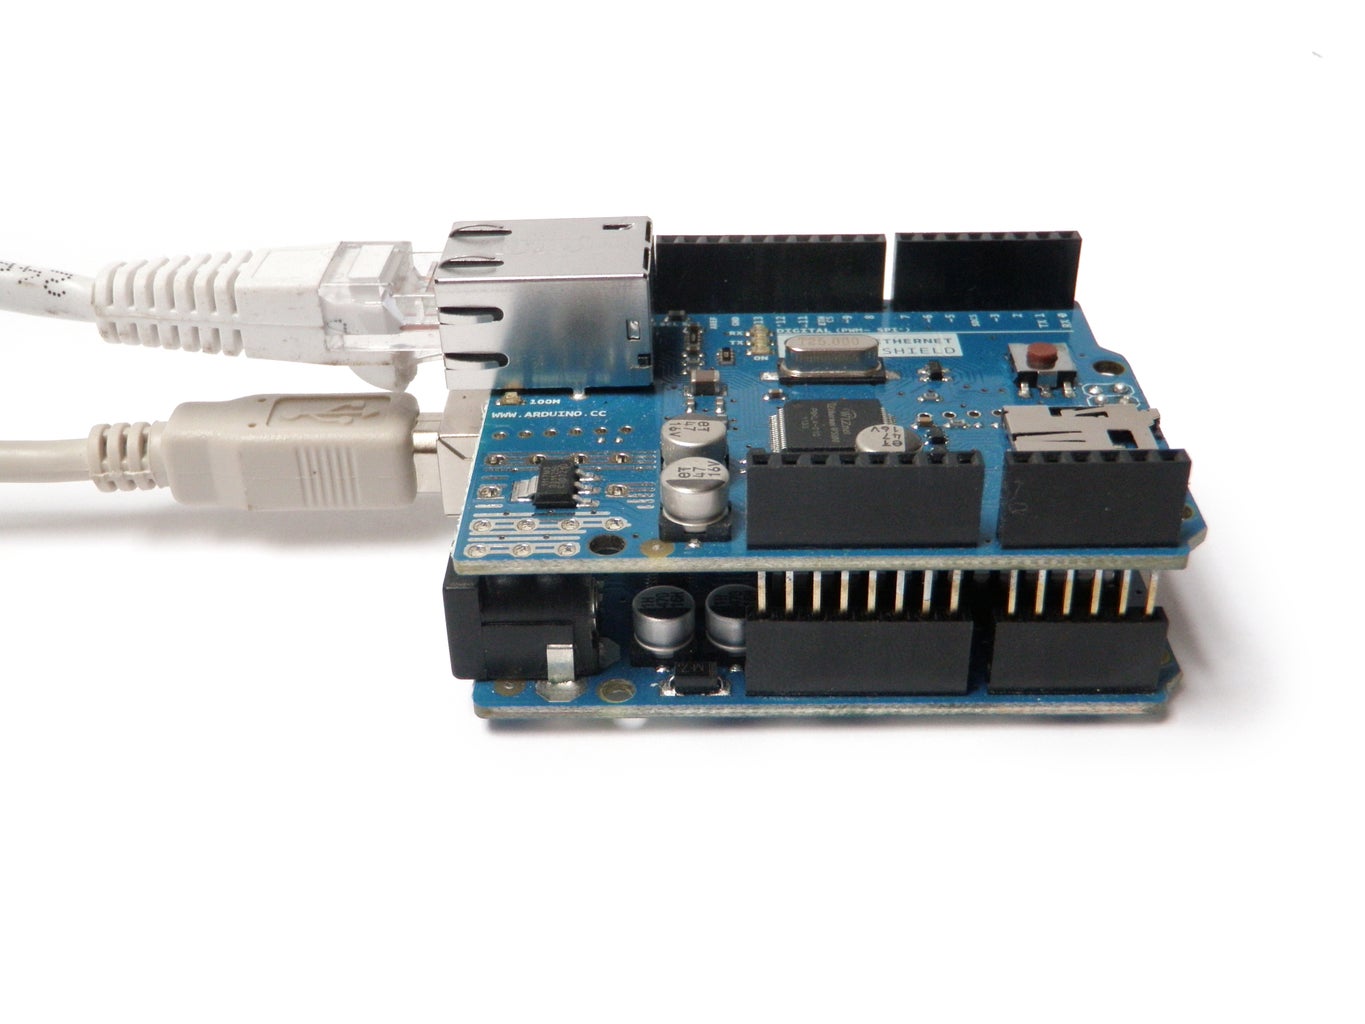
Step 1: Setup

Setting it up is as simple as plugging the header pins from the shield into your Arduino.
Note that the Ethernet Shield used here used to be sold at RadioShack. However, since RadioShack is no more, the shield is harder to come by. This generic ethernet shield available on Amazon should also work.* It is meant to be used with the Arduino Uno Rev. 3 boards (or later). It has too many pins to plug into earlier version Arduino boards.
*I have not personally confirmed this. Buyer beware!
(Note that some of the links on this page are affiliate links. This does not change the cost of the item for you. I reinvest whatever proceeds I receive into making new projects. If you would like any suggestions for alternative suppliers, please let me know.)
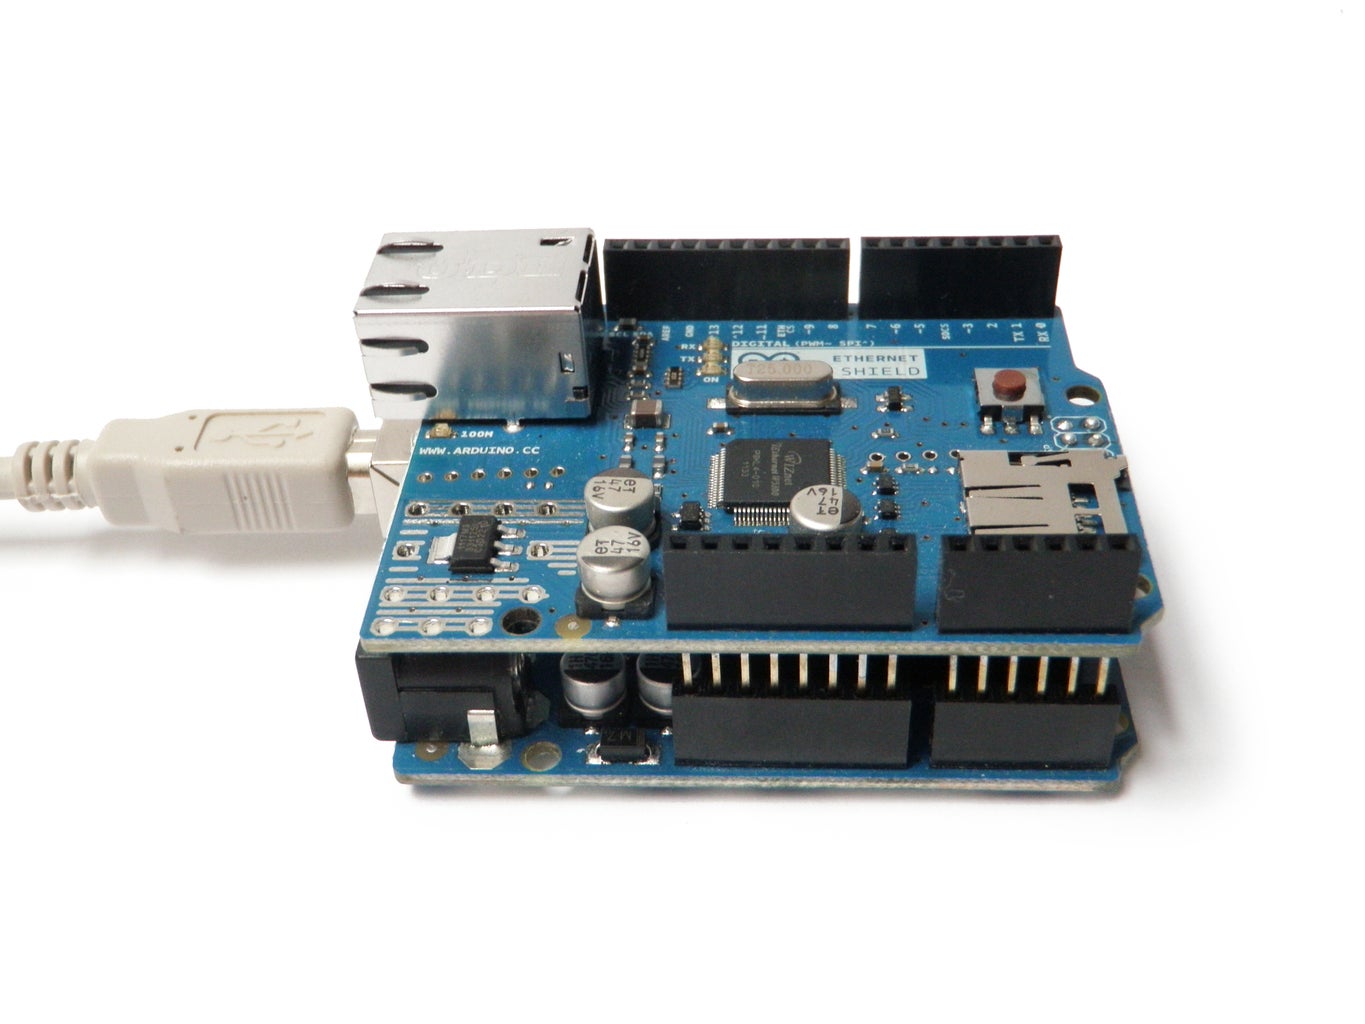
Step 2: Shield Features

The Ethernet Shield is based upon the W51000 chip, which has an internal 16K buffer. It has a connection speed of up to 10/100Mb. This is not the fastest connection around, but is also nothing to turn your nose up at.
It relies on the Arduino Ethernet library, which comes bundled with the development environment.
There is also an on-board micro SD slot which enables you to store a heck-of-a-lot of data, and serve up entire websites using just your Arduino. This requires the use of an external SD library, which does not come bundled with the software. Using the SD card is not covered in this Instructable. However, it is covered in the Step 8 of the Wireless SD card instructable.
The board also has space for the addition of a Power over Ethernet (PoE) module, which allows you to power your Arduino over an Ethernet connection.
For a full technical overview, see the official Ethernet Shield page.
Step 3: Get Started
Plug the Arduino into your computer's USB port, and the Ethernet shield into your router (or direct internet connection).
Next, open the Arduino development environment. I highly recommend upgrading to Arduino 1.0 or later (if you have not done so already). This version of the software has built in DHCP support, and does not require manually configuring an IP address.
To figure out what IP address has been assigned to your board, open the DhcpAddressPrinter sketch. This can be found at:
File --> Examples --> Ethernet --> DhcpAddressPrinter
Once open, you may need to change the Mac address. On newer versions of the Ethernet shield, you should see this address on a sticker attached to the board. If you are missing a sticker, simply making up a unique mac address should work. If you are using multiple shields, make sure each has a unique mac address.
Once the mac address is properly configured, upload the sketch to your Arduino, and open the serial monitor. It should print out the IP address in use.
Step 4: Server

You can use the Arduino Ethernet shield as a web server to load an HTML page or function as a chat server. You can also parse requests sent by a client, such as a web browser. The following two examples show how to use it to serve HTML pages, and parse URL strings.
One important thing to keep in mind is that you will have to enter your Arduino's IP address in both of the examples below in order for them to work.
The following code changes the web page served based on a button press:<pre>/*
Web Server Demo
thrown together by Randy Sarafan
A simple web server that changes the page that is served, triggered by a button press.
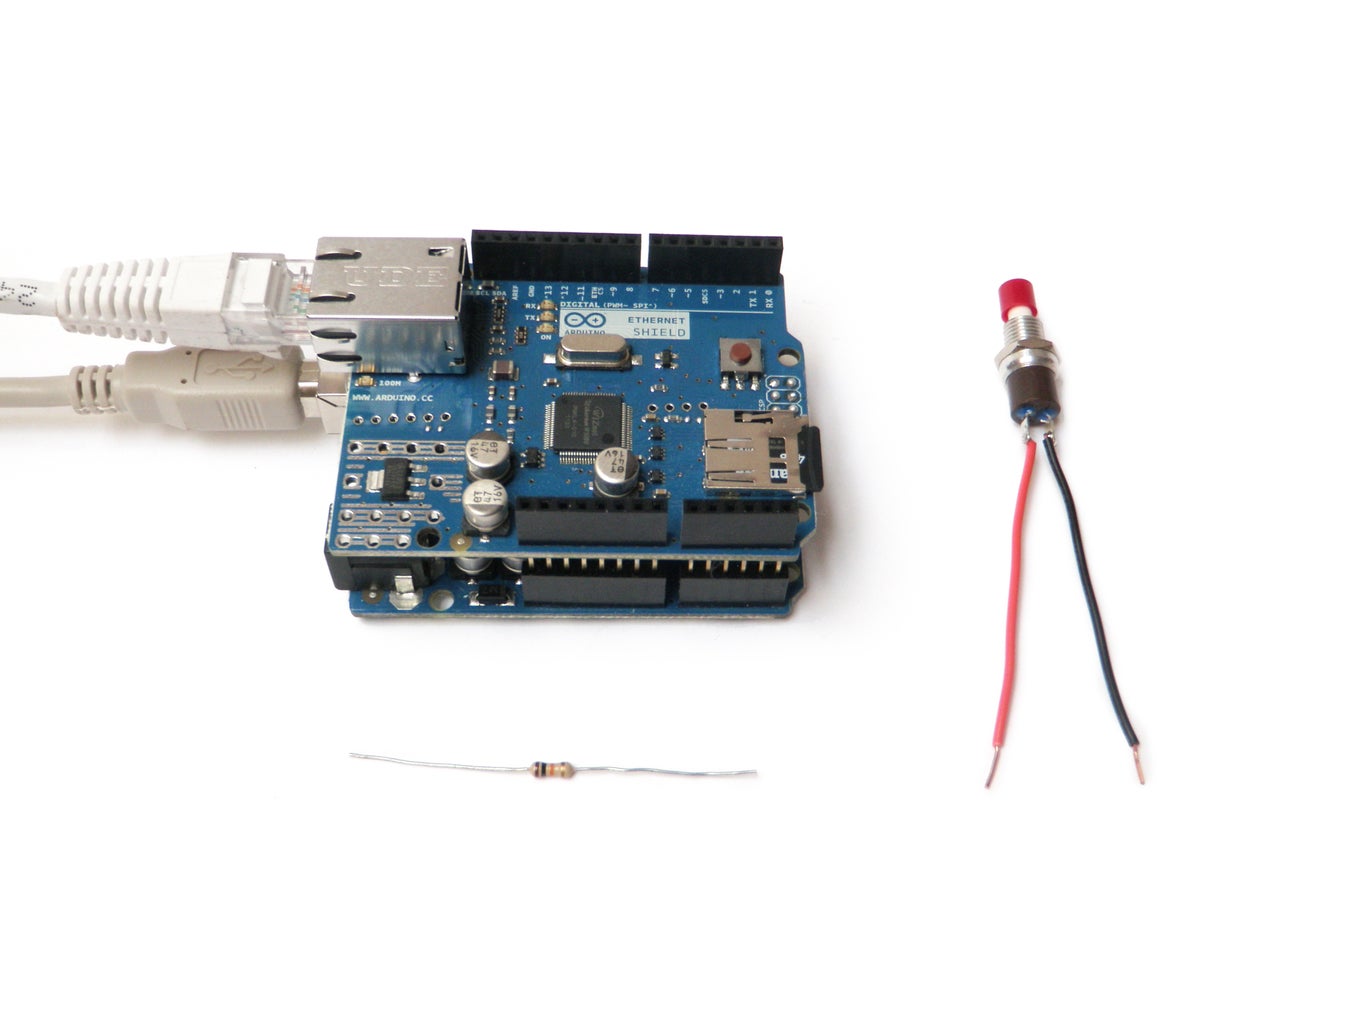
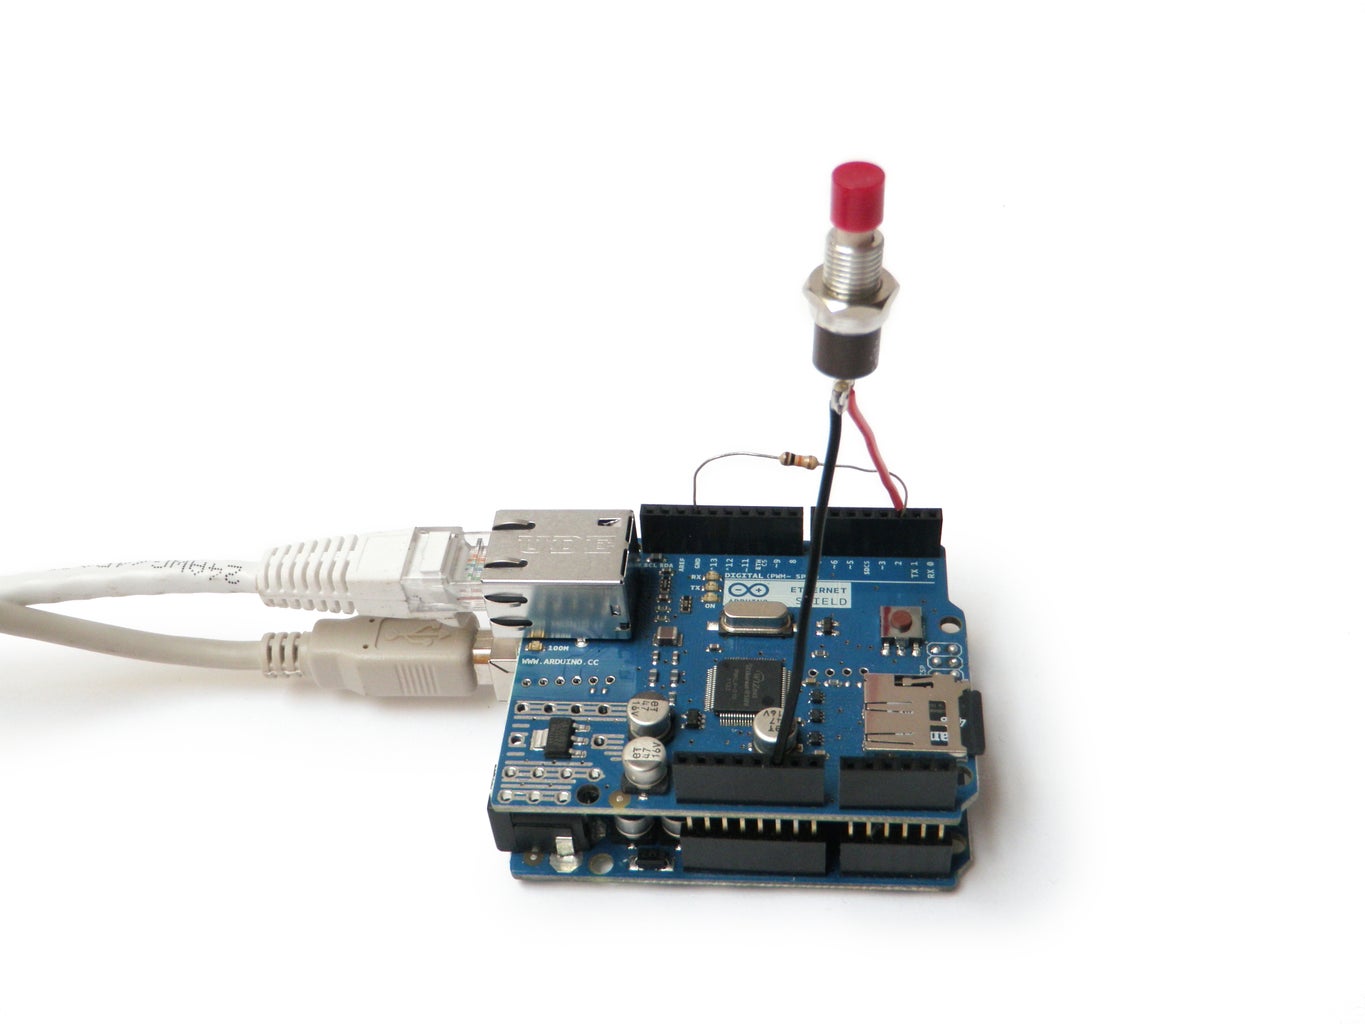
Circuit:
* Ethernet shield attached to pins 10, 11, 12, 13
* Connect a button between Pin D2 and 5V
* Connect a 10K resistor between Pin D2 and ground
Based almost entirely upon Web Server by Tom Igoe and David Mellis
Edit history:
created 18 Dec 2009
by David A. Mellis
modified 4 Sep 2010
by Tom Igoe
*/
#include <SPI.h>
#include <Ethernet.h>
// Enter a MAC address and IP address for your controller below.
// The IP address will be dependent on your local network:
byte mac[] = { 0x00, 0xAA, 0xBB, 0xCC, 0xDA, 0x02 };
IPAddress ip(191,11,1,1); //<<< ENTER YOUR IP ADDRESS HERE!!!
// Initialize the Ethernet server library
// with the IP address and port you want to use
// (port 80 is default for HTTP):
EthernetServer server(80);
int buttonPress = 1;
void setup()
{
pinMode(2, INPUT);
// start the Ethernet connection and the server:
Ethernet.begin(mac, ip);
server.begin();
}
void loop()
{
buttonPress = digitalRead(2);
// listen for incoming clients
EthernetClient client = server.available();
if (client) {
// an http request ends with a blank line
boolean currentLineIsBlank = true;
while (client.connected()) {
if (client.available()) {
char c = client.read();
// if you've gotten to the end of the line (received a newline
// character) and the line is blank, the http request has ended,
// so you can send a reply
if (c == '\n' && currentLineIsBlank) {
// send a standard http response header
client.println("HTTP/1.1 200 OK");
client.println("Content-Type: text/html");
client.println();
//serves a different version of a website depending on whether or not the button
//connected to pin 2 is pressed.
if (buttonPress == 1) {
client.println("<cke:html><cke:body bgcolor=#FFFFFF>LIGHT!</cke:body></cke:html>");
}
else if (buttonPress == 0){
client.println("<cke:html><cke:body bgcolor=#000000 text=#FFFFFF>DARK!</cke:body></cke:html>");
}
break;
}
if (c == '\n') {
// you're starting a new line
currentLineIsBlank = true;
}
else if (c != '\r') {
// you've gotten a character on the current line
currentLineIsBlank = false;
}
}
}
// give the web browser time to receive the data
delay(1);
// close the connection:
client.stop();
}
}
To make this example code work, simply attach a button between pin D2 and 5V, a 10K resistor between pin D2 and ground, and then load the IP address of your Arduino into your web browser. The page should load with a black background. Press and hold the button, and then refresh the browser page. The site should now load with a white background.
The following code lights up an LED depending on the URL that is sent to the Arduino:
<pre>/*
  Web Server Demo
  thrown together by Randy Sarafan

 Allows you to turn on and off an LED by entering different urls.

 To turn it on:
 http://your-IP-address/$1

 To turn it off:
 http://your-IP-address/$2

 Circuit:
 * Ethernet shield attached to pins 10, 11, 12, 13
 * Connect an LED to pin D2 and put it in series with a 220 ohm resistor to ground

 Based almost entirely upon Web Server by Tom Igoe and David Mellis

 Edit history:
 created 18 Dec 2009
 by David A. Mellis
 modified 4 Sep 2010
 by Tom Igoe

 */

#include <SPI.h>
#include <Ethernet.h>

boolean incoming = 0;

// Enter a MAC address and IP address for your controller below.
// The IP address will be dependent on your local network:
byte mac[] = { 0x00, 0xAA, 0xBB, 0xCC, 0xDA, 0x02 };
IPAddress ip(191,11,1,1); //<<< ENTER YOUR IP ADDRESS HERE!!!

// Initialize the Ethernet server library
// with the IP address and port you want to use
// (port 80 is default for HTTP):
EthernetServer server(80);

void setup()
{
  pinMode(2, OUTPUT);

  // start the Ethernet connection and the server:
  Ethernet.begin(mac, ip);
  server.begin();
  Serial.begin(9600);
}

void loop()
{
  // listen for incoming clients
  EthernetClient client = server.available();
  if (client) {
    // an http request ends with a blank line
    boolean currentLineIsBlank = true;
    while (client.connected()) {
      if (client.available()) {
        char c = client.read();
        // if you've gotten to the end of the line (received a newline
        // character) and the line is blank, the http request has ended,
        // so you can send a reply

        //reads URL string from $ to first blank space
        if(incoming && c == ' '){
          incoming = 0;
        }
        if(c == '
To make this work connect the positive lead an LED to pin D2, and the negative lead in series with a 220 ohm resistor to ground.
To turn on the LED enter this into your browser:
http://[YOUR IP ADDRESS HERE]/$1
To turn off the LED enter this into your browser:
http://[YOUR IP ADDRESS HERE]/$2
Note: You should obviously replace [YOUR IP ADDRESS HERE] with your IP address.){ incoming = 1; } //Checks for the URL string $1 or $2 if(incoming == 1){ Serial.println(c); if(c == '1'){ Serial.println("ON"); digitalWrite(2, HIGH); } if(c == '2'){ Serial.println("OFF"); digitalWrite(2, LOW); } }
if (c == '\n') { // you're starting a new line currentLineIsBlank = true; } else if (c != '\r') { // you've gotten a character on the current line currentLineIsBlank = false; } } } // give the web browser time to receive the data delay(1); // close the connection: client.stop(); } }
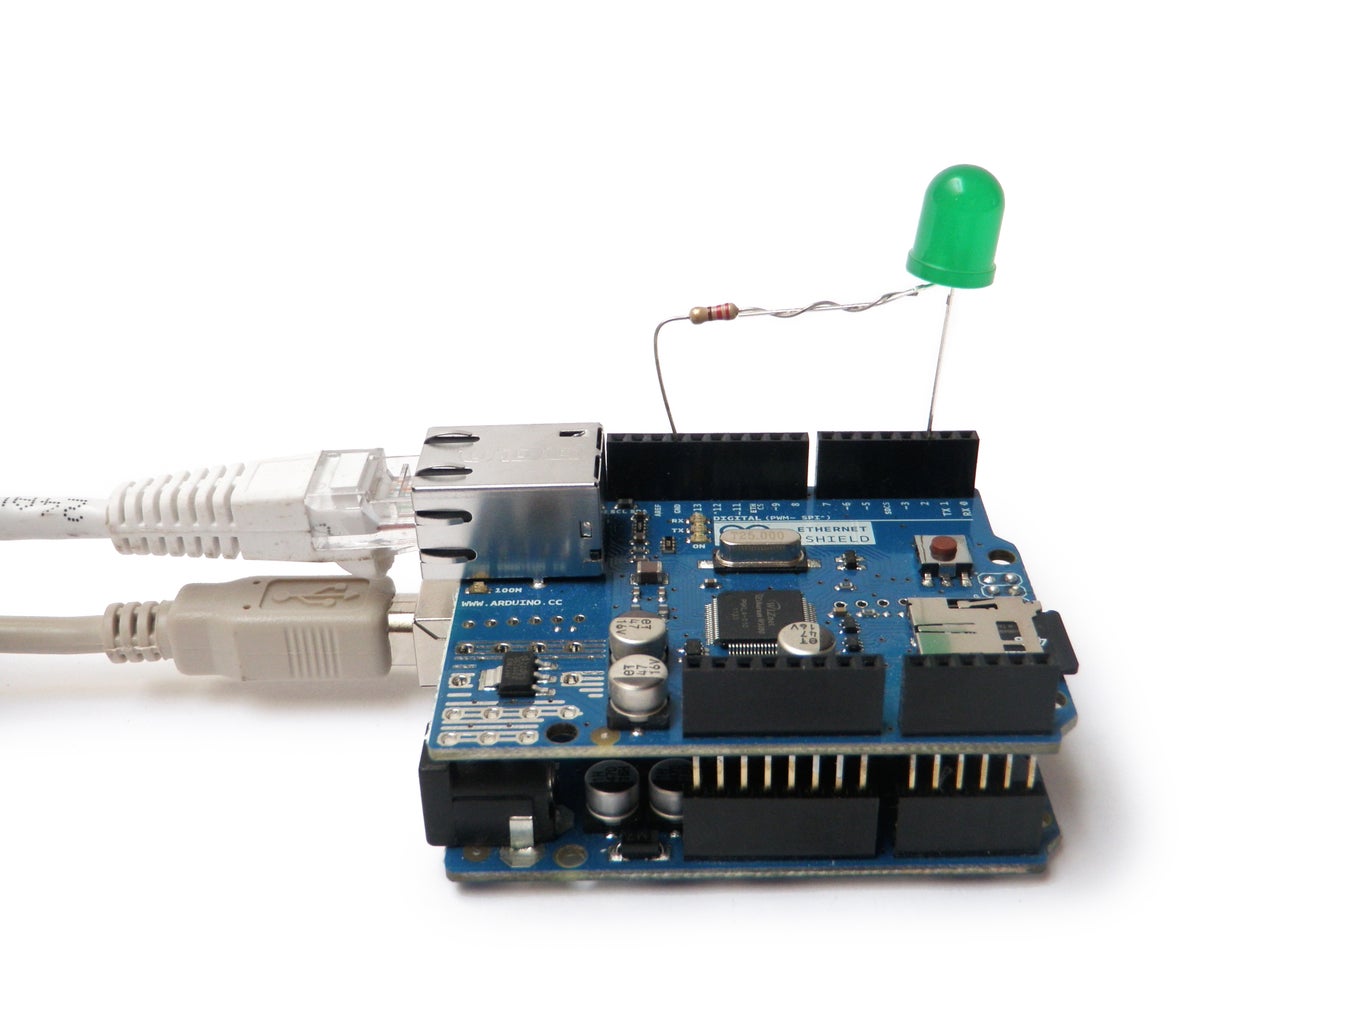
To make this work connect the positive lead an LED to pin D2, and the negative lead in series with a 220 ohm resistor to ground.
To turn on the LED enter this into your browser:
http://[YOUR IP ADDRESS HERE]/$1
To turn off the LED enter this into your browser:
http://[YOUR IP ADDRESS HERE]/$2
Note: You should obviously replace [YOUR IP ADDRESS HERE] with your IP address.
Step 5: Client

You can also use the Ethernet Shield as a client. In other words, you can use it to read websites like a web browser.
Websites have a lot of text both visible and hidden, which makes programming on the client side very tricky. Reading information from websites typically involves parsing a lot of strings. This is maddening, but worth it, if that is what you intend to do.
I was going to write some code to read Twitter messages, but such a code already exists as an example within the Arduino programmer. Instead, I simply modified it slightly to turn on an LED if a special message is read.
To make this work connect the positive lead an LED to pin D2, and the negative lead in series with a 220 ohm resistor to ground.
Don't forget to enter your own IP address into the code below, or it will not work.
Here is the code:<pre>/*
Twitter Client with Strings
This sketch connects to Twitter using an Ethernet shield. It parses the XML
returned, and looks for <text>this is a tweet</text>
You can use the Arduino Ethernet shield, or the Adafruit Ethernet shield,
either one will work, as long as it's got a Wiznet Ethernet module on board.
This example uses the DHCP routines in the Ethernet library which is part of the
Arduino core from version 1.0 beta 1
This example uses the String library, which is part of the Arduino core from
version 0019.
Circuit:
* Ethernet shield attached to pins 10, 11, 12, 13
created 21 May 2011
by Tom Igoe
This code is in the public domain.
*/
#include <SPI.h>
#include <Ethernet.h>
// Enter a MAC address and IP address for your controller below.
// The IP address will be dependent on your local network:
byte mac[] = {
0x00, 0xAA, 0xBB, 0xCC, 0xDE, 0x01 };
IPAddress ip(191,11,1,1); //<<< ENTER YOUR IP ADDRESS HERE!!!
// initialize the library instance:
EthernetClient client;
const int requestInterval = 60000; // delay between requests
char serverName[] = "api.twitter.com"; // twitter URL
boolean requested; // whether you've made a request since connecting
long lastAttemptTime = 0; // last time you connected to the server, in milliseconds
String currentLine = ""; // string to hold the text from server
String tweet = ""; // string to hold the tweet
boolean readingTweet = false; // if you're currently reading the tweet
void setup() {
pinMode(2, OUTPUT);
// reserve space for the strings:
currentLine.reserve(256);
tweet.reserve(150);
// initialize serial:
Serial.begin(9600);
// attempt a DHCP connection:
if (!Ethernet.begin(mac)) {
// if DHCP fails, start with a hard-coded address:
Ethernet.begin(mac, ip);
}
// connect to Twitter:
connectToServer();
}
void loop()
{
if (client.connected()) {
if (client.available()) {
// read incoming bytes:
char inChar = client.read();
// add incoming byte to end of line:
currentLine += inChar;
// if you get a newline, clear the line:
if (inChar == '\n') {
currentLine = "";
}
// if the current line ends with <text>, it will
// be followed by the tweet:
if ( currentLine.endsWith("<text>")) {
// tweet is beginning. Clear the tweet string:
readingTweet = true;
tweet = "";
}
// if you're currently reading the bytes of a tweet,
// add them to the tweet String:
if (readingTweet) {
if (inChar != '<') {
tweet += inChar;
}
else {
// if you got a "<" character,
// you've reached the end of the tweet:
readingTweet = false;
Serial.println(tweet);
if(tweet == ">Hello Cruel World"){
digitalWrite(2, HIGH);
Serial.println("LED ON!");
}
if(tweet != ">Hello Cruel World"){
digitalWrite(2, LOW);
Serial.println("LED OFF!");
}
// close the connection to the server:
client.stop();
}
}
}
}
else if (millis() - lastAttemptTime > requestInterval) {
// if you're not connected, and two minutes have passed since
// your last connection, then attempt to connect again:
connectToServer();
}
}
void connectToServer() {
// attempt to connect, and wait a millisecond:
Serial.println("connecting to server...");
if (client.connect(serverName, 80)) {
Serial.println("making HTTP request...");
// make HTTP GET request to twitter:
client.println("GET /1/statuses/user_timeline.xml?screen_name=RandyMcTester&count=1 HTTP/1.1");
client.println("HOST: api.twitter.com");
client.println();
}
// note the time of this connect attempt:
lastAttemptTime = millis();
}
Presumably you are going to want to read something other than the recent post on the RandyMcTester Twitter feed.
To read other Twitter feeds, change the following bit of text:
client.println("GET /1/statuses/user_timeline.xml?screen_name=[NEW TWITTER NAME HERE]&count=1 HTTP/1.1");

Did you find this useful, fun, or entertaining?
Follow @madeineuphoria to see my latest projects.

Participated in the
Arduino Challenge


