

Introduction: Arduino (Increase Power Port Pins)


Hello friends,
This instructable is show you how to increase the number of power port in arduino board. In arduino micro-controller we have only few pins for power. For example we have only 1 port for 5V power supply in arduino uno r3. When we require many 5V port than we connect so many jumper wire and use breadboard. As a result the wires are look like a net of wire. If we connect a wrong connection of wire. Then find out a wrong wire connection is quite difficult. To overcome these types of problems follow this instructable.
Step 1: Parts Required


- Arduino uno
- Female Header
- Soldring iron
- Wire etc.
Step 2: Cutting


Now take a Female Header and cut it as much you required. In my case I cut 10 port of Female Header. In arduino have required only 2 pins, so cut all extra pins. And then a 2 pin Female Header port cut for arduino 5V and GND as shown in above image.
Step 3:

You can use simple wire for connect to each other. solder 2 side of Female Header (Left side & Right side). Now solder it. as shown in above image.
Step 4: Attached
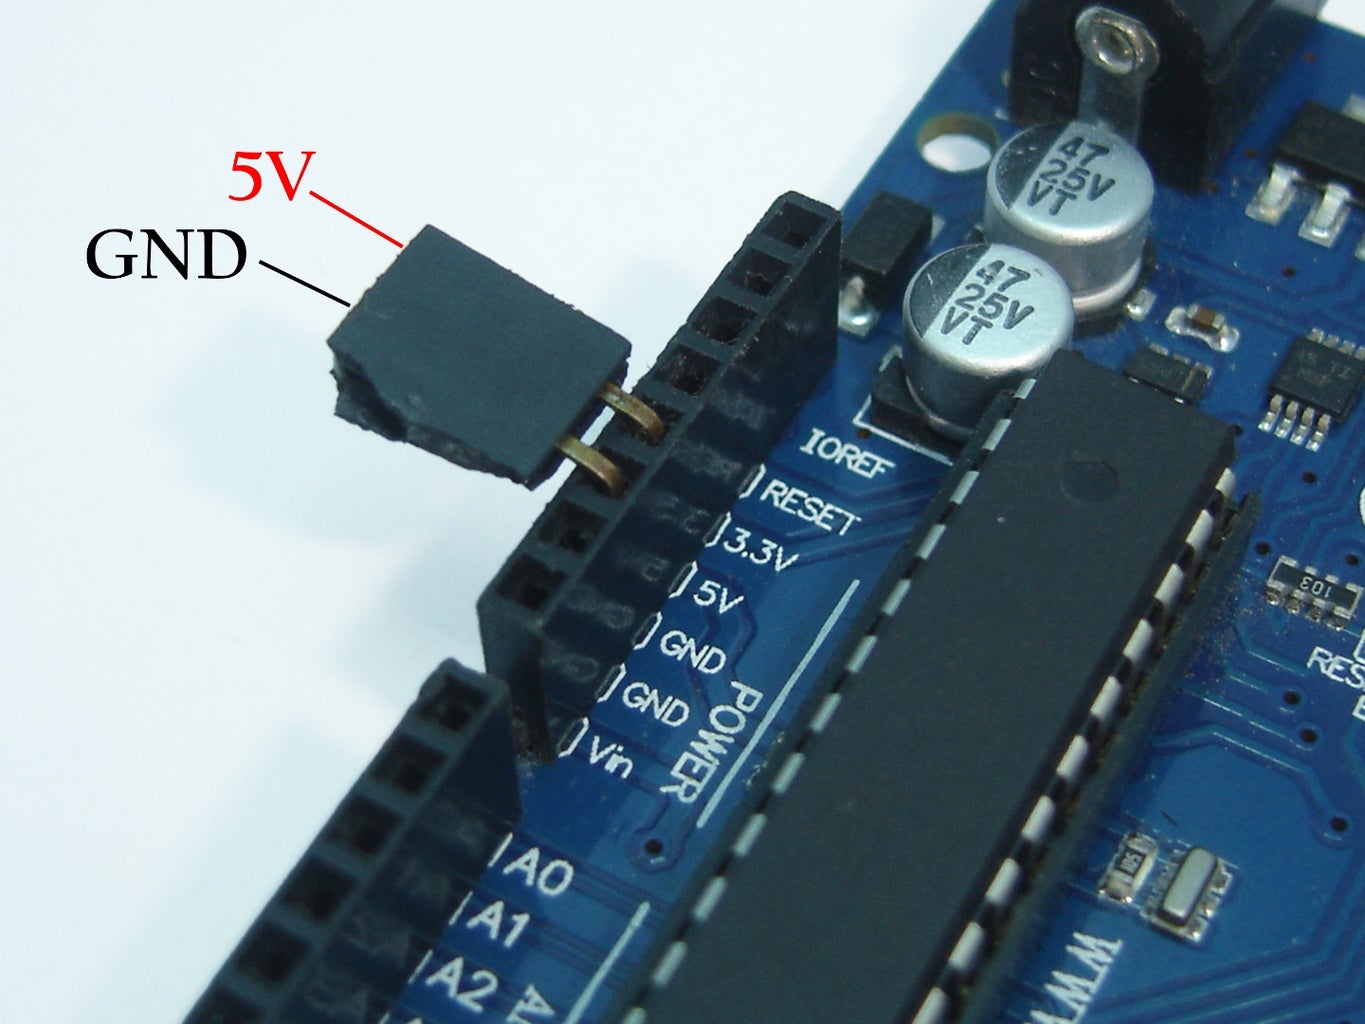
Now attached the 2 pin Female Header on the arduino. first pin is connect to 5V and other pin is connect to GND of arduino as shown in above image.
Step 5: Finish


In the last step you connect the 10 pin Female Header on 2 pin Female Header.
The process is complete.
Now Enjoy it.
Thank you for reading.


