

Introduction: Arduino Infrared Remote Tutorial
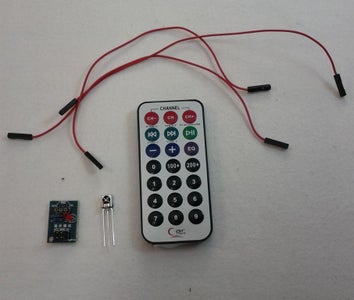


It is really easy to control an Arduino using an infrared remote. There is one particular remote that is available from multiple sources and is really quite cheap, they look and operate in a very similar way.
NEOMART Raspberry Pi HX1838 Infrared Remote Control Ir Receiver Module DIY Kit. Amazon
Kootek Raspberry Pi Infrared Remote Control Ir Receiver Module DIY Kit. Amazon
KIT,IR REMOTE,IR RECIVER,ARDUI,COMPATIBLE Jameco
The problem is that documentation seems to be scarce for these particular remotes. Here is how I figured out how to use them.
Step 1: Assemble Circuit
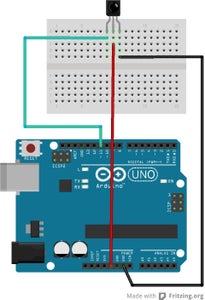
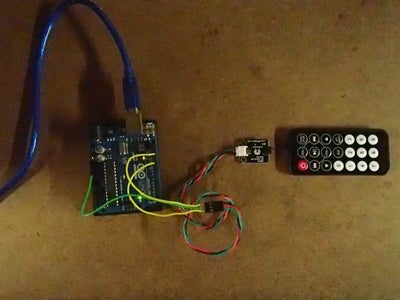
You will need one Arduino for this. I used a UNO, but just about any Arduino should work. First wire up the infrared receiver that came with your kit. There are 3 wires, PWR, GND, and SIG, I used port 11 for SIG. Note! some readers have reported that their sensor has different wiring, double check it yourself.
Step 2: Download IR Library


In order to reverse engineer the remote and obtain the codes for each button we are going to need to download and install the following library.
https://github.com/shirriff/Arduino-IRremote
Extract the file in your libraries directory. e.g. ( C:\electronics\arduino-1.0.5\libraries )
note: I had to rename the library because the name was too long, I just renamed it to IR.
Step 3: Add Library to Sketch

With the IR folder ( or whatever you named it) now in your libraries directory, we can import it into a new sketch.
Start a new sketch and the Click
Sketch->Import Library->IR.
Step 4: Paste Code and Compile
#include <IRemote.h>
int RECV_PIN = 11;
IRrecv irrecv(RECV_PIN);
decode_results results;

void setup()
{
  Serial.begin(9600);
  irrecv.enableIRIn(); // Start the receiver
}

void loop()
{
  if (irrecv.decode(&results))
    {
     Serial.println(results.value, HEX);
     irrecv.resume(); // Receive the next value
    }
}
Step 5: Open the Serial Monitor

Connect the Arduino to your computer using the usb port, then upload the sketch. Open up the Serial Monitor, get the remote and press the buttons. Some hex codes should appear on the Serial Monitor.
Step 6: Record Button Codes


Here are the codes that I got for the white remote. FFFFFF is a repeat command, you'll get a stream of them if you hold down a button.
PWR FF629D
CH FFE21D
|<< FF22DD
>| FFC23D
>>| FF02FD
- FFE01F
Plus FFA857
EQ FF906F
0 FF6897
100 FF9867
200 FFB04F
1 FF30CF
2 FF18E7
3 FF7A85
4 FF10EF
5 FF38C7
6 FF5AA5
7 FF42BD
8 FF48B5
9 FF52AD
and here are the codes I got from the black remote.
PWR FD00FF
VOL FD807F
FUNC/STOP FD40BF
|<< FD20DF
>| FDA05F
>>| FD609F
DOWN FD10EF
VOL FD906F
UP FD50AF
0 FD30CF
EQ FDB04F
ST/REPT FD708F
1 FD08F7
2 FD8877
3 FD48B7
4 FD28D7
5 FDA857
6 FD6897
7 FD18E7
8 FD9867
9 FD58A7
Step 7: Works on Any Remote!

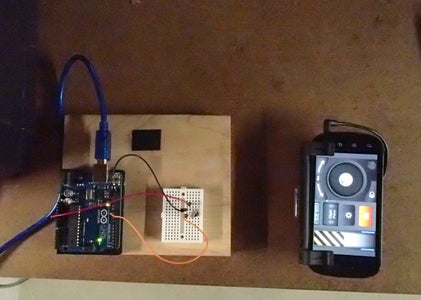
Now go grab a bunch or remotes from around the house, and give those a try! I got a direct-tv remote and the smartphone pod/remote for a Helo TC remote controlled helicopter. This circuit showed the code for both of these remotes.
Here is the project that inspired me to write this up!


