

Introduction: Arduino Motorized Window Blinds


More by the author:


About: I am a recent graduate from the University of Pittsburgh. While i was there i got a Bachelors degree in Computer Science and explored a few new hobbies, one of which being circuitry. I purchased a few Arduino'…
Hey everyone,
Here with a quick and easy instructable for those of you who want to motorize your window blinds! I have seen other people post motorized blinds on instructables and all over the internet but I feel as though i chose a less expensive, easier alternative to accomplishing the same task. I say less expensive because i chose a simple VCR motor to power my blinds instead of (what I've commonly seen) power drills modified to spin the blinds rod. The Arduino and motorshield i used for this project could end up being expensive if you do not have one already, but luckily they are pretty inexpensive online. Hopefully this will help you (or maybe inspire) to build something similar in your house!
The parts list for this is pretty short, here goes:
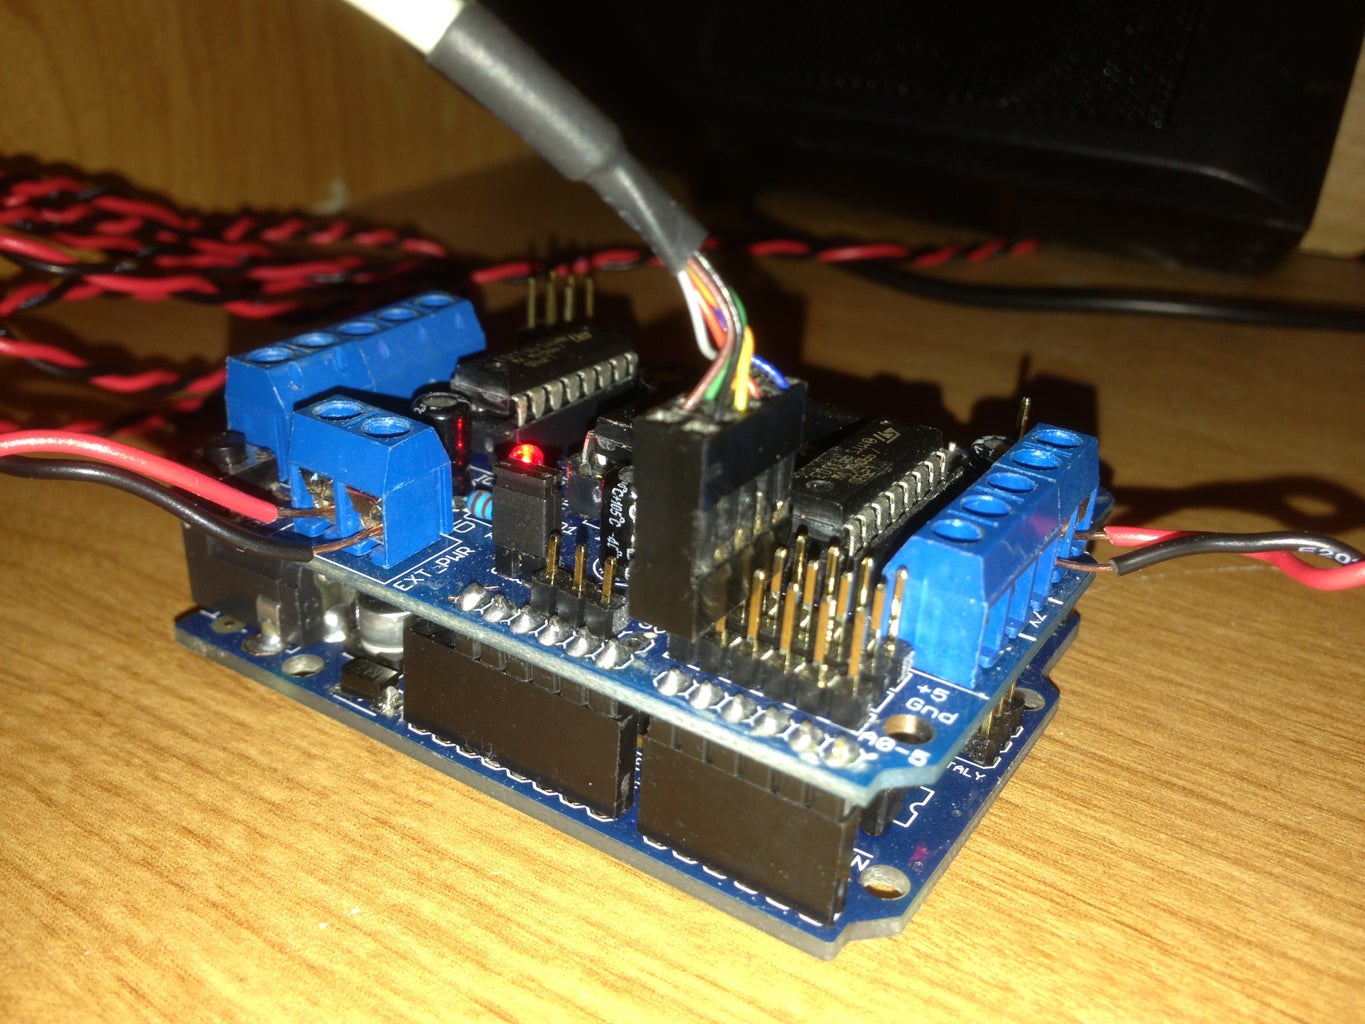
-Arduino
-Motor Shield (an h-bridge would probably work just as well)
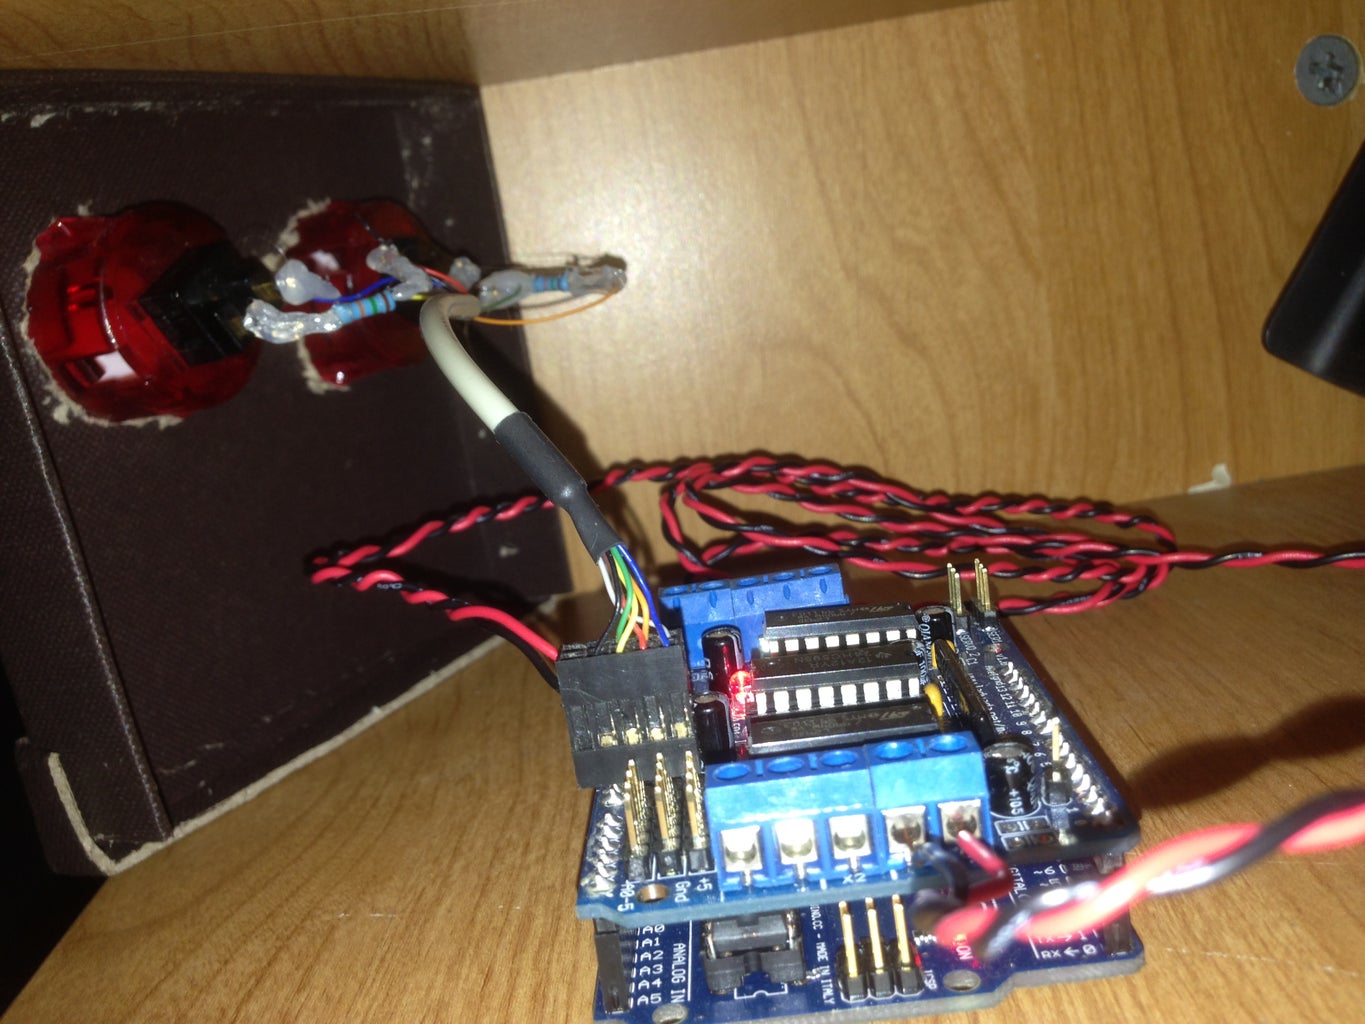
-some buttons (with pull-down resistors)
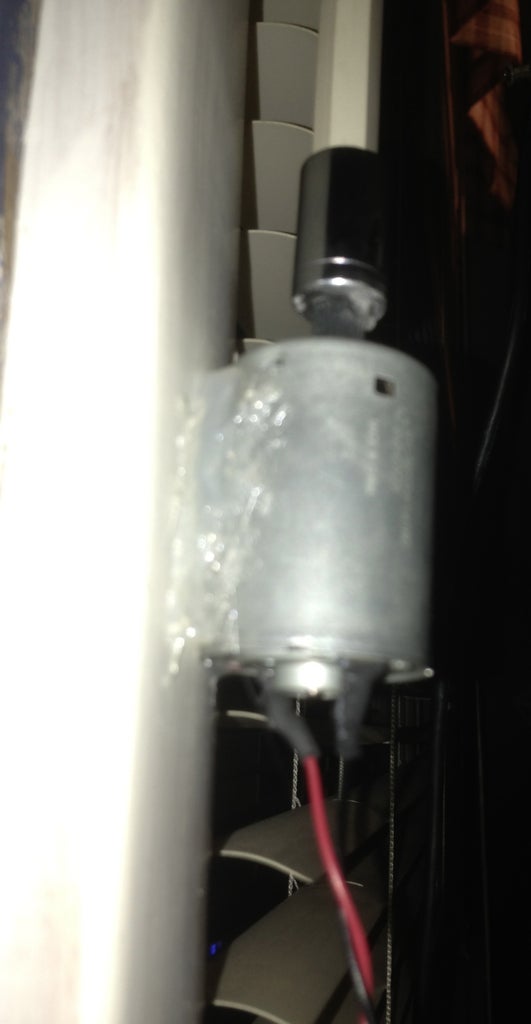
-VCR motor, or whatever you have laying around that's kinda strong
-Ratchet socket which fits your window blind rod
and my favorite tools, soldering iron and hot glue.
I wont bore you with the details, however a lot of what made this project work was the smaller of the details which ill mention up front.
-WD40 inside the window blind's gears to help loosen it up
-placement of the motor so as to allow free movement
-external power for the motor shield (i use a 12volt laptop charger), don't fry your motorshield but the motor does needs some amps to get the window blinds' rod spinning
-make sure your motor is secured tightly to wherever your attaching it
-last one, i used ribbon/string tied loosely around the window blind rod to keep the rod from jumping around
The Build:
Very simple! After you found a way to attach the ratchet socket to your motor (i used super glue) test it with your arduino/motor shield to make sure it can get the job done. Make sure to have a strong power source for the motor shield to successfully turn the blind's rod enough to open and close the blinds (obviously). I got impatient and just used hot glue on the motor and stuck it against the wood trim of my window, actually doesn't look too bad and function triumphs appearance. If you have the materials to make a bracket for the motor and make it look nicer, do it up!
At first i gave my Arduino some simple test code to run the motor forward and backward but buttons were something that was a must for this project.
if you need help wiring up buttons to your arduino i strongly suggest the Arduino tutorials.
Once you have everything connected all you have to do is run some code into your arduino. Below is the code i used for my build. Each button press simply steps the motor a little bit in each direction, short pulses seem to be stronger and therefore turns the rod better. A ton of improvements can be made to the code, but this is all i need.
The Code:
--------------------------------------------------------
#include <AFMotor.h>
AF_DCMotor motor4(4, MOTOR12_8KHZ);
//motor4 is just where i placed my motor on
//8KHZ runs smooth for me
const int buttonPin1 = 14; //button 1 on analog pin 0
const int buttonPin2 = 15; //button 2 on analog pin 1
int buttonState1 = 0;
int buttonState2 = 0;
void setup() {
Serial.begin(9600);
Serial.println("Welcome to your new blinds!");
pinMode(buttonPin1, INPUT);
pinMode(buttonPin2, INPUT);
motor4.setSpeed(255);
}
void loop() {
buttonState1 = digitalRead(buttonPin1);
buttonState2 = digitalRead(buttonPin2);
if (buttonState1 == HIGH){
motor4.run(FORWARD);
delay(100);
motor4.run(RELEASE);
Serial.print("forward");
delay(500);
}
if (buttonState2 == HIGH){
motor4.run(BACKWARD);
delay(100);
motor4.run(RELEASE);
Serial.print("backward");
delay(500);
}
delay(10);
}
--------------------------------------------------------
very simple, I hope you think so too!
Library for AFMotor.h here. Don't forget to change wprogram.h to arduino.h
Here with a quick and easy instructable for those of you who want to motorize your window blinds! I have seen other people post motorized blinds on instructables and all over the internet but I feel as though i chose a less expensive, easier alternative to accomplishing the same task. I say less expensive because i chose a simple VCR motor to power my blinds instead of (what I've commonly seen) power drills modified to spin the blinds rod. The Arduino and motorshield i used for this project could end up being expensive if you do not have one already, but luckily they are pretty inexpensive online. Hopefully this will help you (or maybe inspire) to build something similar in your house!
The parts list for this is pretty short, here goes:
-Arduino
-Motor Shield (an h-bridge would probably work just as well)
-some buttons (with pull-down resistors)
-VCR motor, or whatever you have laying around that's kinda strong
-Ratchet socket which fits your window blind rod
and my favorite tools, soldering iron and hot glue.
I wont bore you with the details, however a lot of what made this project work was the smaller of the details which ill mention up front.
-WD40 inside the window blind's gears to help loosen it up
-placement of the motor so as to allow free movement
-external power for the motor shield (i use a 12volt laptop charger), don't fry your motorshield but the motor does needs some amps to get the window blinds' rod spinning
-make sure your motor is secured tightly to wherever your attaching it
-last one, i used ribbon/string tied loosely around the window blind rod to keep the rod from jumping around
The Build:
Very simple! After you found a way to attach the ratchet socket to your motor (i used super glue) test it with your arduino/motor shield to make sure it can get the job done. Make sure to have a strong power source for the motor shield to successfully turn the blind's rod enough to open and close the blinds (obviously). I got impatient and just used hot glue on the motor and stuck it against the wood trim of my window, actually doesn't look too bad and function triumphs appearance. If you have the materials to make a bracket for the motor and make it look nicer, do it up!
At first i gave my Arduino some simple test code to run the motor forward and backward but buttons were something that was a must for this project.
if you need help wiring up buttons to your arduino i strongly suggest the Arduino tutorials.
Once you have everything connected all you have to do is run some code into your arduino. Below is the code i used for my build. Each button press simply steps the motor a little bit in each direction, short pulses seem to be stronger and therefore turns the rod better. A ton of improvements can be made to the code, but this is all i need.
The Code:
--------------------------------------------------------
#include <AFMotor.h>
AF_DCMotor motor4(4, MOTOR12_8KHZ);
//motor4 is just where i placed my motor on
//8KHZ runs smooth for me
const int buttonPin1 = 14; //button 1 on analog pin 0
const int buttonPin2 = 15; //button 2 on analog pin 1
int buttonState1 = 0;
int buttonState2 = 0;
void setup() {
Serial.begin(9600);
Serial.println("Welcome to your new blinds!");
pinMode(buttonPin1, INPUT);
pinMode(buttonPin2, INPUT);
motor4.setSpeed(255);
}
void loop() {
buttonState1 = digitalRead(buttonPin1);
buttonState2 = digitalRead(buttonPin2);
if (buttonState1 == HIGH){
motor4.run(FORWARD);
delay(100);
motor4.run(RELEASE);
Serial.print("forward");
delay(500);
}
if (buttonState2 == HIGH){
motor4.run(BACKWARD);
delay(100);
motor4.run(RELEASE);
Serial.print("backward");
delay(500);
}
delay(10);
}
--------------------------------------------------------
very simple, I hope you think so too!
Library for AFMotor.h here. Don't forget to change wprogram.h to arduino.h


