

Introduction: Arduino RGB LED Music Lights


In this ultra-simple project, we're gonna connect 3 (three) RGB LEDs with an Arduino, and use Processing in our PC to analyze and control the LEDs.
The video basically shows what our project is all about. The LEDs displays colors than was captured in the camera. My camcoder doesn't take good videos in the dark, and the LEDs are not distinct when there is too much light. Bummer.
Step 1: Connect the Components
You'll need -
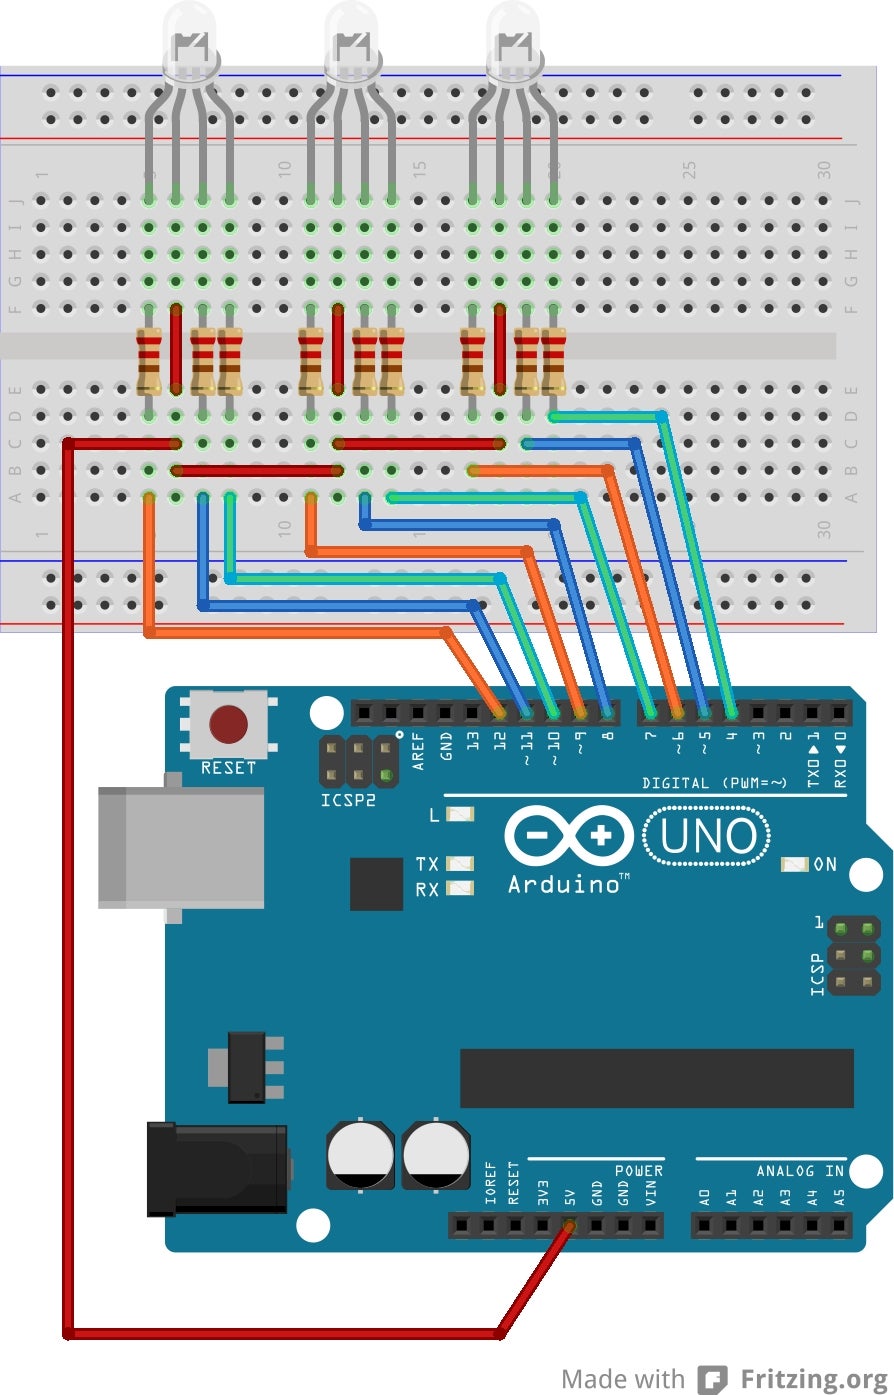
- 3 x RGB LEDs
- 9 x 220 ohm resistors
- Arduino
- Wires
Connect all components as shown in the schematic.
Check the type of your RGB LEDs. I'm using the Common Anode type. Hence, the anodes are all connected to +5v pin of the Arduino. If your LEDs are of the Common Cathode type, you need to connect them all to GND.
Open the Arduino IDE, go to File > Examples > Firmata > StandardFirmata, and upload the example sketch to your Arduino.
Step 2: Time to Party

Open the Processing IDE if you already have Processing installed, else install it. Then go to Sketch > Import Libraries and check if Arduino (Firmata) is on the list. If it's not there, install it from Sketch > Import Libraries... > Add Library...
Download the source code (musicLED.pde) from the bottom of this page and open it using Processing. Processing will copy it into a folder with the same name. Copy a mp3 song into the folder (/path/to/musicLED) where you saved the Processing sketch. Change the song.mp3 string in line 36 to the name of your mp3 file, or rename your mp3 file to song.mp3.
As I said before, I'm using the Common Anode type of RGB LEDs. If you have the Common Cathode type, you have to change int common_cathode = 0 to int common_cathode = 1 on line 26 in the above source code.
Also, you should probably use some basic program to check whether the variables like redPin1, bluePin2, etc. are all correct. Different RGB LEDs may have different pin patterns.
Also you have to change the /dev/ttyUSB0 in line 31 to point to your Arduino's port (something like /dev/name on Linux or com5 on Windows).
Put on your party hats, hit run (the triangular thing on the top of the Processing IDE). Sit back and enjoy...
You can also find this tutorial here .


