

Introduction: Arduino Uno Menu Template
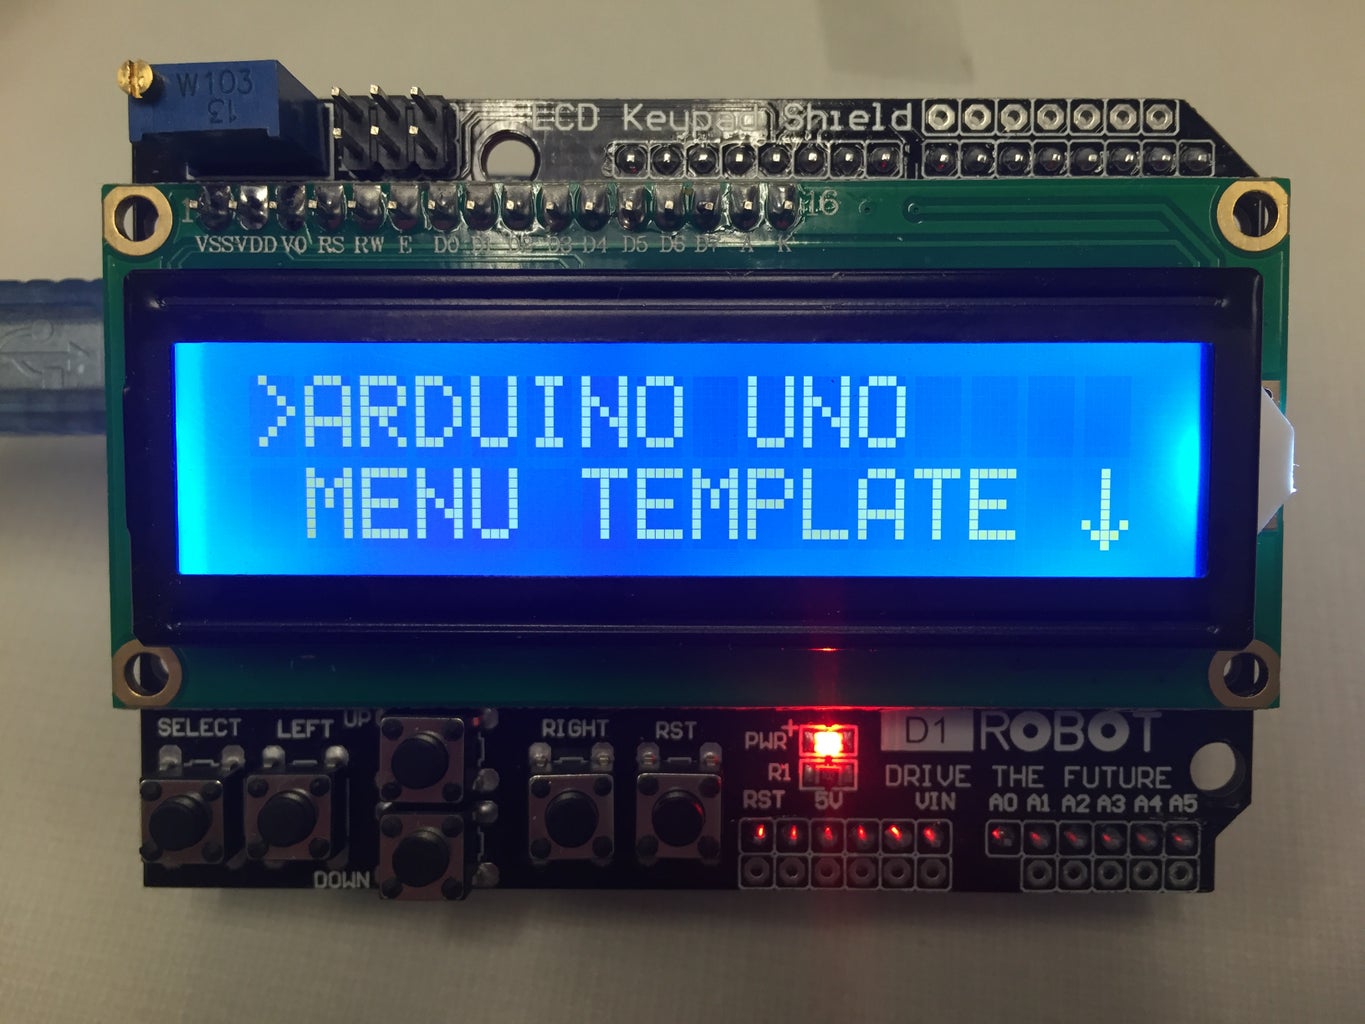


While working on a new Instructable (coming soon) I had decided to use an Arduino Uno with an LCD/button shield I purchased off of AliExpress. It's a knockoff of the DFRobot Shield. I knew that I needed a menu for my project but was becoming so disillusioned with the terrible menu template programs available for the Arduino Uno. Many of which were not designed to work with this shield. I decided to make my own.
Since I put a significant amount of work into making this menu template so easily modifiable I figured I would share it.
Attachments

Step 1: Parts
Parts are relatively simple. All you'll need is an Arduino Uno and a LCD Keypad Shield. I purchased mine from AliExpress for a total of $6.75.
Step 2: Modifying the Program
The program attached is written with the basic Arduino libraries of Wire.h and LiquidCrystal.h so there should be nothing else for you to download besides this program.
One of the things you'll have to modify is the array of menu item names on line 27 and the programming content for each sub menu. I've started with 10 possible menu items in the program. If you want 10 or fewer just modify line 27 to create your main menu structure.
String menuItems[] = {"ITEM 1", "ITEM 2", "ITEM 3", "ITEM 4", "ITEM 5", "ITEM 6"};For example, you could do fewer items:
String menuItems[] = {"DISTANCE", "TIME", "REPEAT", "DIRECTION", "START", "ABOUT"};Or you can add more (up to 10 of course):
String menuItems[] = {"DISTANCE", "DELAY", "RANDOMIZE", "TIME", "REPEAT", "DIRECTION", "START", "ABOUT"};Beyond 10 items you will have to add additional "cases" to the "switch/case" section starting on line 167. You will also have to add additional menuItemX[] (where X is 11, 12, 13, etc.) void functions at the bottom of the program.
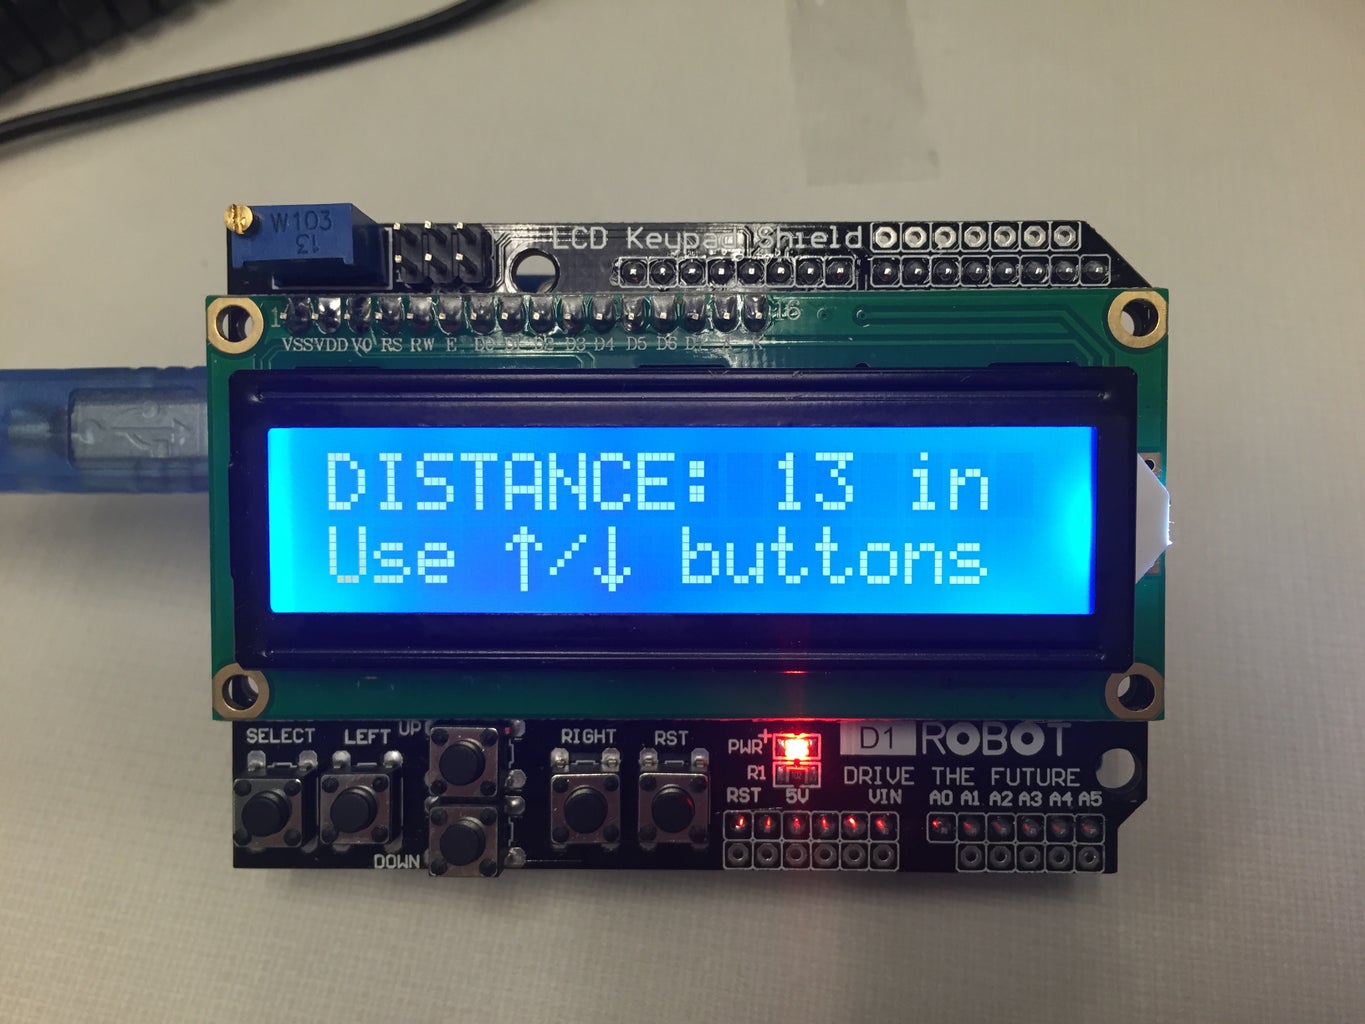
After you have created the menu structure you want it's time to create the content for each one of those sub menus. The first menuItem void function starts on line 275. I put in some default code to print "Sub Menu X" for each menu item as well as a code to wait for a back button to be pressed. Below as an example of what you could do in the sub menu. This is the sub menu I'm using to modify and store the "savedDistance" variable. The up and down buttons are used to select the distance and when back is pressed it dumps back to the main menu.
void menuItem1() { // Function executes when you select the 1st item from main menu
  int activeButton = 0;
  lcd.clear();
  lcd.setCursor(0, 1);
  drawInstructions();
  lcd.setCursor(0, 0);
  lcd.print("DISTANCE: ");
  lcd.print(savedDistance);
  lcd.print(" in");
  while (activeButton == 0) {
    int button;
    readKey = analogRead(0);
    if (readKey < 790) {
      delay(100);
      readKey = analogRead(0);
    }
    button = evaluateButton(readKey);
    switch (button) {
      case 2:
        button = 0;
        savedDistance = savedDistance + 1;
        savedDistance = constrain(savedDistance,0,36);
        lcd.setCursor(10,0);
        lcd.print("     ");
        lcd.setCursor(10,0);
        lcd.print(savedDistance);
        lcd.print(" in");
        break;
      case 3:
        button = 0;
        savedDistance = savedDistance - 1;
        savedDistance = constrain(savedDistance,0,36);
        lcd.setCursor(10,0);
        lcd.print("     ");
        lcd.setCursor(10,0);
        lcd.print(savedDistance);
        lcd.print(" in");
        break;
      case 4:  // This case will execute if the "back" button is pressed
        button = 0;
        lcd.clear();
        lcd.setCursor(2,0);
        lcd.print("-- VALUES --");
        lcd.setCursor(2,1);
        lcd.print("-- STORED --");
        delay(1500);
        activeButton = 1;
        break;
    }
  }
}
This function generates the distance menu shown in the picture above.
Attachments
Step 3: Programming Buttons to Tasks
This LCD shield has 6 buttons, only 4 of which I'm using in my program. There is a select, up, down, left, right, and reset button. The reset is hard wired into the Arduino Uno reset so there is nothing we can do with it. The select button is left off of my program and I just used the right button instead. For some reason having the select button be so far to the left of up and down felt unnatural for menu navigation.
The function that determines which button you just pressed is called evaluateButton(). Right before you call that function you need to read the analog signal from the A0 input on the Uno and save it to the readKey variable. When you call the evaluateButton() function make it evaluateButton(readKey). This will send that function the signal from A0 and the function will determine which button that is associated with and return the button number in integer form.
Here's an example of calling for a button check:
int button;                         // Declares a fresh button variable
readKey = analogRead(0);            // Reads the analog signal from A0 and saves it to readKey
if (readKey < 790) {                // If the signal drops below 790 that means a button was
                                    // pressed. The if statement delays the program for 100 microseconds
                                    // to debounce the button press and let voltage stabilize
  delay(100);
  readKey = analogRead(0);          // Once the voltage has stabilized read the signal again
}
button = evaluateButton(readKey);   // Call the evaluateButton function and send it the readKey data
                                    // Whatever integer comes back save it to the button variable
The evaluateButton() function looks like this:
int evaluateButton(int x) {
  int result = 0;
  if (x < 50) {
    result = 1; // right
  } else if (x < 195) {
    result = 2; // up
  } else if (x < 380) {
    result = 3; // down
  } else if (x < 790) {
    result = 4; // left
  }
  return result;
}
The easiest and cleanest way to use that button variable is with a switch/case. A switch/case function essentially looks at that button variable and matches it to "case". The programming inside that case is executed if it matches the button pressed. For example:
switch (button) {
      case 0:  // When button returns as 0
        break;
      case 1:  // When button returns as 1
        lcd.clear();
        lcd.print("Forward Button");
        break;
      case 2:  // When button returns as 2
        lcd.clear();
        lcd.print("Up Button");
        break;
      case 3:  // When button returns as 3
        lcd.clear();
        lcd.print("Down Button");
        break;
}
Ideally you will nest the button evaluation call and the switch/case inside of a do/while or while loop that will continue to execute until a button is pressed.

Participated in the
Beyond the Comfort Zone Contest


