

Introduction: Arduino Bot Android Remote Control


In this instructable I would like to explore the connection between Arduino and Android. Both are open, easy-to-program environment (well, Android not so easy, but quite), and the interaction between them allows interesting human-to-device interaction.
The goal here is to drive a small Arduino bot of the simplest kind with an Android app, through Bluetooth connection. The robot itself will have nothing extraordinary and is inspired by the many tutorials out there on the Interwebs. But I have not found tutorials on how to create an Android remote control - so here it is.
Level and assumption :
- the reader is assumed to know its way around Arduino and electronics, including soldering, although there will be very little of it. Arduino starter kit level is sufficient.
- more importantly, the reader is assumed to have a working knowledge of Android. If not - I can recommend to work through the official Android tutorials, among others available online.
Step 1: Bill of Material
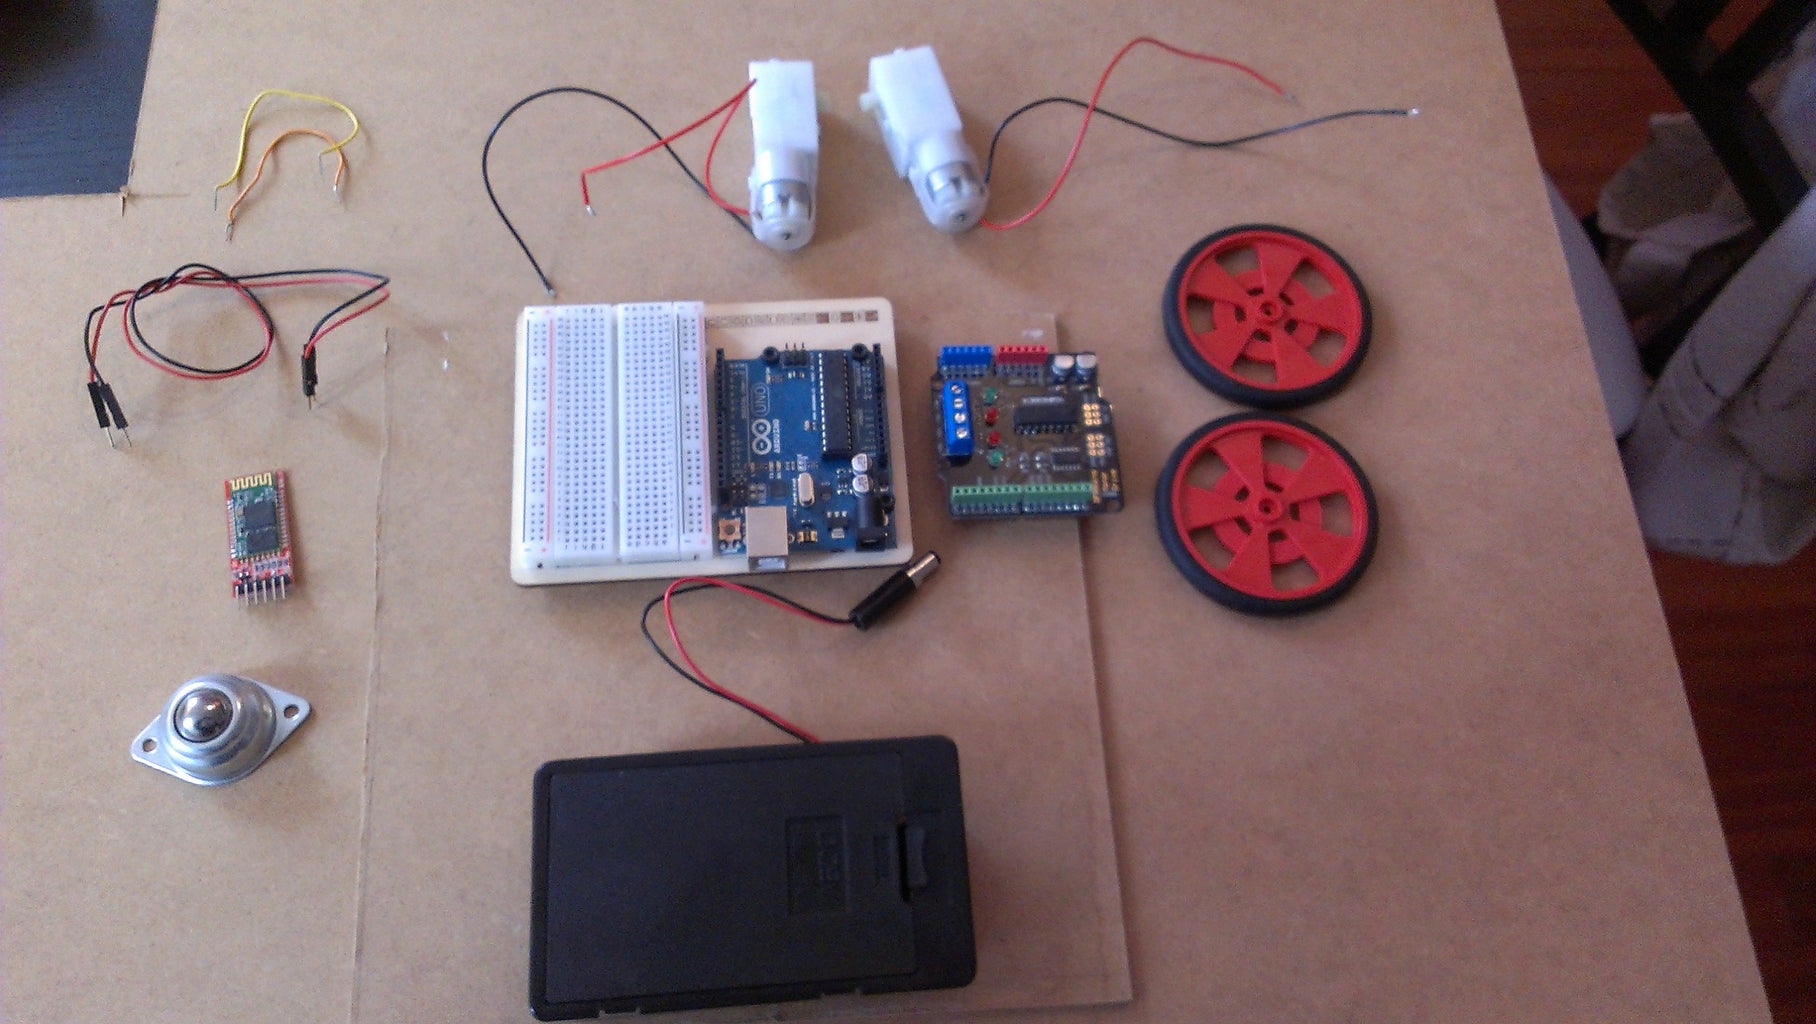
- Arduino UNO or equivalent (23.92€)
- Arduino-compatible 1A Motor Shield (12.95€)
- 2x GM9 geared motors (2x 4.29€)
- 2x GMPV wheels (2x 2.79€)
- (optional) 2x mounting brackets (2x 1.38€)
- 1 ball caster(1.78€)
- a 6 AA battery holder with 2.1mm jack (4.82€)
Not on RobotShop
- Bluetooth module (5€) such as this one on Ebay
- 2mm MDF plate
- some wires
- some screws and nuts
- a breadboard if you don't want to solder
- 6 Alkaline AA batteries or 6 NiMh rechargeable batteries (they provide 7.5V instead of 9V, but this is still sufficient for the GM9 motors)
Step 2: Mounting the Electronics
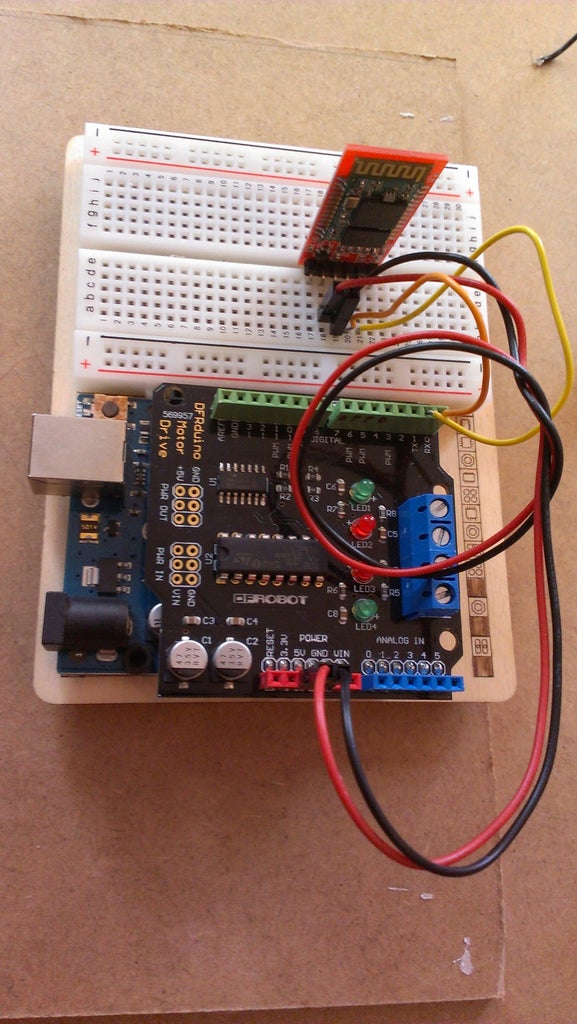
2) Mount the Bluetooth tranceiver on a breadboard.
3) Connect with wires the +5V and Ground from the Arduino board (actually, from the shield) to the +5V and Ground pins of the BT module
4) Connect with wires the Tx and Rx pins of the Arduino (ie, pins 0 and 1) to the Tx and Rx of the Bluetooth module
Warning 1 : some Bluetooth tutorials mention that you cross the connection (ie Tx to Rx and Rx to Tx). The way my module works, it needs to be parallel, ie Tx to Tx and Rx to Rx. You can try one way, and swap the connections if it doesn't work
Warning 2 : remember to unplug the BT module while loading the script on the Arduino. The Tx and Rx plug are actually the same as the Serial port used to communicate with your computer through USB, and the BT module will mess up the communication
Step 3: Prepare the Motors


1) Solder wires on each motor electrodes. If one motor turns much slower than the other, it is likely due to poor soldering (or poor connection at the motor shield)
2) (Optional) Screw the motor holders to the motors
Step 4: Finish the Assembly


2) Mount the Arduino + shield on it as well as the battery pack on the MDF, as well as the ball caster on the back side. You can screw them or use double-sided tape - I used tape
3) Mount the motors on each side of the MDF. Here again you can use tape or screws, but I chose to screw them for better stability
4) Connect the motors wires to the motor shield
That's it ! As you can see, it's a really simple robot layout. You can plug the jack from the battery pack into the Arduino, to test that the Arduino is lighting up and the Bluetooth module is blinking
Step 5: The Software Part
1) An Android app gives user the ability to connect to and disconnect from the bluetooth module. When connected, a serial link will exist between the smartphone and the Arduino robot
2) The user can then use arrows to drive the robot and a "stop" button to, well, stop it. Every time the user presses a button, the app sends a character (eg "f" for forward, "s" for stop and so on)
3) The Arduino board listens to the Serial port. When a character is received, it drives the motors accordingly.
Step 6: The Arduino Sketch
Upload the attached code to the Arduino Uno. Remember, to unplug the bluetooth module while doing so.
As you can see 5 intructions are defined : move forward, backwards, left, right, and stop. All motions are executed at full speed (the GM9 motors are geared, and thus not turning very fast) but you could change the speed value if you want.
A nice addition would be a capability to select the speed directly from the Android app, or even adjust the speed to each wheel to correct for small differences that always exist between geared motors. If you implement it, please let me know and I'll add the code to the Instructable !
Attachments

Step 7: The Android App

Extract the following file to your usual Android project folder - such as the Eclipse workspace if you use Eclipse.
Then, connect your Android smartphone to your computer and launch the app - it will be automatically transfered to your smartphone.
Quick run-through. The app has two main Classes :
1) AndroidRemoteActivity, the main activity, that take the layout activity_android_remote and inflates it. It also associates actions with buttons, such as sending the character associated with each arrow.
2) a BtInterface class that provides all the utility tools to manage the Bluetooth connection, such as connecting, disconnecting, and listening and sending messages over the Serial port. This utility comes from this tutorial (FR)
Warning 1 : the Bluetooth module name is hard-coded in the app. Mine is "HC-05". If your module is different, you should change that name.
Warning 2 : The Bluetooth module should be paired with your phone prior to attempting connection. To do so, power the Arduino with the BT connected, turn on the Bluetooth on your smartphone. Search for your module, click on it (if a password is asked, it is usually "1234" or "0000") - et voilà, it's paired.
The most important actions are performed when
- The user clicks on "Connection" - do it when the Arduino board is powered, with the Bluetooth module blinking. It should stop blinking when you see the "Connected" message in the app
- The user clicks on an arrow or on "stop". The app send a character to the Arduino through the Serial connection. You should see the robot moving while at the same time as a confirmation message appears on the app.


