

Introduction: BAR T.A.B. (Take Along Bar)


Biking and beverages have long been a passion of mine. This BAR T.A.B. allows me to enjoy both....
This is not an original concept. You will find a couple others out there on the internet. The configuration and specific add ons are original, which will be outlined in the steps to follow. Enjoy!
Step 1: Materials and Tools List


The materials purchased for this project amounted to around $35 total. The wood glue, nails, screws, stain, and varnish I had on hand.
1 - 2' x 4' sheet of 1/4" plywood
1 - 8' 1" x 4" pine board
2 - 1/4" x 1 1/8" x 2" u-bolts
2 - small hinges
1 - magnetic door latch
2 - plastic tumblers
1 - side loading water bottle cage
The tools used for the job included:
- power drill
- hammer
- belt sander
- mitre box and saw
- hand jig saw
- couple of screw drivers
Step 2: Framing It Up


Because of the nature of a bike frame, all the angles and tube lengths vary from bike to bike based on frame size and material (steel framed tubing is present on the Fat Rat fat bike used in this project), I thought it best to actually lay out and piece together the frame of the BAR TAB on the bike itself. The holes for the U-bolts were counter sunk to keep them out of sight, and to allow for the length of the bolts. I used a socket head and wrench to fasten the frame piece on the top tube of the bike. The down tube framing piece was positioned and held in place by the brazed on waterbottle cage mounts that were already in place on the bike frame. These holes were counter sunk as well. These bolts will help to stabilize the BAR TAB when in use, and for positioning during the build. The bottom piece near the bottom bracket of the bike frame was leveled with the bike up on the bike stand. This way the cover, when in the table position, will be a relatively level surface and appear "right with the world" (as my dad would have said) when in use.
Step 3: Closing the Case...


Next I moved the framed BAR TAB to the workbench to affix the back and cover portions. I glued and nailed the back on with wood glue and finishing nails. The cover was fastened with two small hinges. If you notice in the 4th picture, I drilled out where the screw heads on the hinges would butt up against the box, so the cover would fit flush to the frame.
Step 4: Finishing It Off...


I used some Minwax Golden Oak stain I had left over in the "paint pantry". This was covered with Zinsser Bulls Eye Spar Varnish for weather resistance. I next mounted the magnetic latch to the inside of the top frame and the accompanying brass plate to the cover. I found a very strong magnet at Ace Hardware that will hold the cover shut even when biking down a reasonably bumpy road / trail.
Step 5: Configuring the Compartment...


This was the most creative step in the process. How to configure the compartment to accommodate two glasses, mini liquor bottles, and a large bottle for mix. I decided to use a Kleen Kanteen stainless steel bicycle water bottle I already had in stock. I like these because they don't change the flavor or taste of whatever liquid you put in them. And they look cool. The tumblers are plastic; broken glass is the main enemy of cyclists! The mini bottles are all plastic as well. My wife came up with the used leather belt "bottle holster" idea. With some trial and error, that worked out great. The bottle cage is a side loading style aluminum cage, with the traditional tabs on the bottom and top cut off to accommodate the clean cylindrical shape of the Kleen Kanteen.
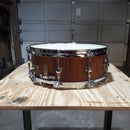
Step 6: Let Happy Hour Commence!

After finishing the compartment, I remounted the BAR TAB to the bike. By using a spring clamp, I clamped the cover/table top to the pedal/crank arm to create a resistance between the two. This holds the table top firmly in place and allow a surface on which to mix and set the drinks. This should be large enough for two drinks, and some meat / cheese / cracker snacks as well (carried in the handlebar bag in the picture). Bottoms up!
Step 7:

Second Prize in the
Small Spaces Contest


