

Introduction: Bike Pannier From Scratch Using a Home Sewing Machine


I can't stand a sweaty back when I bike, which is why I switched to panniers ~10 years ago. It's also much easier on the back in my opinion. You can get by making this pannier with a waterproof/coated fabric (I'm using 500D Cordura), some easy to find hardware, and a home sewing machine. Other things come in handy, but you can make it work with the bare minimum.
Look through the pictures and skim the words a bit before you start. If you get stuck or something isn't clear, drop me a line and I'll try and help out as best I can.

Step 1: Tools and Materials
I'm adding some optional materials/tools to either make things easier on you, or give you the option to add some accessories to your pannier. I tried to group together items from the same carrier so you can cut down on shipping cost, assuming you don't live near a decent fabric store.
Materials you definitely need:
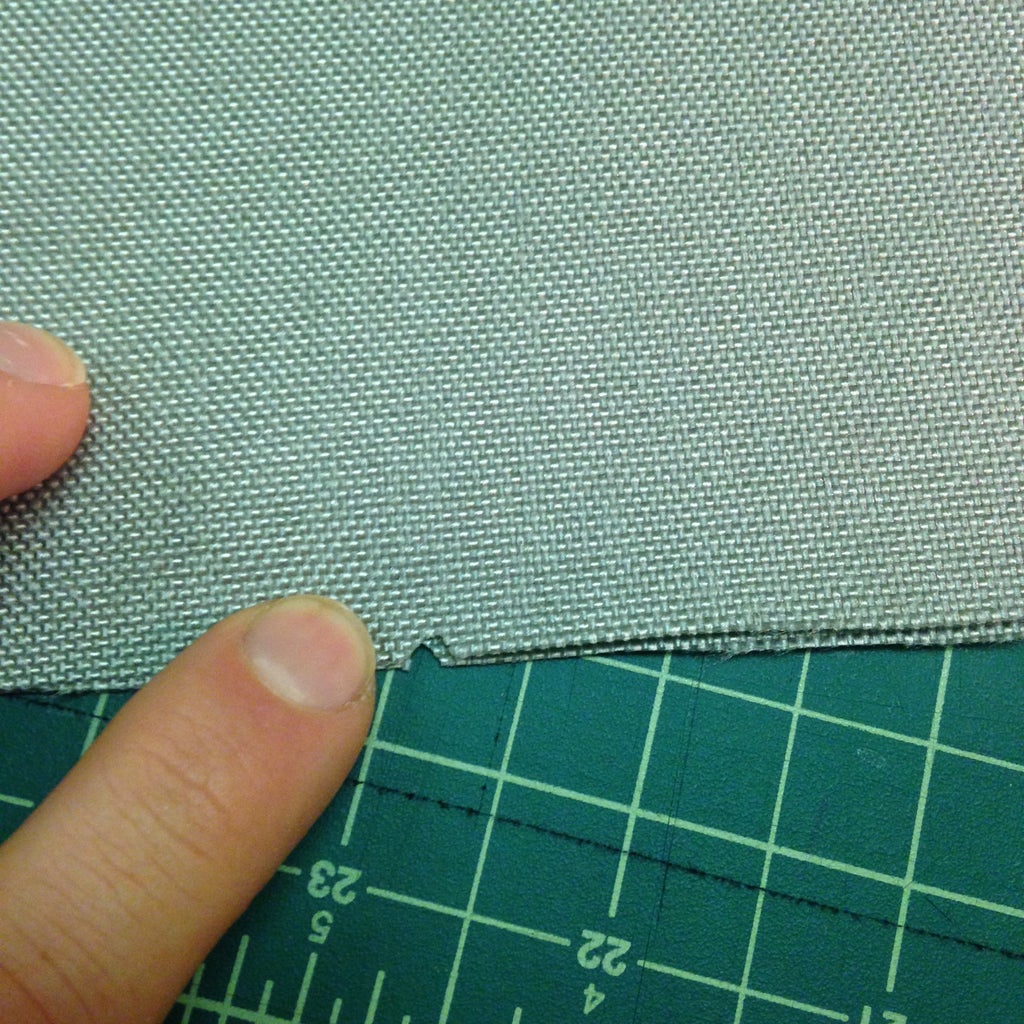
- Fabric. Coated water-repellent fabric works best. I'm using 500D Cordura that I found at my local sewing shop. You can order some online, but it's not cheap. A single yard (1-yard) will be plenty to sew this bag with some leftovers for small pouches.
- Good, strong thread. Coats and Clark Heavy Duty Works ok. I use this thread from Sailrite. It's silky smooth through my machine and super beefy. It just barely goes through the needle I use and sometimes gets jumbled inside my bobbin because it doesn't want to stay wound, but I really like it. Lays a nice stitch.
- x1 Buckle from Strapworks. Make sure you get the 1" buckle
- x2 J-hooks. I got mine from Jandd
- x1 bottom hook, also from Jandd, or this set, also from Jandd
- 1" webbing, approximately 4 feet. Might as well get more so you don't have to pay for shipping next time. Also from Strapworks
- 2" wide Velcro, 3' of the loop side and 1' of the hook side
- Bungee cord or something strong and stretchy. I've used old bike tubes with decent results.
- Plastic sheet for your back panel. This can get pricey so it's best if you can scrounge up something <1/8" thick that isn't too heavy. If not, I'm using an HDPE sheet that's 1/16" thick, but shipping is $$$. Plexi/acrylic can work but you'll probably want to wrap it in duct tape to keep it from cracking.
- Screws (nuts and bolts) to fasten your your J hooks to your back panel. I used cheap aluminum Chicago screws, but you might want something a little more robust. Jandd sells just the things for cheap enough.
- Bag pattern. So I drew up a pattern in Onshape and made it into a PDF drawing. I'm not sure if you can print it on a normal printer in sections without some special software. The pattern isn't that important. You can easily make your own. The main panel on the pattern I made is 12.5" wide x 16" tall. If you are able to print it out, the seam allowance is built-in, so cut on the line.
Optional materials:
- 12.5" of zipper tape(continuous zipper) and corresponding zipper pull. I use #6 nylon coil teeth because it's easy to sew over/through.
- Reflective material. I got lucky and found a huge roll of 2" wide reflective webbing. I think I paid $5 for the roll. Stuff ain't normally cheap, though.
- D-rings and clips. This is to make a shoulder strap to carry around your pannier when you're not biking.
- Strapworks has a huge selection. Plastic or metal, it's up to you.
- Stretchy materialfor side pockets. Depending on your heel clearance, this might not be such a good idea. However, the pockets sit fairly high on the bag, so you might be ok. I've never had an issue with bumping my water bottle in any of the bags I've made. I found some random stretchy mesh that's pretty durable, but have yet to come across the stuff they use in hiking backpacks.
- Binding. So I don't always cover my messy seams with binding, especially when sewing Cordura. Why? Because it's a hassle. And even though I have a binding attachment that should make it easy, it still takes me forever and the results are never perfect. Cordura doesn't unravel like canvas, and you can always melt the edges a bit if you're worried.
Tools
- Sewing Machine. I use an old Singer I found on the sidewalk. The old, heavy cast machines beat the new, cheap plastic ones any day, IMO.
- Sharp scissors and a rotary cutter if you have one.
- Ruler and measuring tape.
- Candle and matches/lighter (to melt the edges of the webbing)
- Screw driver (to attach the J hooks)
- Drill with drill bit or heavy punch (to make holes in your plastic panel)
- Seam ripper (I mess up. A lot.)
- Chalk pen (you can use a pen/marker but chalk is nice because it goes away.)
Step 2: Cut Out All Pieces


After cutting out or making the pattern, you'll need to trace it on your paper. A few things:
- I put my patterns on thick paper (large cereal boxes work well) so it's easier to trace onto my fabric
- I cut tiny notches on the center fold of my pieces. They're included in the pattern but it's just as easy to fold the piece in half and cut out a tiny, tiny triangle. This will help you line up your pieces when you're putting things together. The last image shows the notches.
All of the pieces are listed here:
- (x3) large panel. I cut two from grey Cordura and one from black. The black will face my bike rack and won't show dirt like the gray
- (x1) medium panel. This is for the optional zippered pouch on the front of the bag.
- (x1) bottom panel. Also in black to hide dirt (even though it shows dust like crazy)
- (x2) side panels. These are in grey.
- (x1) side pockets. Optional pockets from stretchy material. I cut each pocket twice as long as I want so i can fold them in half. That way I have a nice clean edge on the top of my pocket and it's a little thicker so it holds things a bit tighter.
- (x1) inner flap. This flap with help secure our back panel inside the bag. You can sew Velcro on both sides so you can attach small, organizing pouches.
- 12.5" zipper with pulls (I like to use two)
- (x2) loop Velcro, 11" long (the soft side is the loop side)
- (x1) loop Velcro, 12.5" long (for the outside of the bag to attach patches or tiny pouches)
- (x1) hook Velcro, 11" long (the flap will attach to this piece)
- (x1) 20" long 1" webbing
- (x6) 3" long 1" webbing ( I've only shown four in the picture)
- (x1) 12.5" 1" webbing (guide for your bottom hook)
- ***there's one large piece of fabric that you'll cut near the end. It will be approximately 12" x 36"***
Step 3: Sew the Zipper Pouch to the Front Panel (optional)


Side the right side of the zipper to the right side of your fabric. Then fold it over and top stitch it down. If you've never made your own zipper from zipper take, find a quick video to watch to make sure you know what's going on. I think once you realize how easy (and cheap) it is to make your own, you won't use pre-cut ones again unless you need it to separate.
Now line up those notches on the bottom of the pouch panel and one of the large grey panels. Be sure your fabric is facing the same way. We're not turning anything inside out, so what you see is what's going to show.
I sew right over my zipper, even backstitch a few times, just to make sure it's secure. Obviously, make sure your pulls are on first. I use two pulls so the ends of the zipper are closed when I sew over them. I also just like having two pulls.
SOMETHING THAT MADE THINGS A WHOLE LOT EASIER FOR ME
So when I sew panniers or backpacks, I always use this method and it's helped a ton since I don't use pins (it's hard to pin Cordura). I line up my panels using that notch, and then I sew half of my piece at a time, starting at the notch and moving outward. It helps keep things lined up, the fabric doesn't move from where I want it, and I always get a clean, even edge.
Step 4: Sew on the Front Velcro and the Long Webbing


The piece of Velcro will cover the top edge of your zipper (if you decided to sew it) as well as hide the long strap used to secure the roll top.
Be sure you're using the longer piece of loop (soft) Velcro. Sew the bottom edge first, covering your zipper but don't get so close they you get in the way of the zipper pulls. Then find the middle of your panel and attach the strap. Be sure the ends of the strap have been melted so they don't. Also make sure that your stitching on the strap is low enough to be hidden by the Velcro. Once that's done you can sew the top. You can't have to sew the sides since those will get sewn when we attach the side panels.
Step 5: Sew on Side Pockets (optional), Sew on Reflective Tape (optional), Sew on D-rings (optional), Sew Side Panels to the Bottom Panel (not Optional)


I cut my stretchy material larger than my side panel to make it easier to sew. I also sew it with the stretchy stuff on the bottom because I find I get much better results. My presser foot seems to want to stretch it out, even if I reduce the tension a ton. Line up the two cut ends with the end of your panel and sew all the way around. I find i do a better job if I sew the bottom first, and then the sides. Just trim what's left with scissors when you're done.
Next I added my reflective webbing. Nothing much to this step. Just leave 1/2" or so on your top edge.
After that you can add those D-rings if you went to attach a carrying strap. I'm using white thread because it's my nicest thread but also so you can see my stitches. I tucked the webbing underneath in a way so you don't see where the two ends come together. Then I made an X to attach it.
Now put your side panels on top of your bottom panel, right side facing right side. The pattern was designed about 1/4" of seam allowance, but if you are slightly off it's not a big deal. There's only one piece that matter and we haven't cut it yet. Just try and be consistent.
Step 6: Sew Velcro Onto Inside Flap


This is the flap that will secure the plastic panel that will fit inside a sleeve. It's pretty straightforward. Make sure you use the loop Velcro.
- Sew Velcro onto the right side of the fabric.
- Fold in half so Velcro is touching; sew sides.
- Turn inside out.
Step 7: Stitch Hook Velcro Onto Sleeve


Take the remaining gray panel and fold down the top edge and then stitch. Next sew on the hook Velcro. Leave a little space on the top edge.
Step 8: Attach Pieces to Back Panel


Take the longer piece of webbing and place it across the right side of your back panel, about 8 inches down. This measurement depends a bit on your rack, but 8 inches should be a good compromise.
Make marks approximately two inches apart and stitch the webbing onto the pack panel. These slots will act as a guide for your bottom hook.
On the back side of the panel (the wrong side), attach the panel with the Velcro facing out. Use the method of lining up the notches and sewing from the middle outward.
Next attach the female side of your buckle to the top of the back panel using a 3" piece of webbing.
Add the panel flap to the top of the back panel. You can use the Velcro to hold it in place while you switch the top.
Step 9: Attach the Front and Back Panels to the Side/bottom Panel


It doesn't matter if you start with the front or back panel. Pick one and use the notches to line it up with the bottom panel. Make sure your pieces are right side facing right side. Start in the middle and begin sewing. This part is tricky and takes patience because you're trying to connect a curved piece with a straight piece. The trick is to go slow and to have your needle sunk when you want to pull and adjust your pieces. As you get to the curve you want to keep the edged lined up. If you're pulling on your fabric to line up the pieces, try and pull toward the center of the bag. That way it won't bunch too much.
Once you get half of one side sewn up, do the same for the other side. It'll be a bit different since the bottom panel will be on the opposite side (it it was on the bottom with the front/back panel on top, now it will be on top and the front/back panel will be on the bottom.)
Once you get the whole panel sewn to the bottom panel, do the other one.
Step 10: To Bind or Not to Bind? (optional Step)


If you want to bind the edges of your bag, this is the time to do it. Unless this bag is looking great and you know you're going to use it for years to come, I wouldn't bind. If this is your first bag it probably won't be that great and you'll want to practice a few more times before you commit to finishing the edges. Grosgrain is a cheap ribbon you can use for binding, but it's hard to make it follow a curve. I recently got a large batch of hat ribbon that looks similar to grosgrain but is much thinner and smoother.
Step 11: Add Roll Top Piece


This piece wasn't in the images in the beginning, and there's not a pattern piece for it. That's because, depending on your seam allowance and personal preference, the size can vary. I typically make mine 12" tall. In order to get the girth, you'll need to measure around the top edge of your bag. Now's the time to trim the top edge if your pieces didn't line up perfectly.
Turn your bag right side out. Using a measuring tape, start on one seam and carefully measure around the top of your bag. Don't stretch your bag or your tape measure too tight, but also don't let it sag too much. You're trying to get the exact measurement. Mine came out to 89 cm (If it's closer to a round number in inches, go with inches. Whatever can help you be more accurate. That's why I switched to SI units). Now, cut a piece of fabric that's as tall as you want your roll top to be (I use 12"), and as long as this dimensions, plus TWICE a reasonable seam allowance. Give yourself a good inch (1/2" seam allowance on each side.
Now fold your fabric in half and sew the edges together. You can try and do a dry fit or even pin this to your bag, but I hate using pins, especially on layers of Cordura. I've gotten to be pretty consistent so I skip this part and sew the top edge by rolling it over twice.
Now place your roll top piece around your bag. Your bag should be right side out, and the roll top piece should be right side in (the right sides should be touching each other). I line up the seam with the center back portion of the bag. Making sure to keep the edges lined up, sew around the top of your bag.
If you used binding previously, you can use it here as well.
Step 12: Cut the Plastic Panel and Add to Your Pannier


If your seam allowance was spot on and consistent, you can use the pattern to cut out your back panel. Odds are, though, that you'll need to tweak it a bit. I'd used a piece of cardboard to get the basic shape and then insert and trim until it fits just right. Once you've got the shape you want, trace it onto your plastic panel.
I use a utility knife to carefully score the edges. Once I get a continuous score line, I can go over it 4-5 times until I cut through. In my experience, if you can't too hard too fast, your cut wanders and it's hard to fix.
Once it's cut out, I chop off the sharp corners and then take a file (or sandpaper) to all of the edges. If the edges are too sharp they'll eventually cut through your fabric.
Since my panel was a bit thin and floppy, I added a piece of wire for a support. I didn't have any good, stuff wire so I just used a coat hanger. In the past I've had an issue with the bottom edge of my pannier getting into my spokes when I'm pumping up a hill. Granted my bike rack is pretty awful, and I most likely had too much weight in the pannier. But still, a better wire, like a bike whee spoke, would help a bit.
Insert the panel into your bag and use the flap to secure it tightly.
Step 13: Add Hooks and Hardware


We're nearly there! This part can be a bit tricky, but take your time and double check your thinking. First, lay out your hooks where you want them. Be sure to double check your bike rack to make sure your location works with your bike. Once you mark where you want the holes, use a drill to drill them out. If you have the time and are patient, you can mark the holes, take out the plastic panel, drill that separate, and then punch the holes in the fabric. Be sure you only go through the top layer of fabric and the plastic sheet. Regardless of your method, try and melt the edges of your holes so they don't fray too much. A match sort of works, but a soldering iron or something with a hot tip would be much better.
If you're using a bungee cord to fasten your bottom hook, you'll need to sew two loops from the 3" webbing to hold the ends. Once sewn, you can poke/punch/melt the holes. Then sew a 3" loop around the bottom hook. No need to put a hole in this one.
I didn't get a good picture here, but you'll need to sandwich the looped webbing with the holes between the bag and the J hooks. If you're using a bolt, you can go through the J hook first, insert the webbing with the hole, then go through the bag and plastic panel, and then put a nut on the back side.
Once you have your loops and J hooks attached, you can loop your bungee through. I undid the metal hooks and only cut one end (which I melted to prevent fraying.) That's the end I fed through the looped webbing. When I was through all three loops I tied the end.
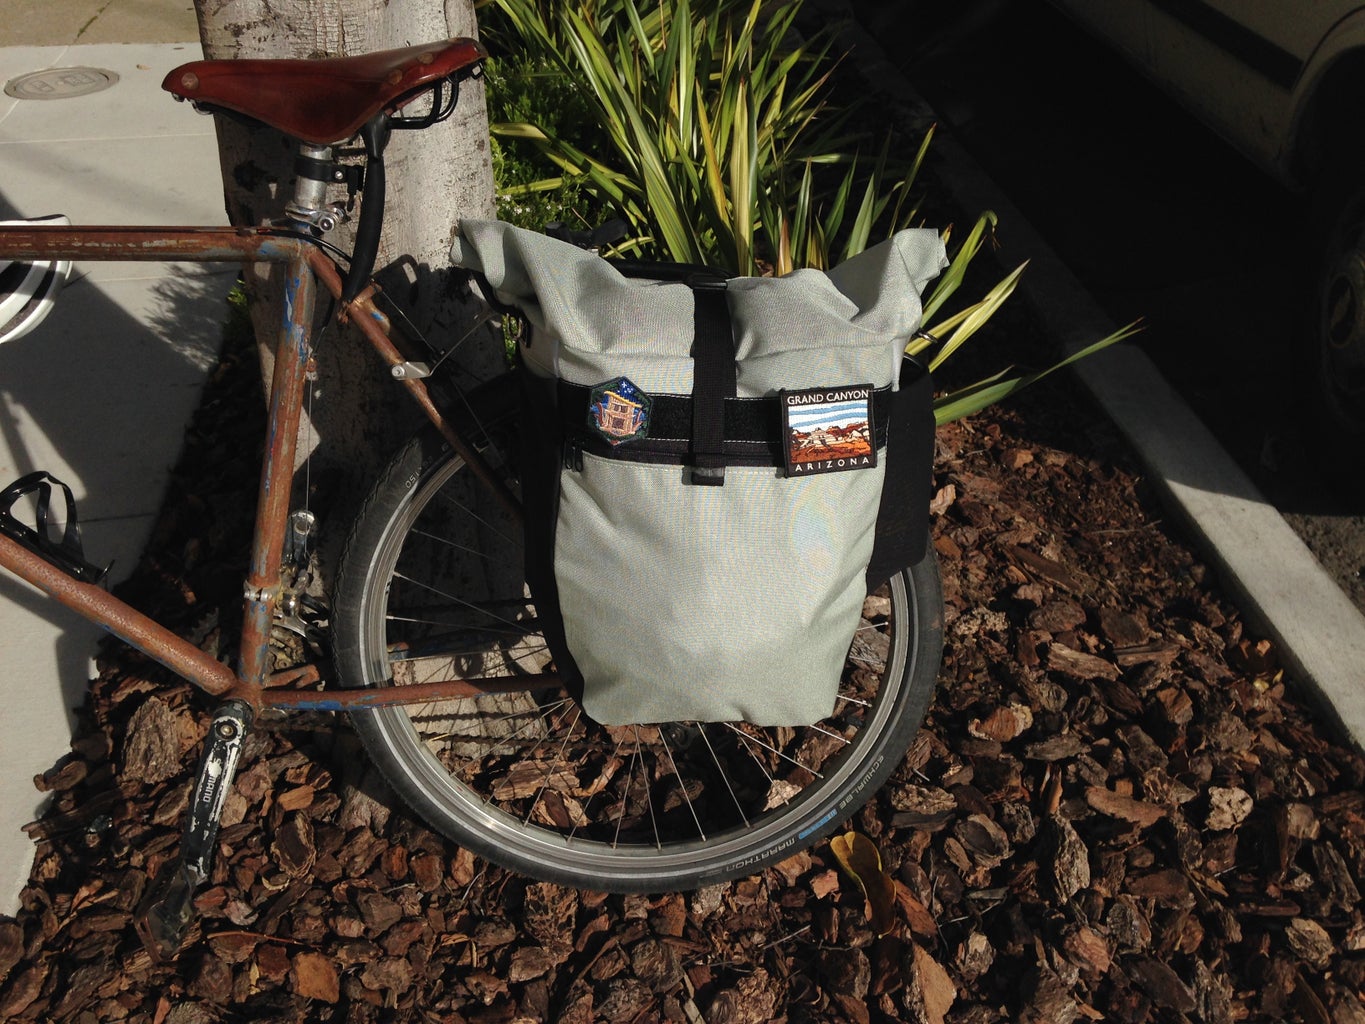
Step 14: Finished!


Now you can stuff it with stuff and give it a roll. Something I noticed right away on mine is that I planned on using the webbing where the buckle is as a handle, but it doesn't work very well. In future panniers I think I'll add a small handle that connects on either side of the female piece of the buckle.
If you're webbing is too long (I always like to make mine long in case I need to overstuff my bag) you can cut a little piece of an old inner tube to use as a durable rubber band.

Participated in the
Bag Contest


