

Introduction: Bleach and Print Pillows


A bleach spot doesn't necessarily mean ruined laundry. Instead, it might just be the starting point for a project. This guide will show you how to combine bleach and Inkodye in the same project to make fantastic DIY pillows.
Step 1: Gather


For this project, you will need will need Inkodye, Inkowash(can be substituted with regular fabric detergent, but be sure to wash twice!), laundry bleach, fabric for printing, a large format negative, two brushes or rollers, and two bowls. If you’re unsure how to make your own large negative, we have just the guide for you.
Step 2: Test

Before starting this project, it is important to test your fabric. Apply bleach to a small scrap and see how the fabric reacts. Look for a fabric that lightens a lot, and is sturdy enough to not dissolve when bleach is applied.
Step 3: Bleach

Dilute the bleach by mixing equal parts bleach and water. Use a brush or roller to apply to an area slightly larger than the negative. We used a ruler as a guide to make a 12” bleached stripe. Do NOT mix bleach and Inkodye! The ingredients in Inkodye can combine with bleach to make toxic fumes.
Step 4: Wash

Let the bleach sit for 10 to 15 minutes, then machine wash the fabric with laundry detergent or Inkowash. You want to make sure all the bleach is fully washed out before you apply Inkodye. Mixing Inkodye and bleach can create toxic fumes.
Step 5: Print

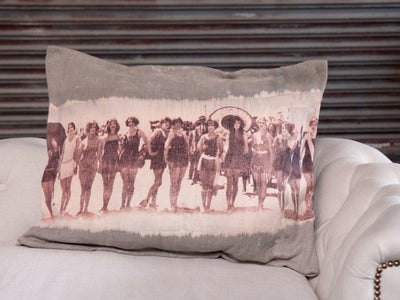
Using Inkodye and the magical power of sunlight, print your image onto the fabric panel. We mixed Orange and Blue dye to create a sepia tone, and left the print outside for 15 minutes to develop. If you would like some guidance on printing with Inkodye, our printing on cotton guide walks you through step by step.
Step 6: Wash
Machine wash your fabric panel with Inkowash to remove any undeveloped dye. This will keep your print looking clear and vibrant.
Step 7: Stitch
With a few simple seams and a bag of stuffing, bring your pillow to life.
Step 8: More!

Why stop here? This technique will work great on jeans, shirts, or anything else in need of a new design.


