

Introduction: Book Sculpture: H.C. Andersen


The book sculpture I made has some parts that have to do with H.C. Andersen and parts that are in his stories. The center piece of the sculpture is an old oak tree. The only story which is really in the book on which it stands. One of its roots lifts a top hat. This hat is often associated with H.C. Andersen, so it couldn't miss from the sculpture. Since he wrote stories, another root lifts a small book 'written' by him. In one of the corners is a pea, also a fairy tale from Andersen. And two of his most famous stories can also be found on the book, the steadfast tin soldier and the little mermaid.
This instructable is a collaboration with my girlfriend. She made the top hat and made me make more than one drawing before starting the real build.
More book sculptures:
- The Scottish book sculpture mystery - Several book sculptures were found in Scotland without knowing who it was.
- fartoomanyideas.deviantart.com/
Thank you voters for voting. I will enjoy my prizes thanks to you.
Update 16-4-2014:
Added the paper ballerina from the Steadfast Tin Soldier.
Step 1: Materials

- 2 Books, one to make the sculpture on, one to sacrifice.
- Glue, just the ordinary paper glue.
- Steel wire.
- Scotch tape.
- Toilet roll.
- Scissors
- Pliers
Step 2: Research & Design


Before starting the build I made some designs on what I wanted to build. An initial though and three of these designs can be found here. The three designs all use the book different.
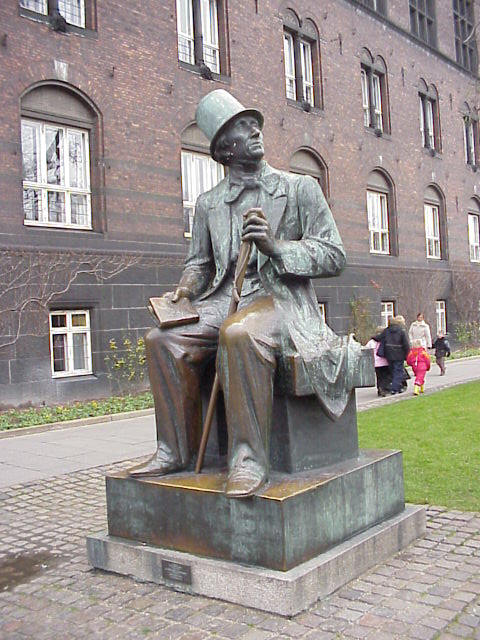
- This statue of H.C. Andersen can be found on HC Andersens Boulevard next to the City Hall in Copenhagen.
- The idea of the closed book was that those three figures released all other story figures from the book.
- The 'standing' book was my favorite, but didn't include the mermaid my girlfriend really wanted.
- The lying book was finally chosen to become the sculpture. Eventually I was happy this one was chosen, since that three is a lot easier to make.
Step 3: Top Hat


The top hat was made the same way papercraft works. A special edge to glue was added to each piece of the hat. We chose to make the lines of text horizontal instead off at an angle or at random. This works to show the symmetry of the hat. The top of the hat is made of an oval were the bottom is round. A belt was added just above the brim. Because the top hat is often associated with H.C. Andersen, it was our idea to have his name on this belt as main indication in the sculpture that is was a sculpture on his fairy tales.
Step 4: Small Book


The small book was the first part that was made and has many details in the cover.
The cover is made as explained in this instructable. As cardboard material the cover of the sacrifice book is cut to the size of the small book. The cardboard wrapping is a blank page out of the sacrifice book. On the front of the book a selfportrait of H.C. Andersen can be found, which was in the sacrifice book, and the text H.C. Andersen. the spline of the book contains the title of one of the books he wrote. The back of the cover shows a list of fairy tales written by Andersen.
The inside of the book are just some pages of the sacrifice book. The side of the spline is glued with a thick layer of glue, so it is possible to open the book.
Step 5: Mermaid Tail


The most well known story of Andersen couldn't be missed in this sculpture. So here it is, the little mermaid. The tail itself is kept white on purpose, the rest was made of text to give it some contrast.
Step 6: Tin Soldier


The soldier is build from several tubes, all with different diameter. During the building of it I tried to give it some coloring. I did this by using text for colored places and white for white spaces. To get an extra dimension I cut a picture from the sacrifice book to use for the hat. The picture I chose for it has some lining, this way it looks like the hat has a certain flow to it. A nice touch is the fact that below his belt the text Andersen is visible. I didn't do this on purpose, but is adds something to the complete soldier.
Improvements:
- Make a gun
Build the ballerina from the story like in the design.
Step 7: Paper Ballerina


The story of the steadfast tin soldier contains a paper ballerina. This is the last addition to the build. It is used as part of the story and to put the tin soldier vertical, since it stood not completely vertical by itself. The main inspiration comes from the same reference as the tin soldier.
The ballerina is maid approximately the same as the soldier. It consists mainly of tubes and some small extra additions. The head, neck, arms, torso and shoulders are made from tubes of different sizes. The legs are made of tapered tubes to give the effect of stretched feet. The skin of the ballerina is made of white paper, the dress is made of text. Again this is done to show the difference between the two The hair flows with the text, as can be seen in one of the pictures. By giving the hair a little curl at the tips, the ballerina gets a real girly look to the head.
Step 8: Pea


Can't say much about the pea. Just fumble up a glued piece of paper, let it dry and place it in a corner between some pages. Between those two pages I added glue to get a nice shape of the paper. You can see the place I glued in the picture indicated with a solid red line.
Step 9: Tree


The tree was the biggest, hardest and most fun piece of the build because it needed to hold the book and hat and has a complex shape. I build it in three steps, in step 1 I build the tree from steel wire and a toilet roll. In step 2 I made my own 'clay' from paper and used that to form the tree and finally I made it look like a paper tree again with a gigantic leave. The three steps are explained next.
Step 1:
I started with a toilet roll which I cut to fit in the book. As can be seen in one of the pictures, it sticks out at the backside. This way the tree can't move forward. With some steel wire I laid out the basic shape of the roots of the tree. I planned on removing them as step 2 was finished so only the book and glue was used. This didn't work however, so I left it in the sculpture.
(Please don't tell anyone so they think it's all book and glue.)
Step 2:
Step 2 was forming the tree. I therefore took the paper and put lots of it in water to create a mash. I used my hands to fight the paper fibers and eventually made them small. As soon as the fibers of the papers were small enough I wrung out all excess water and added lots of paper glue. The paper mash glue combo was mixed properly and it then forms some kind of home-made clay. I put the tree on the sacrifice book and started to form the tree. I used the sacrifice book because the mash was wet and the book pages would wrinkle during drying. As soon as it was dry it was time for step 3.
Step 3:
Just old fashioned paper mache with tiny pieces of paper. I added water to my glue, then the pieces of paper turn wet which makes them easier to fold to the shape of the tree. The root pointing to the sky doesn't look good, but is only needed for the top hat. Again, to create some nice contrast, I added parts of pictures of the book and white pages. Eventually, to show it was an oak, I made one big leave and glued it on the top. When looked at from nearby, one can see that I made some folds in the directions you would also see in a real leave. It is not clear from the picture, so I added some lines in paint.
Step 10: Assembly


As soon as all separate parts are finished, it is time for assembly. The first part to be placed is of course the tree, the center piece of the build. It is glued to the book at several places. Second comes the top hat, it is placed on the root pointing in space, this is the only piece of the sculpture which isn't glued to the rest. The small book is glued to the book rest. At first it was my idea not to glue the book, but the root of the tree didn't support the book enough so it had to be glued to prevent it from falling. The tin soldier and the paper ballerina are glued on next. Because they both only stand on 1 foot, they are glued together to make sure both the soldier and the ballerina stand straight, this can be seen in the ballerina step. The ballerina is also placed a little behind the soldier because the soldier is the main character of that story, not the ballerina. Finally the mermaids tail was glued to the book. (Remember that the pea was already glued in place.)
Thanks for checking out my instructable and have fun making you're own book sculptures. Like to see what you made, so when you did, please post them in the comments.

Second Prize in the
Papercraft Contest


