

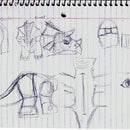
Introduction: Bowser Costume


Hello there! Bowser was my first choice to put up on instructables.com because it’s one I can easily access photos and video right now and I tend to get the most questions on. Though I’ve learned to improve many mistakes form a previous suit, this one was challenging, fun and well liked by many fans of the games.
I’m not really sure how to explain it as a step-by-step tutorial but I’m willing to give it a feel of tell you what I did step-by-step and letting you figure out the rest.
I would not recommend it for the faint of heart I’ve spent over $375 ( including recent repairs) on materials alone and hundreds of hours spent thinking and developing how to build some parts of it. Let alone around 200 hours of building it. in total it took me around 9 months to finish and debut on a deadline for an anime convention.
It is a fairly heavy costume. I would highly recommend it for a heavy set person to fill out the character’s personality and proportions really well.
Step 1: Design


I decided how to ware the shell as a ‘backpack’. But I didn’t want the straps to show. So the body suit would have a open back like a ‘smock’ or ‘scrubs’ where it would tie in the back, this design also helped with air ventilation.
I wondered how many ‘pieces’ this suit will take and how much space it will take in a room or car. THIS part is very crucial. This suit of mine takes up A LOT of room and space. Not because I’m a big person and this suit makes me even ‘bigger’ the largest piece is the shell and it’s awkward to pack around and store. But thanks to my father it hangs in an open closet stand quite nicely but still takes up a chunk of space in my room.
This suit ended up being 8 detachable pieces. Head, shell, suit, Left hand, Right hand, Left foot, Right foot, and tail.During the designing process I also tried to visually putting it on and what process I would take to do so. This ended up being a bit of a ritual but the time spent on putting it on is quite easy if no steps are skipped.
I also did a lot of research on the internet and looked over Deviant art, Cosplay.com, and Google images to find ANY and all previous Bowser costumes I could find. With a mix of Gijinka, poorly built, well built, and intriguing designed ones I gained an understanding what I’d be faced up against trying to build such a monstrosity. I also looked up and gathered original art form Nintendo. As well as Fan art from devoted fans of the franchise and games, also fans of King Koopa himself.This gave me an understanding what Nintendo wanted the character to be portrayed as and what the fans saw Bowser as. I also take still shots of animation and videogame animations to get a understanding. I tried to find a well made 3-D model of Bowser, or a toy of some sort but I found nothing I would be willing to buy as a reference.
I also looked up Turtles for the shell, Bull horns for Bowser’s horns, and stubby legged creatures. I did gain a reference form Riley’s CanineHybrid’s Groundon costume that also shared stubby legs and it hlepd me a lot with making Bowser.
Step 2:
The main structure is made out of a body suit, round snow sled (shell), lots of Upholstery foam, and tons of hot glue.
Other materials in this order included a pair of shoes, floor mat foam, pipe insulation foam, Scrap fabric, elastic, sewing necessities (thread, needle, scissors, sewing machine, serger) Balaklava ski mask, fabric paint, acrylic paint, clear casting resin supplies & kit, and Crayola model magic foam clay.
As for fabric I chose to deal with fleece, having previous experience sewing it on machine and by hand. Also easily gave a ‘smooth cartoon-ish’ look to it.
Plus it came in many colors. Yellow, white, cream/Ivory, dark green, gold, and orange. I got a full bolt ( 8 yards) of Yellow, but only used about 5-7 yards of it. 4-6 yards of dark green, 3 yards of Ivory, and one and a half yards of white. little amounts of orange, and gold.
I got fabric from the remnants bin when possible to save a few dollars.
A year before I was strangely attracted to the silver fabric that was in a remnant bin and had to have it. later it turned out to be the ‘metal’ spikes on the collar, forearms, and wrists. The black fabric on those bands where crudely sewn by hand taffeta.
Oh and polyfil was used for the tail, and hair.
I bought most fabric and foam from Jo-Ann fabric store. The
**All materials listed will be referenced from in the process in which they are used.
The first calculation of price spent was nearly $300. After re-skinning repairs to the ‘boots’ and the bodysuit, it is now a total of $375.
Step 3: The Shell


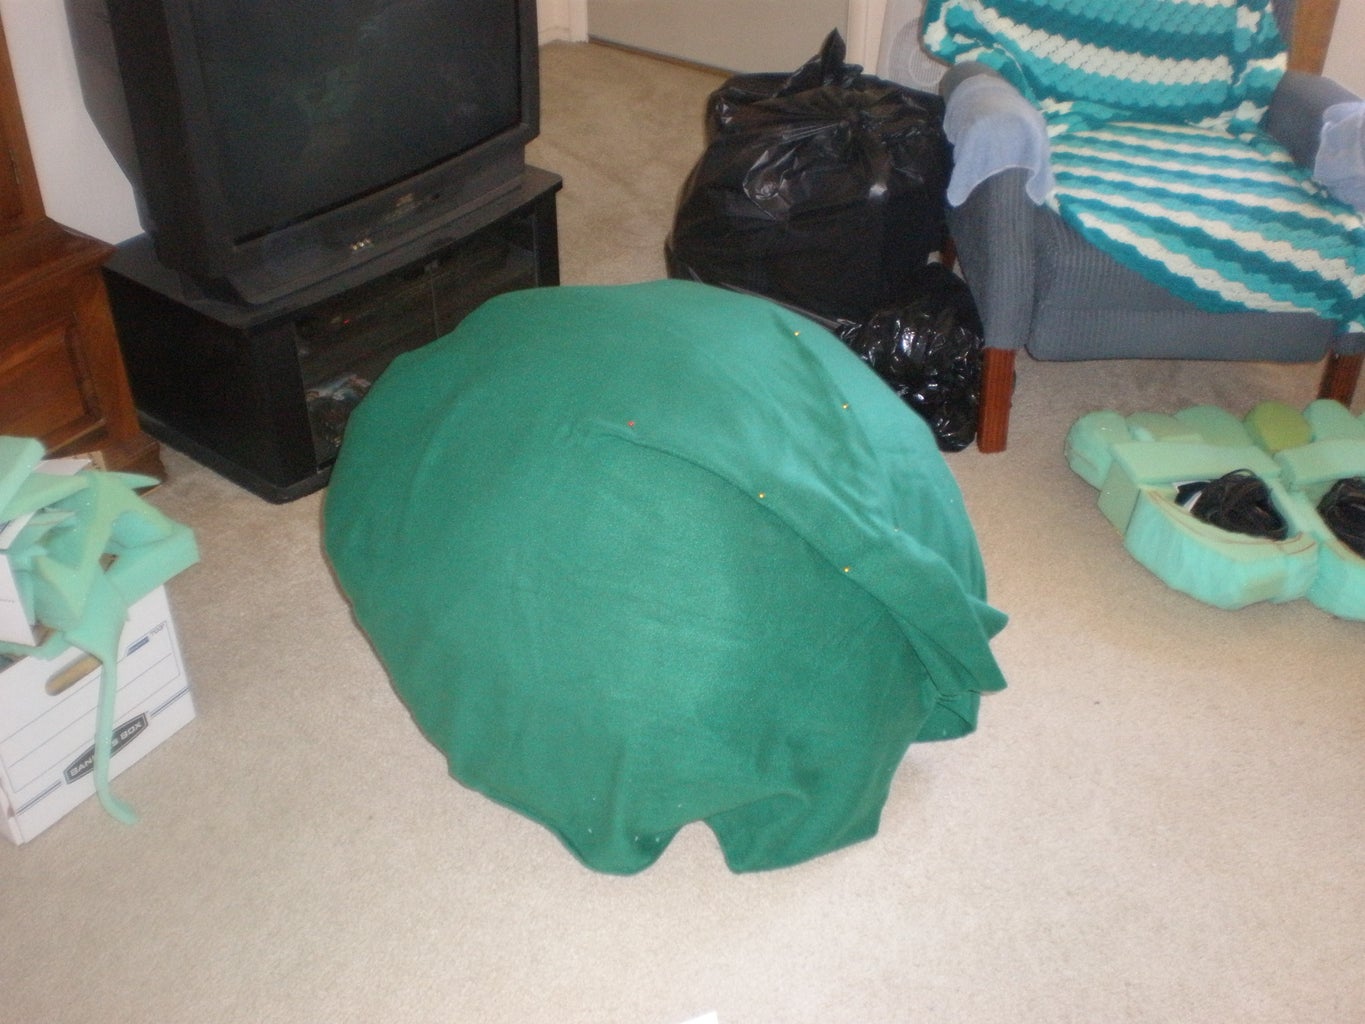


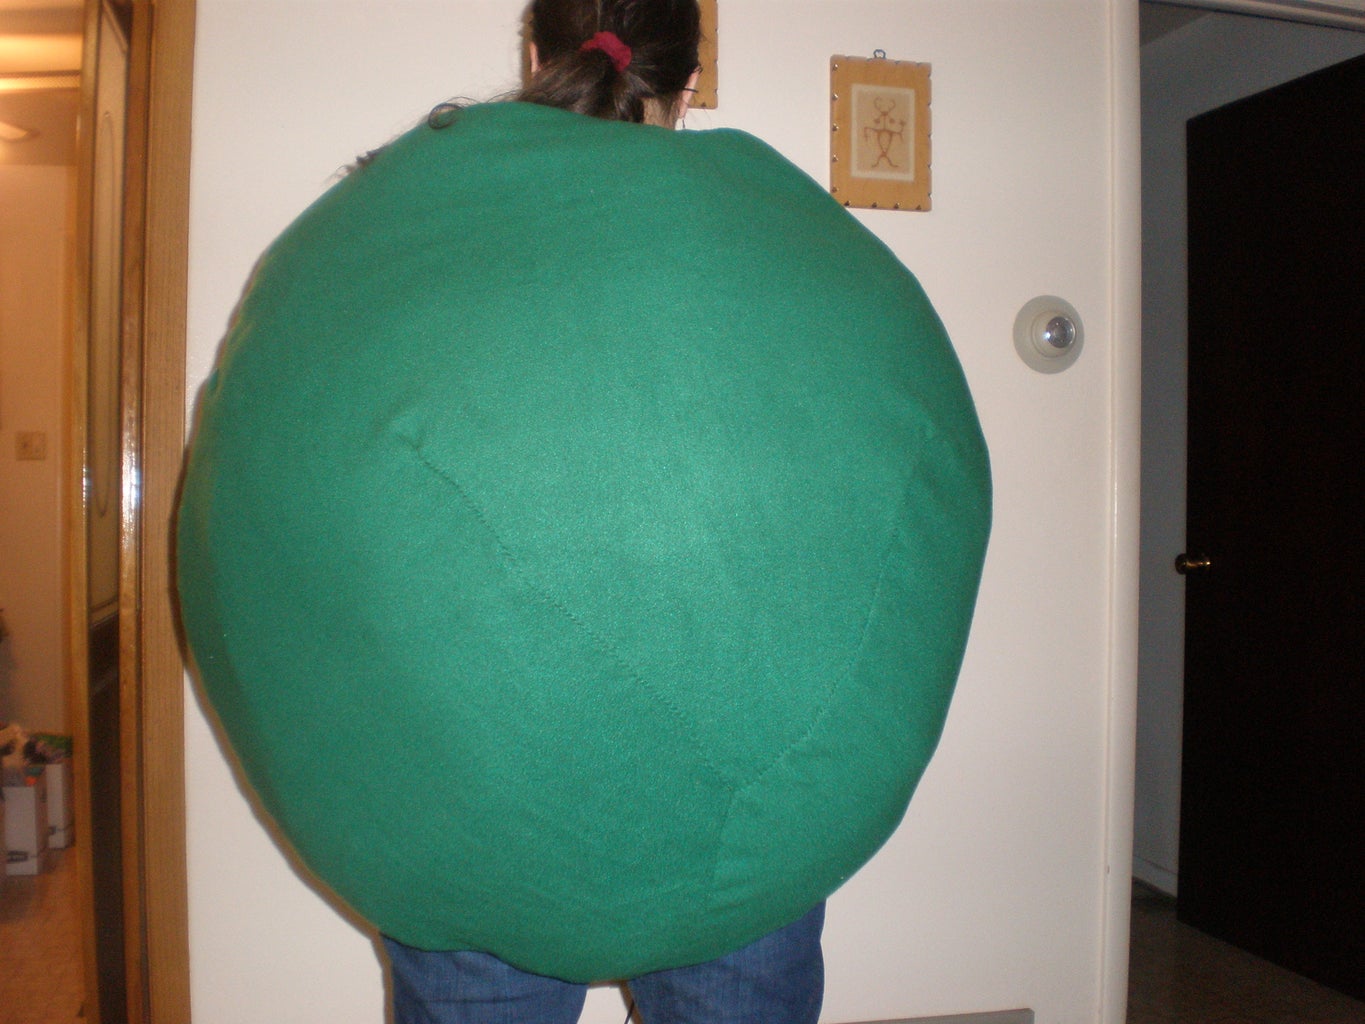


I then added the pipe insulation foam for the ‘rim’ of the shell. Cutting and gluing to make the perfect indents and curves. I covered that in quilt batting and then white fleece. The spikes where a small base of upholstery foam, polyfill stuffing, white fleececone and gold fleece ban around each cone. The spikes where glued and sewn onto the shell itself.
On the inner side of the shell where the adjustable straps that where threaded though the handles of the sled , and a hidden pocket. Sewn into the ‘black space’ fabric to hold my glasses, wallet, and what-nots while I’m wearing the suit.
Completed it weighs around 5-9 pounds.
Step 4: The Head


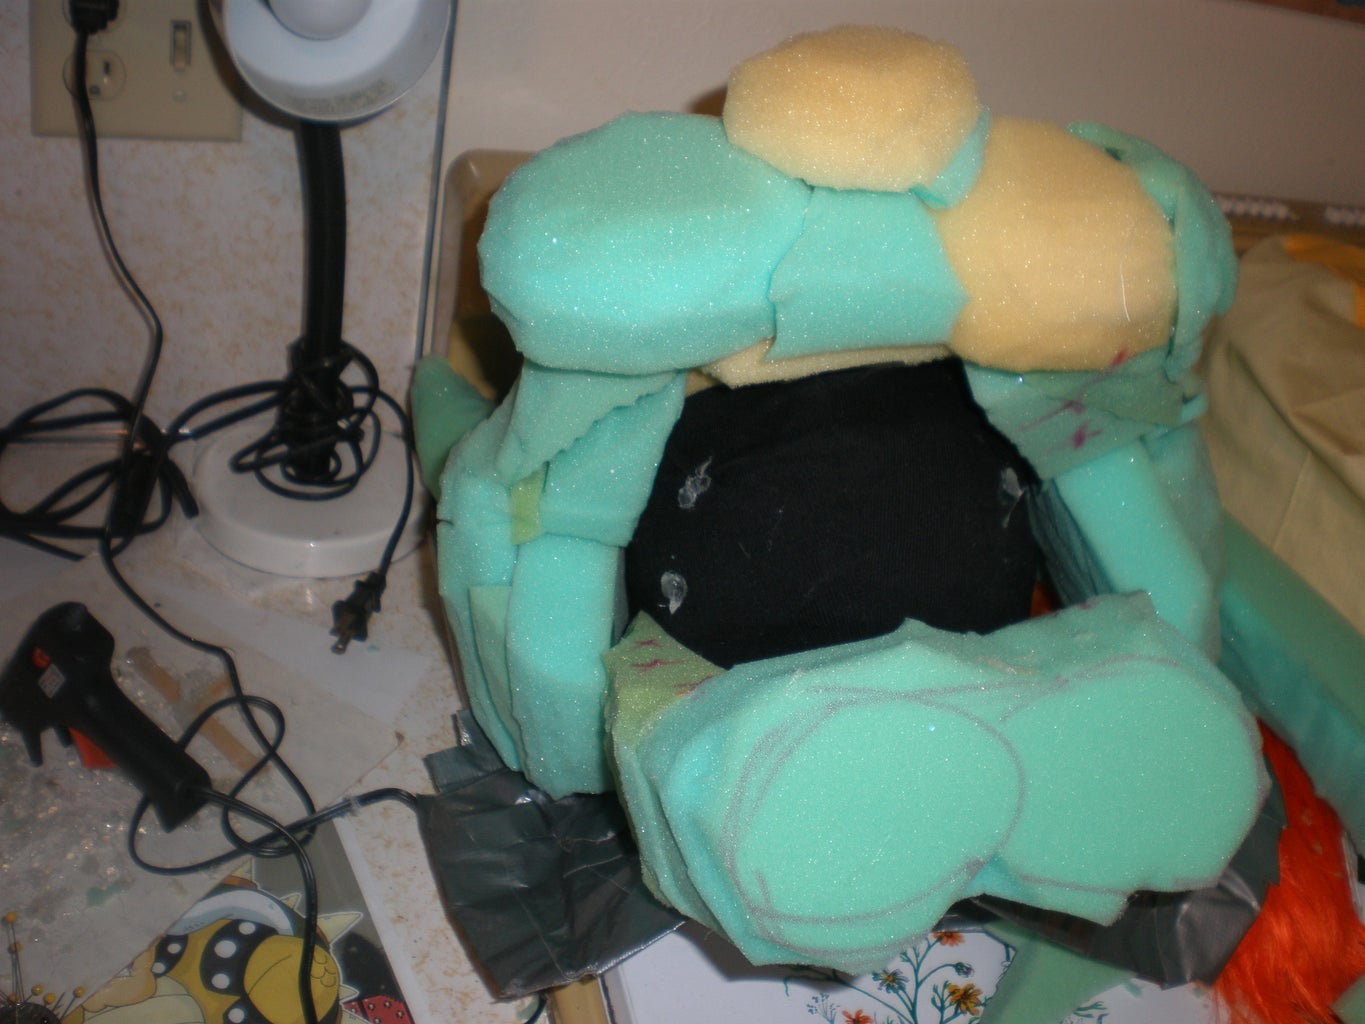


I wanted to make it as a
I wrapped and glued this frame piece to the Baklava so I’d have room for my face. And from there added eyebrows and cheeks and the begging of the muzzle. Bowser’s muzzle is a continuous line of circular shapes. I must admit it was not easy to replicate. I do spend a lot of time cutting shaping, sculpting , gluing back on pieces. To make it look right to my own satisfactory. And it does look like a mess but the outcome is worth it.
At first I wanted a semi-realistic approach and wanted to add ‘hair’ or ‘fur’ for his hair on top and eyebrows but it turned out looking rather ridicules.
The eyes where made at a early stage of sculpting the head. They’re mad from a easy cast clear casting resin kit. With acrylic paint to color. They where placed and removed multiple times while making the mask.
The white of the eyes is sheer white fabric.
I added the jaw at a time thought of having a hinge to make it ‘move’ but alas it did not work with what I had and decided to have his mouth partially open as many of his picture depict him acting. The jaw was re-adjusted many times.
The first pair of eyebrows where replaced with bigger and more well shaped ones.
I used a drape technique to skin the mask. And most of it is hand sewn.
Most of the fabric is fleece.
The lining of the mouth is a left-over scrap fabric, with Sheer Black for the back of the mouth. This is where I mainly saw for my vision, and had for ventilation.
The teeth are made out of white Crayola model magic foam clay.
I learned form this mask a valuable trick, do the inside of the mouth first before skinning anything else.
The hood is quite small due to being tucked and hidden by the collar.
The hair on top was one of the last things to finish. Made into sections of curved ‘triangular’ pieces. Much like a plush and stuffed with polyfil.
The nostrils are painted on with black fabric paint.
A latter addition to the head was installing a small battery powered computer fan for instant AC. This was tricky to put in, so I’d highly recommend putting the fan inside a mask before skinning it.
Step 5: The Boots


With deliberation on if I should have the thigh, knee and leg padding on the suit and the foot separated I decided the look would work if I put the whole leg as a boot, ant that’s how it ended up to be. At this point I was running out of funds and foam to build from so the structure of the boots is very flimsy. But this is how I made it happen. I’d highly recommend others to try a different approach. I made elastic ‘grab’ pants leg that was the lining inside the boot, and then I built from a base upward. I attached my pair of shoes to the foam mat that was cut out to be the bottom of the foot. Made the shoes removable by elastic straps. And started to build with pieces of foam upward to make the foot and the leg. It turned out to be a rather hodgepodge of a mess. I re-used the thigh padding I built for my previous costume Renamon, I know it’s horrible, costume cannibalism :~:
But it had to be done. Layered with quilt batting and then draped with yellow fleece. A little white fleece was used for the toes. And most of the rest was molding by fleece or foam.
Step 6: Body Suit and Bands


I made a scratch one suit. ( shirt and pants sewn together) that tied in the back, behind the neck. I glued on card deck sized pieces of foam for the bands, draped black taffeta that is crudely hand sewn. And the spikes are made out of silver pleather like table cloth material shaped as a cone and sewn onto the bands. Last little detail was matching fabric paint around the rim that made it look even more like metal. The suit started out on the belly, where I made a mat of cream colored fleece and quilt sewed the lines or ribs. The mat was egg shaped and placed on the suit. Then around that was draped yellow fleece that covered the rest of the suit.
A later addition to the suit was a pillow in the front to make Bowser a little fatter.
Step 7: Gloves


I made a cloth glove out of scrap fabric, Bowser has four digits, so I modified the gloves so that my pinky and ring finger are bound together. I added small pieces of foam quilt batting and even padded up the wrist. Draped in yellow fleece and hand sewn. The claws are made out of model magic clay similar to the teeth, and the bands are card deck sized pieces of foam with draped black taffeta crudely hand sewn with the spikes being silver pleather like table cloth material shaped into a cone and painted matching fabric paint around the rim which made a cool effect of looking like it was ‘wielded metal”
Step 8: Tail


The tail was fairly easy. Two curved triangular pieces with a gusset in the middle. (bottom) stuffed with Polyfil. The spikes where made the same way as the spikes on the shell. And the tail is held up with a nylon strap & buckle belt.
Step 9:
This is a short video of the ‘ritual’ on putting on the Bowser costume

Third Prize in the
Halloween Epic Costumes Contest


