

Introduction: Build a Gaming Computer

Today I'll be showing you how to put together an awesome gaming rig. Granted, it's not much different than building a regular PC but there are a few tips & recommendations I have for you guys. Before we begin, let's discuss what you'll need.
~~~
-CPU (Central Processing Unit, or processor)
The single most important part of your machine. This is the brain of your computer, computing everything from word processing the the physics in your hardcore shooter games.
-RAM (Random Access Memory)
This stores everything that is being used in real-time. When the computer is off, RAM is empty.
-Graphics Card
For a gaming PC, you will need a discrete (seperate) graphics card. Using the onboard chipsets of motherboards and integrated graphics of processors just won't cut it when slaughering dragons in Skyrim.
-Hard Drive
This is where the operating system (Windows), your games, music, and videos are stored! You need this (kinda.)
-PSU (Power Supply Unit)
Pretty straight forward, this supplies power to every component in the computer.
-Optical Drive
This is for your DVDs and CDs
-Motherboard
Everything connects to the motherboard in some way. It connects components the way roads connect people.
For recommendations regarding the above parts, I recommend visiting the tomshardware.com forums.
NOTE: This list does not include the OS (Operating System)
~~~
Step 1: Tools

All the tools you need, if any, is a standard Phillips-head screwdriver.
Step 2: Open the Case

Unscrew the thumbscrews on either side of the case to open both sides up.
Step 3: Install the CPU


Remove the CPU from its protective plastic. Do NOT touch the gold pins on bottom! On the motherboard, push the cpu cover up and then the lever on the side. Place the the CPU in gently, using the arrows to line it up correctly. Then push the CPU cover down firmly but not roughly. It will fell quite hard. This is normal.
Step 4: Add the Heatsink

The heastsink will fit right over the processor. It has 4 screws (sometimes tool less tabs) that will have to be secured.
Step 5: Install the RAM

Unlock the clips on the RAM slots, then install the RAM modules in the appropriate slots. There is a groove in the RAM that corresponds to the slot. Push down on both sides of the module, and then replace the clips over the module. Repeat for additional modules.
Step 6: Attach the I/O Shield

Your motherboard will come with a small metal piece that fit over the ports on the motherboard. This goes in a rectangular hole in the back of the case. Simply snap it into place.
Step 7: Install the Motherboard

Place the motherboard in the case and slide it until the ports fit through the I/O shield.
Step 8: Secure the Motherboard to the Case


Your case should come with some screws. The number of screws required depends on your motherboard and case. Refer to their respective manuals for further details. Use the screws to secure the motherboard to the case. It's a good idea to put then all in loosely then secure them tight. Not too tight, otherwise you'll crack the PCB of the motherboard which... isn't good.
Step 9: Install the Graphics Card


Remove the expansion slot covers on the back of the case, and slide the graphics card into place, then push it down into the slot on the motherboard until it clicks firmly into place. Then secure with the thumbscrews.
Step 10: Installing the Hard Drive


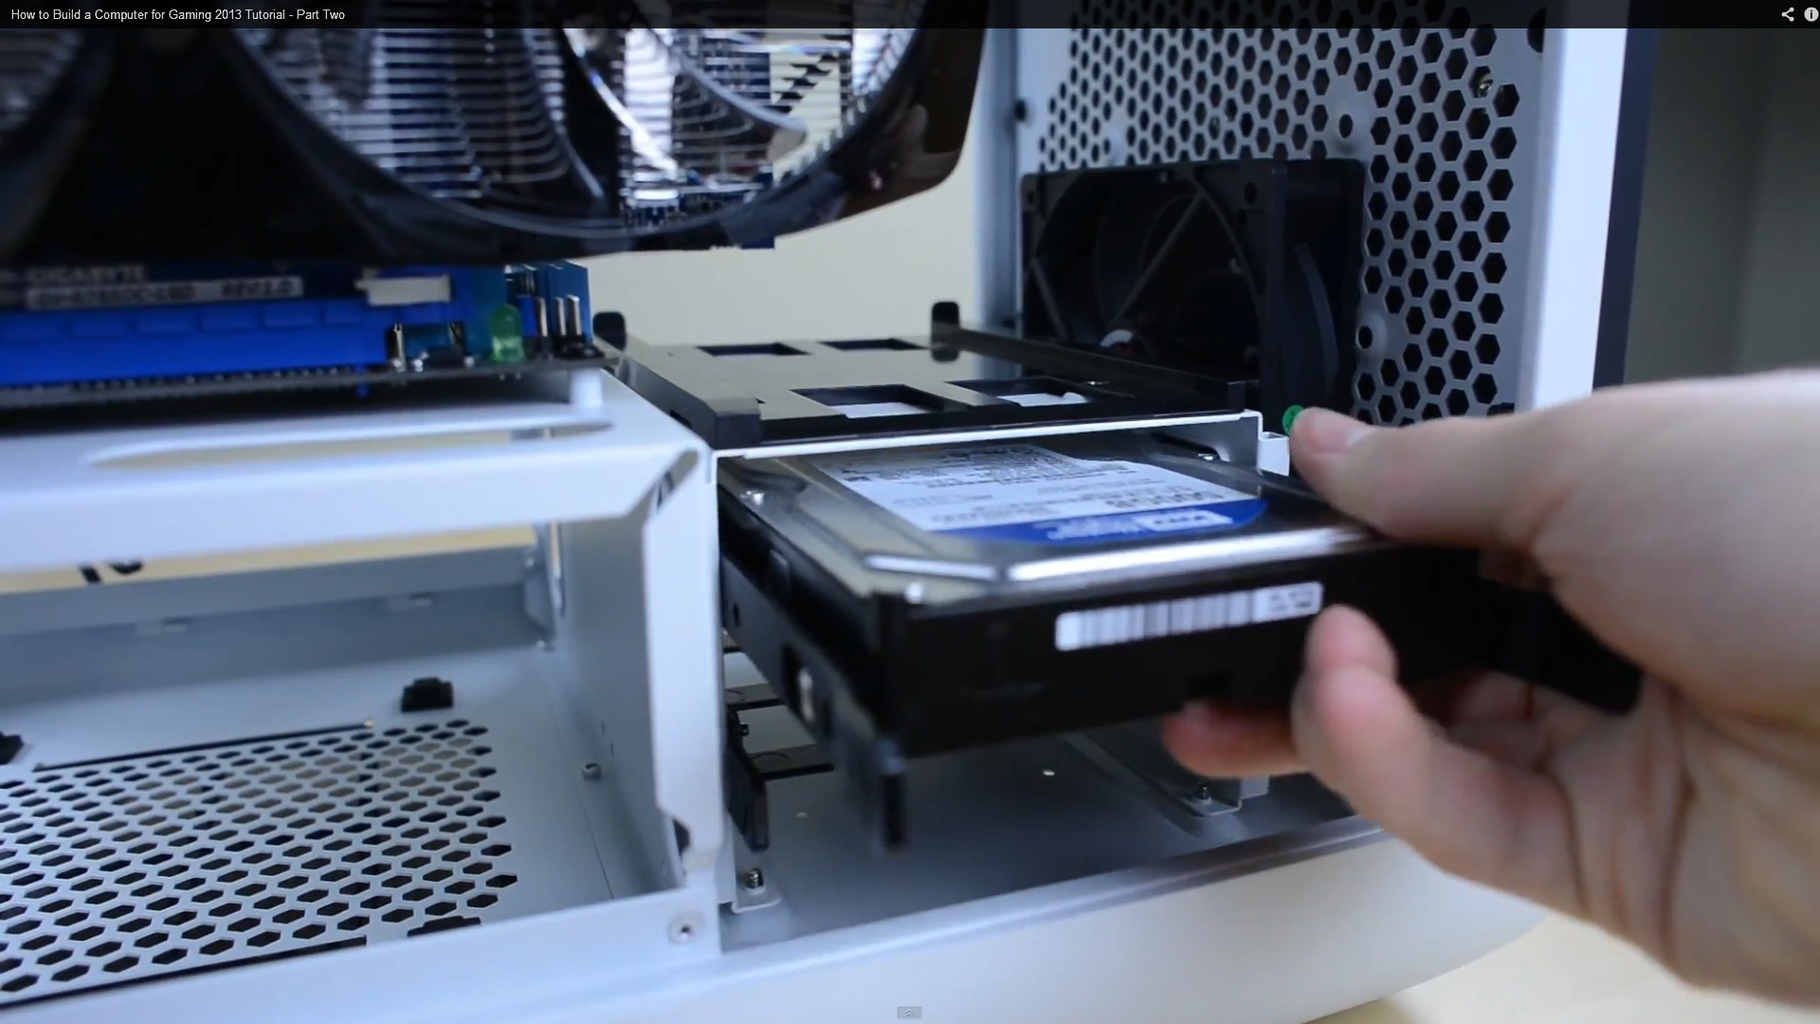
Remove the hard drive bracket from your computer. Secure it to the back of your hard drive. Slide the bracket with the hard drive back into the drive bay.
Step 11: Install the Power Supply.


Remove the thumbscrews securing the power supply bracket. Attach it to the power supply with the included screws. Then thread the cables through the case, and push the PSU until it is flush with the case. Make sure the PSU does not choke any cables.
Step 12: Attach USB 3.0 Cable

Attach the blue USB 3.0 cable in the indicated spot.
Step 13: Attach HD Audio Cable

Attach the HD audio cable to the indicated spot beside the RAM and graphics card. It may help to remove the graphics card temporarily.
Step 14: Remaining Cables

There will be some remaining cables for your motherboard. Refer to the manual on how and where to attach these for your specific model.
Step 15: Connect Graphics Card Power Pins

There will be a 6-pin PCIe connector coming from your power supply. This powers your graphics card. Some graphics cards need two of these, others need none. There will be ports on the top of the graphics card.
Step 16: Connect PSU to Motherboard


There will be a 24-pin connector that powers the motherboard. Connect in the indicated spot.
Step 17: Connect Power to Hard Drive


There is a sata power cable with a protruding connector. Hook this into the hard drive. It will only fit in one way.
Step 18: Plug CPU Power Pins In

There will be a CPU power pin. It should break into 2 parts for motherboard that only use one half.
Step 19: Heatsink Power

Next is the heatsink power cord. It comes off of the heatsink itself.
Step 20: Attach Case Fans to Power


The case will have a small 3 pin connector for the case fan. Hook this in the indicated spot. There will be another in the back that will need a 3-pin to molex adapter. Hook the adapter into the PSU and the other end to the 3 pin connector.
Step 21: Attach Hard Drive to Motherboard


The motherboard comes with a SATA cable. Connect one end to the hard drive and the other to the motherboard.
Step 22: Turn on PSU

Flip the switch on the PSU.
Step 23: Power On!

Press the power button on the case and (hopefuly) the computer turns on! (You still need to install the OS and drivers. I have a guide on this upcoming.)
Thanks to duncan33303's youtube video for the photos.


