

Introduction: Build a Raspberry Pi-Powered Amazon Echo


This Instructable will show you how to build your own Amazon Echo from a Raspberry Pi, some off-the-shelf components, and a laser cut frame. The Echo Pi has almost all the functionality of the real Amazon Echo.
The Amazon Echo is a nifty virtual assistant/home automation product that you have almost certainly heard of before if you've accessed the Internet at least once in the last year. The device is controlled by voice commands given to the artificial personality, Alexa. Amazon Echo lets you do many things from converting measurements in the kitchen, to playing music, to controlling a range of smart home products.
In this Instructable we will be building our very own Amazon Echo using a Raspberry Pi and a couple other off-the-shelf components, plus laser-cut pieces. Our Raspberry Pi-Powered Amazon Echo, that I call the EchoPi, will have almost all the functionality of the real thing, plus building your own Echo will give you a platform for experimenting with the service by giving you an easily modifiable version of the Echo.
The only feature available in the real Amazon Echo that is not available on the EchoPi is Amazon Music. According to the Amazon Developer page, "Amazon Music is currently limited to Alexa-enabled products approved for commercial distribution and use."
Let's get started.
Step 1: How Does Amazon Echo Work
TL;DR Most of the Amazon Echo's capabilities are powered by Amazon's cloud services, not housed in the Echo itself. The hardware inside the Echo is relatively simple, meaning that we will be able to build our own Echo with a Raspberry Pi.
Before starting to build our EchoPi, it will be useful to understand how the real Echo actually works. The hardware inside the device itself is actually fairly simple. All of the technology that powers the platform's higher level functions, all of its voice recognition features, Internet connectivity features, and the engine that finds answers to your queries, is housed in Amazon's data centers.
Inside the Amazon Echo device itself there are basically two main systems. First there is the audio system responsible for playing back answers to questions you ask Alexa or playing music. There is nothing groundbreaking about the Echo's audio system, it is just a loudspeaker and an amplifier, a technology that has existed for about 100 years.
The second system is more sophisticated. In order to listen to your commands, the Echo has an omni-directional microphone system consisting of six microphones arranged around the perimeter of the Echo's circular housing, plus a seventh microphone in the center.

Image from the iFixit Amazon Echo Teardown
The Amazon Echo has a system that constantly listens for you to say the word "Alexa," which arms the system for receiving your command or query. Unlike some alarmists would have you believe, this does not mean the Echo records every single thing happening in your home, it just listens specifically for the word "Alexa."
After capturing the audio of your command the Echo uses its Internet connection to send a file of the audio clip to Amazon's Alexa Voice Service (AVS). The AVS does all the really difficult work of deciphering your voice command into a query a computer can understand. The AVS then finds the resources needed to answer your question, the other cloud services needed to execute a command, or the file to play a song. Once the AVS processes your command it sends a simple audio file back to the Amazon Echo. The Echo then simply plays the audio file.
So, basically, the hardware inside the Amazon Echo itself is nothing too advanced. It is certainly innovative, especially the omni-directional speaker system and the launch phrase detection system, but it is not as if a super computer voice recognition system lives inside each Amazon Echo. There is an extremely advanced computer system behind the platform, but it is housed in some Amazon data center somewhere. The Echo works by communicating with this more advanced system, called the Alexa Voice Service. A Raspberry Pi has more than enough computing power to replace the motherboard inside an Amazon Echo and give us a platform for building our own Echo device.
Step 2: Gather Your Parts


You will need the following hardware to construct your very own EchoPi. In addition to the parts below, you will also need the frame parts, which are made from laser-cut acrylic.
| Image | Part | Quantity | Source |
|---|---|---|---|
 | Raspberry Pi 31 | 1 | Adafruit |
 | Audio Amplifier | 1 | Adafruit |
 | Red Stranded Wire Spool | 1 | Adafruit |
 | Speaker | 1 | Adafruit |
 | Black Stranded Wire Spool | 1 | Adafruit |
 | 3.5mm Audio Cable | 1 | Amazon |
 | USB Microphone | 1 | Amazon |
 | Silicone Bumpers | 1 | Amazon |
 | Header Wiring Kit2 | 1 | Inventables |
 | USB MicroB Breakout | 1 | SparkFun |
 | 16mm Aluminum Spacer | 20 | McMaster Carr |
 | 6mm Aluminum Spacer | 6 | McMaster Carr |
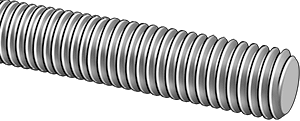 | 2.5mm Threaded Rod | 2 | McMaster Carr |
 | 2.5mm Nut | 18 | McMaster Carr |
 | M2.5 x 22mm Screw | 2 | |
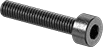 | M2.5 x 14mm Screw | 2 | McMaster Carr |
 | M3 Nylon Nut | 4 | McMaster Carr |
 | M3 x 14mm Screw | 4 | McMaster Carr |
In addition to the parts listed above, you will also need a couple tools for setting up the software on the Raspberry Pi:
- USB keyboard
- USB mouse
- HDMI cable
- HDMI display
1 You can also use a Raspberry Pi 2 for this project, but you will need a USB WiFi Adapter since the Raspberry Pi 2, unlike the Pi 3, does not have built-in WiFi.
2 If you do not have one already, you will need a crimping tool to create the jumper cables. I use one from Inventables.
Step 3: Laser Cut Frame Parts


The Raspberry Pi 3, the speaker, and the rest of the components that make up the EchoPi will be housed in a frame made from laser-cut black acrylic. I designed the frame to resemble Amazon's Echo Dot do some degree, but I decided to go with a more distinctive pentagonal design.
All of the design files for the EchoPi frame are housed in a repository I created on GitHub. If you own a laser cutter, you can use the .ai file in the repository to modify the template to fit the requirements for your laser cutting software. Otherwise, I also included a template for getting the frame cut by Ponoko, a laser cutting service that I have used on dozens of projects and that I highly recommend.
Step 4: Connect USB Hardware to the Pi

We will be building the EchoPi in two phases: first we will connect the Raspberry Pi to a display, keyboard, and mouse to set up the software and make sure everything is working properly, second we will assemble the speaker and Raspberry Pi enclosure so that, in the end, we will have a device that resembles the real Amazon Echo and functions almost the same as well.
So, first we need to set up the work space we will use to configure the Raspberry Pi. So, using any of the USB ports on the Pi, plug in the USB microphone, the keyboard, and the mouse. If you are using a Raspberry Pi 2 rather than a Pi 3, you will also need to plug in a USB WiFi adapter. Finally, connect the Raspberry Pi to a monitor with HDMI.
Step 5: Install Raspbian Jessie With PIXEL


First we need to install Raspbian Jessie on the Raspberry Pi. While it is not strictly necessary for this project, I like to use Raspbian with PIXEL for my Raspberry Pi projects because it is so much nicer to work with than doing everything over SSH. Head over to the Raspbian Download page and download the .zip file for "Raspbian Jessie with PIXEL." Install the operating system the same way you would install any other operating system on the Raspberry Pi.
It takes a little while to download and install Raspbian with PIXEL, so now would be a good time for a cup of coffee.
Step 6: Clone the EchoPi Code From GitHub


With Raspbian with PIXEL installed and the necessary hardware connected to the Pi, we can begin setting up the software. This project is based on Amazon's alexa-avs-sample-app GitHub repository.
First we need to make sure our Raspberry Pi has an up-to-date list of all the packages we will be downloading along the way. So, open the terminal and input sudo apt-get update. Updating the package list can take a few minutes.
I like to work in a more familiar location, like the desktop. To change directory, run cd Desktop/. Then, clone the repository with git clone https://github.com/alexa/alexa-avs-sample-app.git. You should see the alexa-avs-sample-app folder appear on the Desktop.
Step 7: Register for an Amazon Developer Account


In order to use the Alexa Voice Service, you will need to register for a free Amazon Developer Account. This is because Amazon actually needs to grant permission for the Raspberry Pi to access their services. Go to the Amazon Developer site to set up your account. The account setup process should be familiar to you from other websites' account setup forms.
Next, at the top of the screen, click Alexa. On the next screen, select Get Started. We will be registering a new product by filling out a fairly straightforward form. The ultimate goal of this process is to obtain a set of codes from Amazon that will authenticate our EchoPi with the AVS. Click the arrow next to the Register a Product Type button, and select Device.
In the Device Type ID field, enter something like "RaspberryPiEcho." Then, in the Display Name field, enter your own description, something like "Raspberry Pi Echo." Then click the Next button.
On the next screen, select the dropdown menu next to Security Profile and choose Create a New Profile. Fill out the Security Profile Name and Security Profile Description fields. You can use the same information here that you used in the previous screen. Then, click the Next button. The site will then generate three codes: Security Profile ID, Client ID, and Client Secret. We will come back to these codes later on as part of the installation process for the EchoPi code we cloned in the previous step. Above all the codes, click the Web Settings tab.
On the Web Settings page, click the Edit button on the right side. Enter the following information into the Allowed Origins and Allowed Return URLs. Replace the [IP Address] placeholders with the IP address for your Raspberry Pi:

After entering the information, click the Next button.
The next screen, the Device Details screen, is mostly just irrelevant information since we are not actually building a commercial product here. You do not need to upload an image unless you would like an identifier in your Amazon Developer account. After filling out the information, click the Next button.
The next screen is about Amazon Music. Because of music licenses, copyright laws, and other legal issues, enabling your EchoPi to use Amazon Music requires an application process. If you want to use Amazon Music, you certainly can by ticking the Yes box and filling out the form.
Once you are done, go back over to the Security Profile section because we will need those three codes later on.

Step 8: Update the Installation Script With Your Credentials

The alexa-avs-sample-app repository includes a script for automatically installing the software necessary for the Raspberry Pi to act as an Amazon Echo device. However, before we can run the script, we need to update the script with the credentials generated in the Security Profile section of the Amazon Developer site, which we set up in the previous step. To edit the automated_install.sh, first navigate to the alexa-avs-sample-app directory using cd alexa-avs-sample-app. Then, to edit the file, run nano automated_install.sh.
As indicated by the comments in the file, you need to paste the ProductID, ClientID, and ClientSecret from the Amazon Developer Site into the appropriate lines of the automated_install.sh file. After inserting your credentials, press Ctrl-X, and then Y, and then press Enter to save the file.
Step 9: Run Automated Install Script


Now that the automated_install.sh script file has your credentials, it is time to actually run the script. To run the script, first make sure your terminal is in the alexa-avs-sample-app directory, which is should be already, then run . automated_install.sh.
The installation script will periodically ask a few questions about how you want to configure the software. The entire installation process will take about 30 minutes to complete.
Step 10: Run the Web Service


Now that the software has been installed and configured, we will run the three components necessary for the Raspberry Pi to connect with the AVS, and recognize the "Alexa" wake word: the web service, the sample app, and the wake word engine. At this point we are merely testing the configuration to make sure everything is working properly while the Raspberry Pi is connected to a monitor. We will be repeating this step and the next two later on.
First open three separate terminal windows. We will run the web service, sample app, and wake word engine in three separate windows. In the first window, run cd ~/Desktop/alexa-avs-sample-app/samples to navigate to the alexa-avs-sample-app/samples directory. Then run cd companionService to navigate to the companionService directory. Finally, run npm start.
Step 11: Run the Sample App


Now you should have the web service running in one of the three terminal windows on your screen. Leaving the first terminal window open, and in this step working in a second window, run cd ~/Desktop/alexa-avs-sample-app/samples to navigate to the alexa-avs-sample-app/samples directory. Then run cd javaclient to navigate to the javaclient directory. Last, run mvn exec:exec to launch the sample app, which communicates with the AVS.
When you run the sample app, you will see a dialog box that reads
"Please register your device by visiting the following URL in a web browser and following the instructions: https://localhost:3000/provision/d340f629bd685dee... Would you like to open the URL automatically in your default browser?"
Click Yes to open the URL.
When Chromium opens, you may get a warning saying "Your connection is not private." To get around this, click Advanced → Proceed to localhost(unsafe).
Next you will be directed to a page requesting you to log in to your Amazon account. After logging in, you will be directed to the Developer Authorization page, confirming that you would like your device to have access to the Security Profile you created earlier. Click the Okay button.
Next you will be directed to a very simple web page that should display the message "device tokens ready."
Finally, minimize Chromium and press the OK button in the dialog box.
Step 12: Run the Wake Word Engine

In the third terminal window we will start the wake word engine. Just like the real Echo from Amazon, the EchoPi will being accepting commands when you say the wake word, "Alexa." There are two different wake word engines included in the repository, one called KITT.AI, the other called Sensory. I have tried both systems and they both seem to perform similarly in my experience so far. I will be using KITT.AI for this Instructable because it seems to be a slightly more high-profile platform.
Anyway, in the third terminal window, once again run cd ~/Desktop/alexa-avs-sample-app/samples to navigate to the alexa-avs-sample-app/samples directory. Then run cd wakeWordAgent/src to navigate to the wakeWordAgent/src directory. To start your wake word engine of choice, run ./wakeWordAgent -e kitt_ai if you want to use KITT.AI or ./wakeWordAgent -e sensory if you want to use Sensory.
Once the wake word engine is running, test out the system by saying "Alexa" and asking your EchPi a test question.
Step 13: Install VNC Server


At this point we are almost ready to detach the Raspberry Pi from the keyboard, mouse, and monitor so the finished EchoPi will run headless. Before doing that though, we will install VNC onto the Raspberry Pi so we can remotely set up and adjust the software on the Pi. Go ahead and close all of the open windows; now that they system is working and tested, we will wait until later to start up the software again. To install VNC, open a new terminal window and run sudo apt-get install tightvncserver. To start the server, run tightvncserver.
We want VNC server to run every time we start up the Raspberry Pi so we do not have to run the tightvncserver command every time. To get VNC to launch at startup, run:
cd /home/pi
cd .config
mkdir autostart
cd autostart
Create a new configuration file by running nano tightvnc.desktop.
Copy the following into the file:
[Desktop Entry]
Type=Application
Name=TightVNC
Exec=vncserver :1
StartupNotify=false
Press Ctrl-X, and then Y, and then press Enter to save the file.
Step 14: Connect Raspberry Pi to Frame Base


It is time to move on to phase two of the EchoPi build, constructing the frame that will house the EchoPi. Disconnect the Raspberry Pi from everything except the USB microphone.
If you take a look at the frame base piece, you will notice that two of the four mounting holes are loser to one side of the pentagonal shape of the piece. Insert a M2.5 x 14mm screw through each of these holes and an M2.5 x 30mm screw through the two holes farther away from the edge. Then, onto each of the four screws, place one of the 6mm aluminum spacers.
Next, place the Raspberry Pi onto the screws. Fasten down the Raspberry Pi by placing a nut onto each of the screws.
Finally, place two additional nuts onto the long screws, we will use these as spacers between the Raspberry Pi and the audio amplifier board.
Step 15: Assemble the Audio Amplifier


The Stereo 20W Class D Audio Amplifier - MAX9744 we are using to amplify the audio from the Raspberry Pi and drive the speaker at a loud volume comes from Adafruit in kit form. Therefore, you will need to solder on all of the connectors for the board to work. The kit is not very complicated, simply follow the picture of the completed board and solder on the parts.
Step 16: Mount the Audio Amplifier Onto the Raspberry Pi


On the back of the Raspberry Pi you should currently have two long screws protruding above the board with three nuts on the bottom. In this step we will mount the audio amplifier board on these two long screws.
First place a 6mm aluminum spacer onto each of the long screws, on top of the three nuts. Then, place the audio amplifier board onto the screws. The board will only fit one way because the volume adjustment potentiometer blocks two of the holes.
Hold the audio amplifier in place with a nut on each of the screws.
Step 17: Add 3.5mm Audio Cable


Connecting the audio amplifier board to the Raspberry Pi is simple. Using the 3.5mm male-to-male audio cable, plug one end into the Raspberry Pi 3.5mm jack and the other into the 3.5mm jack on the audio amplifier.
Step 18: Solder Headers to the USB Breakout


Like with the audio amplifier board, there is some assembly required for the USB MicroB breakout board. The breakout board is much simpler though. All we need to do is solder a row of female headers onto the board, facing the same direction as the USB port.
Step 19: Assemble Power Wiring Harness


To avoid having two separate power inputs to the EchoPi, one for the audio amplifier and one for the Raspberry Pi, we will need to create a wiring harness to power both boards from a single power input. We will provide power to the EchoPi system using the barrel jack on the audio amplifier. In this step we will create a wiring harness to connect the audio amplifier's power screw terminals, located next to the barrel jack, to the Raspberry Pi's Micro USB power input.
The wiring harness is very simple. One one end we will have a double male pin header with one black wire (ground) and one red wire (+), and on the other end two individual male pin headers. To create the wiring harness you will need a 10cm length of red wire and a 10cm length of black wire, four male crimp pins, a double crimp pin housing, two single crimp pin housings, and a crimp tool. If you have never made your own jumper cables, it is an extremely useful skill to have and Inventables, the company that sells the crimp tool I use in this Instructable, has a great tutorial on creating clean connections.
So create the power wiring harness as pictured on this step.
Step 20: Wire the Power System


Now that we have a wiring harness to link the power input on the audio amplifier board to the power input on the Raspberry Pi, we can wire it all together. On the audio amplifier board, locate the power screw terminals located next to the audio jack. Insert the double pin end of the wiring harness into this screw terminal and tighten down the screws.
Next, plug the USB MicroB breakout board into the power input jack on the Raspberry Pi. Plug the loose ends of the power wiring harness into the USB MicroB breakout board. The black wire connects to the GND pin, and the red wire connects to the VCC pin.
Step 21: Solder Wires Onto the Speaker

In order to connect the speaker to the rest of the EchoPi system, we will first need to solder wire leads to the speaker. If you look closely at the metal contact points on the back of the speaker, you will notice a + symbol and a - symbol pressed into the white cardboard piece. Solder a 150mm long red wire onto the + terminal and a 150mm long black wire onto the - terminal. Then, to give the connections a little bit of extra strength, slip a piece of heat-shrink tubing over each connection and use a heat gun to shrink it down.
Step 22: Mount the Speaker


At this point we are almost done assembling the electronic guts of the EchoPi, the only thing left to connect is the speaker to the audio amplifier board. We will make this connection later because we first need to do a bit of frame assembly. However, to prepare for this step, we will mount the speaker onto the laser cut speaker mount piece, which is the one with a large hole in the middle.
Insert an M3 x 16mm screw through each of the four holes on the speaker mount piece. Place a nylon nut onto each of the screws. We are using nylon nuts in this step to help absorb vibrations created by the speaker. Then, place the speaker onto the four screws. Secure the speaker in place using a nylon nut on the top of each screw.
Step 23: Cut Threaded Rod to Length


Assembling the EchoPi will be fairly easy. Five lengths of 2.5mm threaded rod run vertically up the EchoPi with the various laser-cut parts layered on the rods, separated by aluminum spacers. Before we can begin assembly, we need to cut the threaded rods to length. We will need five 96mm lengths of 2.5mm threaded rod. I simply used a bolt cutter to cut the rods because it is quick, easy, and since the rods simply serve a structural purpose, it does not matter too much if the threads are not quite perfect after cutting.
Step 24: Assemble the EchoPi


Assembling the EchoPi basically consists of stacking up the laser cut acrylic pieces on the five threaded rods we cut in the previous step. First, place a nut onto the very end of each of the threaded rods. Then, place the five rods up through the laser cut piece onto which the EchoPi electronics are mounted.
Next, on top of each threaded rod, place one of the 16mm aluminum spacers. Then take one of the laser cut ring pieces and place it on top of the spacers. Follow the ring with five more spacers, then another ring, then five more spacers.
Now you should have the base of the EchoPi that holds the electronics, with two of the laser cut rings on top, spaced apart with aluminum spacers. The next piece to go on the stack is the speaker mount, but before adding the speaker to the assembly, it must be electrically connected to the system. On the side of the audio amplifier board opposite the 3.5mm jack there are two screw terminals for audio outputs; one terminal is used for the right audio output, the other for the left. We only have one speaker for this project, so simply connect it to one of the screw terminals.
With the speaker connected, place the part on top of the threaded rods with spacers. Follow this part by five more spacers and finally the laser cut top panel.
To finish the assembly, place a nut on top of each threaded rod to hold everything together.
Step 25: Start the EchoPi Software


Now that the EchoPi is fully assembled, we just need to restart the software by repeating the process in steps 10, 11, and 12. We will start the web service, the sample app, and the wake word engine. This time, however, since we can no longer connect peripherals or a monitor to the Raspberry Pi, we will control the EchoPi over VNC.
TightVNC is already installed on the EchoPi because we installed it in step 13. In order to connect to the EchoPi, we also need to install TightVNC on a computer. Head over to the TightVNC website to download the software.
After installing TightVNC on your computer, launch the software and plug in the EchoPi. On the New TightVNC Connection dialog box, enter the IP address for the EchoPi. Then, enter the VNC password you set in step 13. After connecting to the EchoPi, you will be able to interact with the device on a virtual desktop just like you would if the Raspberry Pi was connected to a keyboard, mouse, and monitor. Follow the procedure from steps 10-12 to start the Alexa software again.
Step 26: Add Skills to the EchoPi


One of the central features of the Amazon Echo platform is the ability to add capabilities to the device by enabling "skills" from the mobile application. Skills basically allow the Echo to interact with third-party services. For example, the Uber skill allows you to call an Uber by asking Alexa, the Nest Smart Home skill allows Alexa to change the temperature in your home, and the Dominos skill allows Alexa to order a pizza for you. We will be able to add skills to the EchoPi as well.
Start by installing the Amazon Echo app on your smartphone. Once you sign into your Amazon account on the app, it should automatically find your Raspberry Pi-Powered Amazon Echo. Access the Skills section of the app to browse and enable skills for your EchoPi.

First Prize in the
IoT Builders Contest

Second Prize in the
Arduino Contest 2016

Participated in the
Epilog Contest 8


