

Introduction: Build Your Own Hovercraft


Here's another project that I have, it was a physics project for school but I thought I could put an Arduino somewhere in there and make it more interesting, and it worked. The hovercraft has a tubular skirt that I made out of duct tape. It has two 50mm EDFs (EDF= Electronic Ducted Fan), one for hovering and one for propulsion, each with 40amp ESCs (ESC = Electronic speed controller). For direction I used a servo to turn the back fan left and right. The propulsion fan and the servo are connected to an RC receiver and I control them from the remote. The hovering fan( the one that blows downwards and produces the lift and onflates the skirt) is connected through the ESC to the arduino and the Arduino sets the speeh of the fan according to the position of a potentiometer. For the code I used the servo library and I connected the signal wire of the ESC to the arduino as it would be the signal of a servo. I just had to change some numbers in the delay statements and it works just fine. Both the Arduino and the lift fan use a second 7.2v LiPo battery( separate from the one used for the servo and propulsion EDF). Go watch the videos for more info. The first video is an explanation on how it works and the second is a drive. It is a very fun project to play with :)I'll show you how to make your own. Hang on to this instructable.
Step 1: What You Will Need
In this tutorial I will be showing you how a hovercraft works, its principles, and how to make your own RC Hovercraft.
You will need:
• Some 1/4 inch plywood ( $0- I found some in the workshop)
• A lot of duct tape, but 2 rolls should do it ( You can find it at your hardware store for about 3-4 $ a roll)
• A breadboard (I got mine at radioshack)
• Hookup wire (22 gauge solid core from Radioshack)
• One RC servo ( any size but not too big)
• Two 55mm EDFs (Electronic Ducted Fans)
• Two 30A ESC (Electronic Speed Controller)
• Two 7.4v 1500mAh LiPo batteries
• RC car remote and receiver (2channels)
• Paper
• Some small cardboard boxes ( I used the ones from the batteries)
• A place where you can cut wood. I used my CNC machine, but a bandsaw, a jigsaw and a drill will do the job.
• A reason to build the hovercraft (for Fun ) :)
• One arduino board ( can be any kind of arduino ).
• Vacuum tube
• Double sided tape
All the parts that I put links for add up to a total of $104, and since they are all from the same store you won’t pay much for shipping.
The rest of the parts will cost maximum $70 with the arduino, so you get to a total of $174 without shipping, but it will be worth it.
Step 2: Cutting the Frames


The base of the Hovercraft is composed of two plywood boards, one for supporting the skirt, and one for supporting the Hardware and electronics.Take a piece of letter size paper (8.5x11in) and a CD. Place the CD in the corner of the paper, tangent to both sides as shown below:
Trace the shape of the CD on the paper from side to side to make a round corner. Do the same for all four corners.
Step 3: Frame Continued


Now cut the paper on the lines to get the round corners we are looking for.
Now determine its center by folding it longitudinally and latitudinally. Do not fold it all the way to the edges, just enough to see the center. Mark the center with a pen.
Step 4: Frame Continued

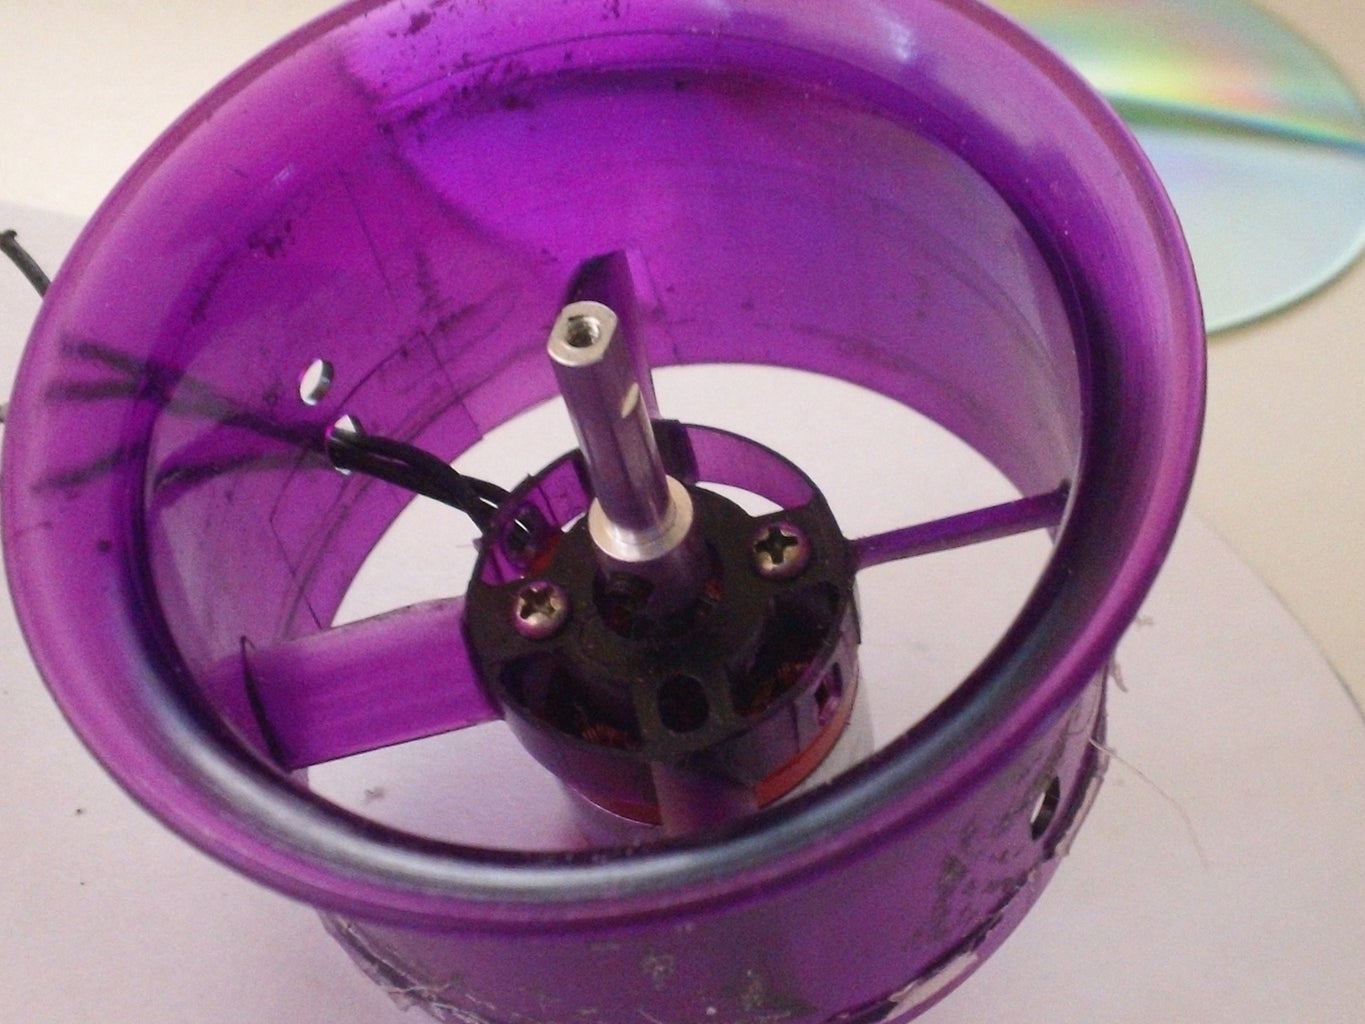


Take the EDF and take out the fan by taking out the screw on the top of the blade.
Now take out the motor by unscrewing the two screws you revealed when you took out the fan.
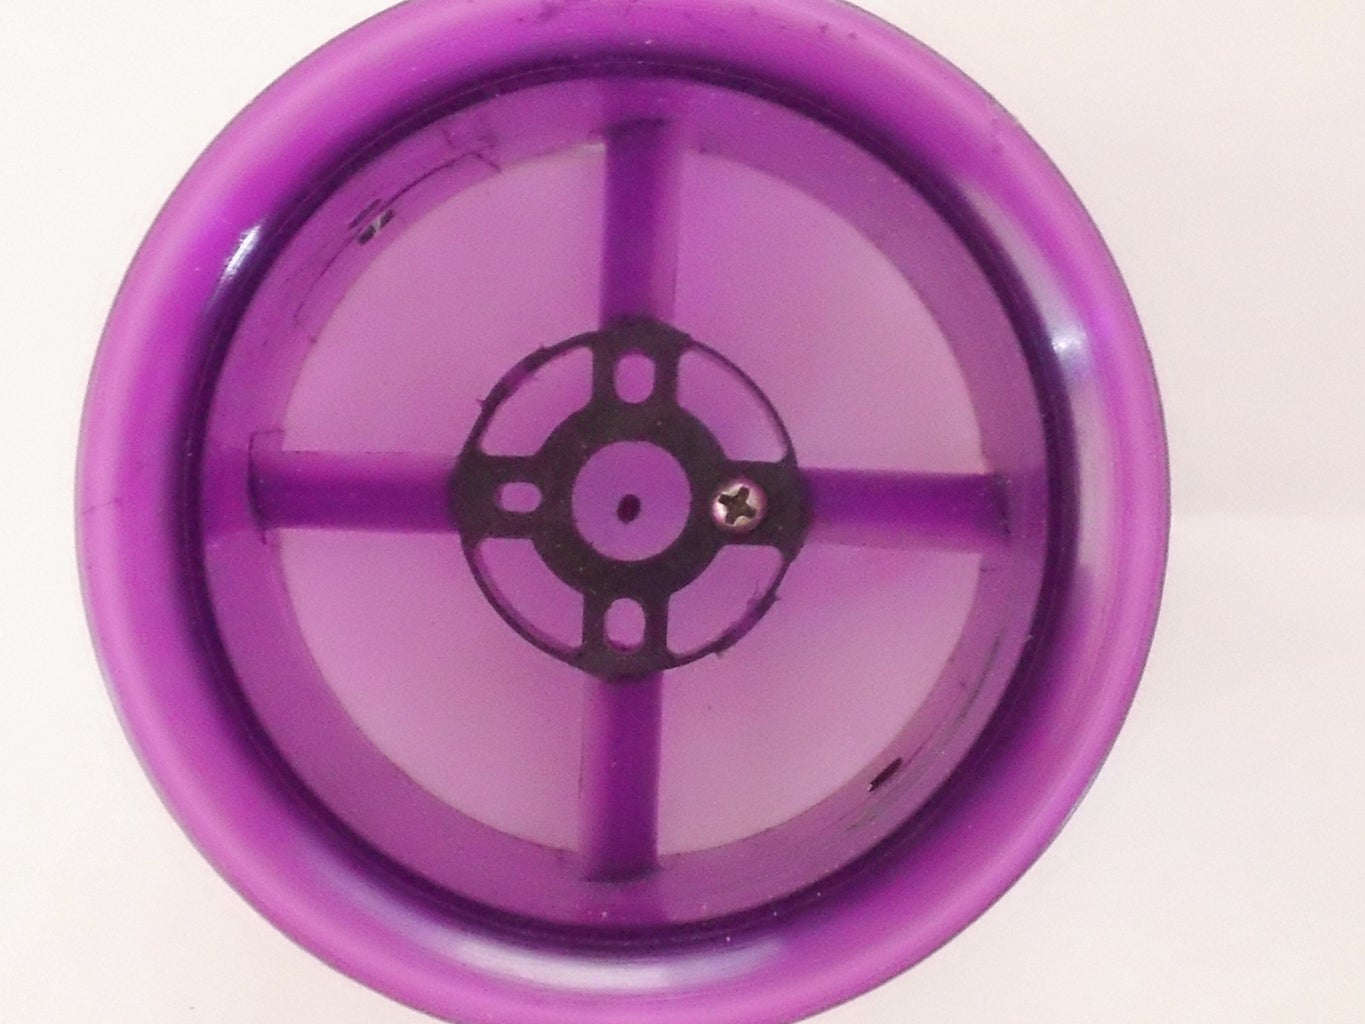
Now you have the fan housing. We will use it to trace a circle in the middle of the paper.
Put the fan housing on the paper, with the center hole aligned with the dot that you made in the center of the paper.
Trace the outer edge of the duct on the paper.
Step 5: Frame...


Now take a piece of plywood and glue the paper to the paper to it.Cut the plywood in the shape of the paper, then drill and cut the hole in the middle. Make sure it is round. You should get something like this:
Step 6: Still... the Frame

Now, using the first frame as a guide, cut another one, but without the hole in the middle. Tis time draw a contour that is 1 ¼ in from the outer edge. Now cut it. You should get a ring that looks like this but without the holes on the edge, you won’t need them for this type of hovercraft:
Step 7: Making the Skirt

The skirt of the hovercraft if a key feature for having a well balanced and high-class hovercraft. It is also the hardest to make, but we’ll get through it together.Find a plane surface to work on and get the duct tape. You will also need some vacuum cleaner tubing.
Lay down several 30-35’’ strips of duct tape overlaying them 1/16 of an inch. Tape them down to the table at the edges so they won’t move. Now put facing down tape over them to cover the whole sticky surface. Fold over the sticky sides so you get a nice piece of fabric. This is the material for the skirt.Take the vacuum cleaner tube and put it over the ring-like frame. You will use the tubing as a guide to get the shape you want for the skirt. Use the fabric that you made to make the skirt. Use additional tape to hold it down. Be careful not to stick the tape to the tube. Now take the tape roll and go round and round over the fabric and the tube. Leave an open space so you can pull out the vacuum tubing.
After you pull out the vacuum tubing close the gap with tape.
It wasn’t that bad, was it?
Step 8: Putting Together the Two Frames

Now take the double-sided tape and put some on the top of the skirt (the side with the frame). Put the other frame on top and align them together. Push it down so it sticks there. Now seal it with some duct tape as seen below:
Step 9: Adding the Hardware


Take one of the white boxes you got with the batteries and cut a rectangular hole in its cover so that the servo can fit in there. Just as seen below:
Now use a hot glue gun or the screws to tighten the servo in place.Glue the box in the back of the hovercraft as seen below:
Do the same with the other box but in the front. But do not cut a hole in the cover.
Step 10: Testing the Motors
Take an EDF, an ESC, and the radio system. Connect the wires of the Motor to the 3 thick wires of the ESC. Connect the ESC to the RC receiver and put batteries in the remote. Also connect the 7.4v battery to the motor when you are ready.Use the tutorial on HobbyPartz.com for the Remote to program it add do a test.
Speed up the motor and see if it blows backwards (towards the end with the motor). If not, switch any two of the thick blue wires. Squish the bullet connectors of the ESC with a pair of pliers so the wires do not slip out. Plug the servo in the receiver, reprogram it, and do a test with direction and propulsion.Connect the second ESC to the other motor and put in the place of the other one to check the flow direction and make it right just like the other one.
Take the Arduino, a 9V battery, and a battery clip.Connect the white wire of the ESC to pin 9 of the Arduino and the black wire to GND in the Arduino. Do not connect the red wire to the arduino.
Now complete the circuit with the potentiometer as it was a servo circuit, power the Arduino with the 9v battery and the motor with the 7.4v battery. Do a test: upload the servo code to the arduino, power the motor, and play with the pot until you figure out how to tune the motor. This may take some practice.
Step 11: Hardware, Continued
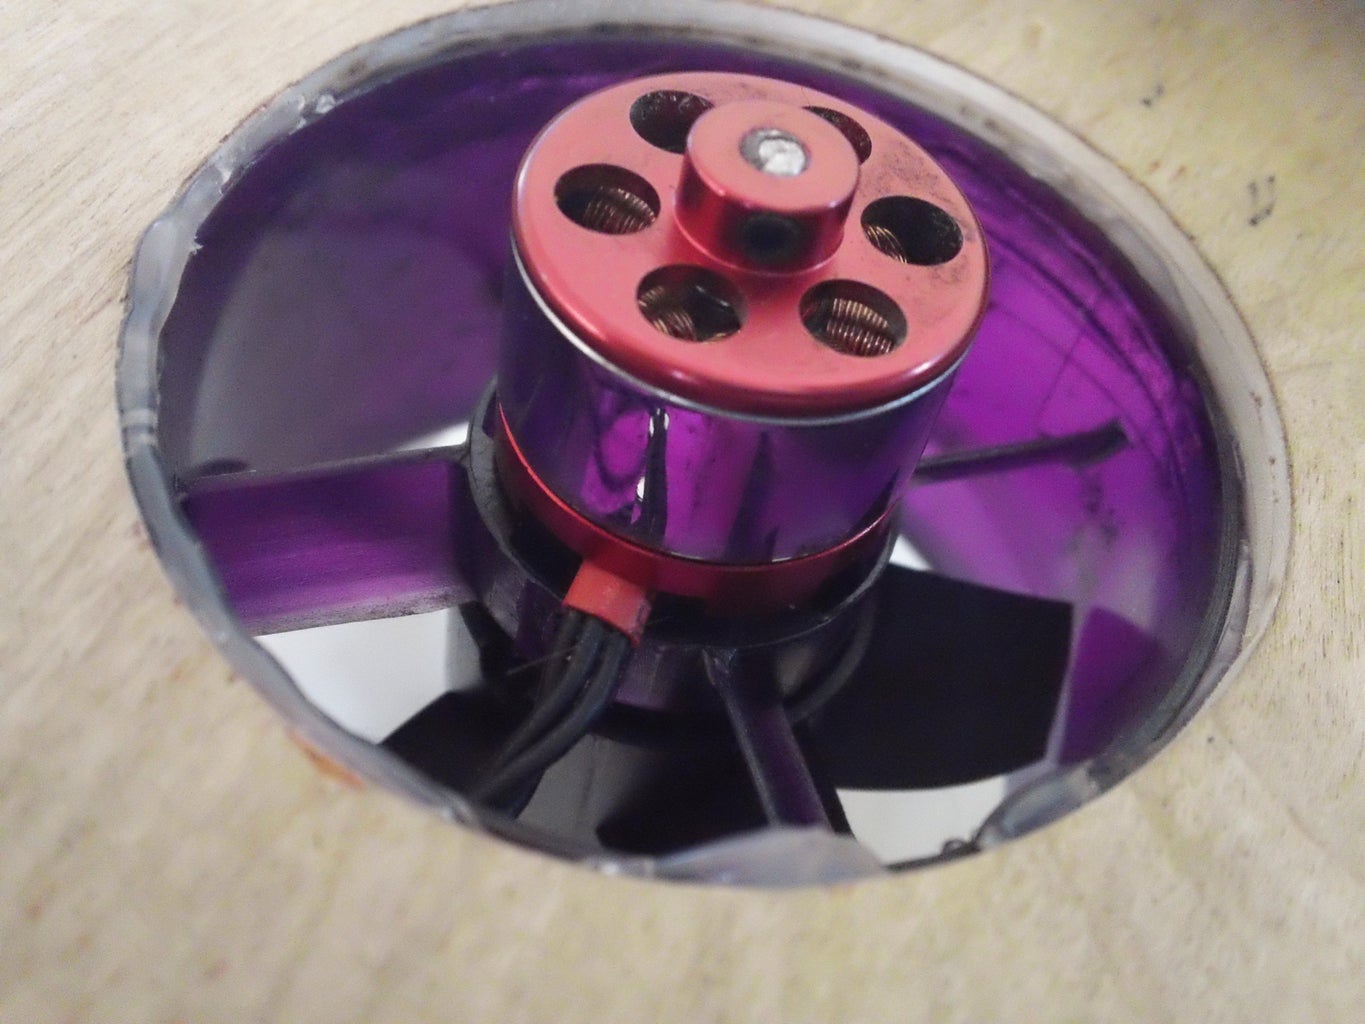


Put the arduino with the breadboard in the front box and the motor on the middle hole with the motor down and hot-glue it in place.
Now get a smaller and flatter box, I used a small Sparkfun box, and make a round hole for the propulsion EDF. Place the star servo cap on the bottom and glue it or use some wire to tighten it.
Step 12: Finally, the Final Step

If you want you can add protection gear as in the videos to protect the propulsion fan.
DONE!
There you go, you’ve got your own homemade hovercraft. It’s great for a science project. You will certainly get an A wit this one. I did.
Watch the two videos for more in depth details about how it works and to see it running, well… floating.
Step 13:
If you have any problems or questions regarding this Instructable, feel free to post a comment. I will answer as soon as I can. Also, if you like the project, consider voting it in the following contests:
https://www.instructables.com/contest/micro2/?show=ENTRIES
https://www.instructables.com/contest/makeitmove/?show=ENTRIES
https://www.instructables.com/contest/toy/?show=ENTRIES
Thanks for reading this 'till the end and I hope you liked it.

Participated in the
Microcontroller Contest

Participated in the
Make It Move Challenge

Participated in the
Toy Challenge


