

Introduction: Building a Houseboat - With Added Information About Dimensions by Request (see Step 11)

There are quite a lot of steps needed to build a houseboat as you can imagine.
I've tried to embed a video but it doesn't seem to play for some reason but the link is
www.youtube.com/watch?v=PpRxQma9Oxk
The priority of my design was to try to build it big enough so that 3 or 4 people could sleep in it, the idea being that I would attempt to hire it out to tourists that come to the Togian Islands in Central Sulawesi, Indonesia, which is an area well known amongst divers and snorkelers.
I have travelled around the area for 6 months every year since 2004 and due to being recently getting divorced from my Indonesian wife, now have just a 9 year old son as proof of my existence there as everything else has been claimed by my ex, except my houseboat.
Step 1: The Design
To start building a houseboat all you need is a pen and a cigarette packet.
These are used to draw the design of the houseboat.
Apologies for not having a photo of the cigarette packet. It got thrown away long before the project was finished.
I designed the actual house part to be 3 metres wide x 5 metres long.
The base was designed to be 5 metres wide x 7 metres long so there would be a metre of the base all of the way around the house.
More dimensions have been included in Step 11.
Step 2: Building the Base


This needs to be built on land first.
We used beams that were 8cm x 14cm x 7m and spaced them out to what we thought would be appropriate, roughly 80cm apart.
Number 14 bolts that were 30cm long were used at each intersection to secure the beams so that it would stay in position and cut off underneath so that the buoyancy aids wouldn't be damaged by the bolts that were protruding from the beams.
Step 3: Getting the Base Into the Water With Buoyancy Aids Underneath


First you need to buy the buoyancy aids which in our case were basically polystyrene cylinders coated with plastic to avoid them getting too damaged.
Then you need to lever the base into the water, adding buoyancy aids as you go until the whole of the base is in the water and all of the buoyancy aids have been tied underneath.
As we had no experience of building a houseboat and no examples to copy from the launch was considered a complete success based on the fact that it didn't immediately sink.
Step 4: Add the Floor of the Houseboat

This is quite an easy step. Basically buy enough planks of wood to cover the base and nail them down.
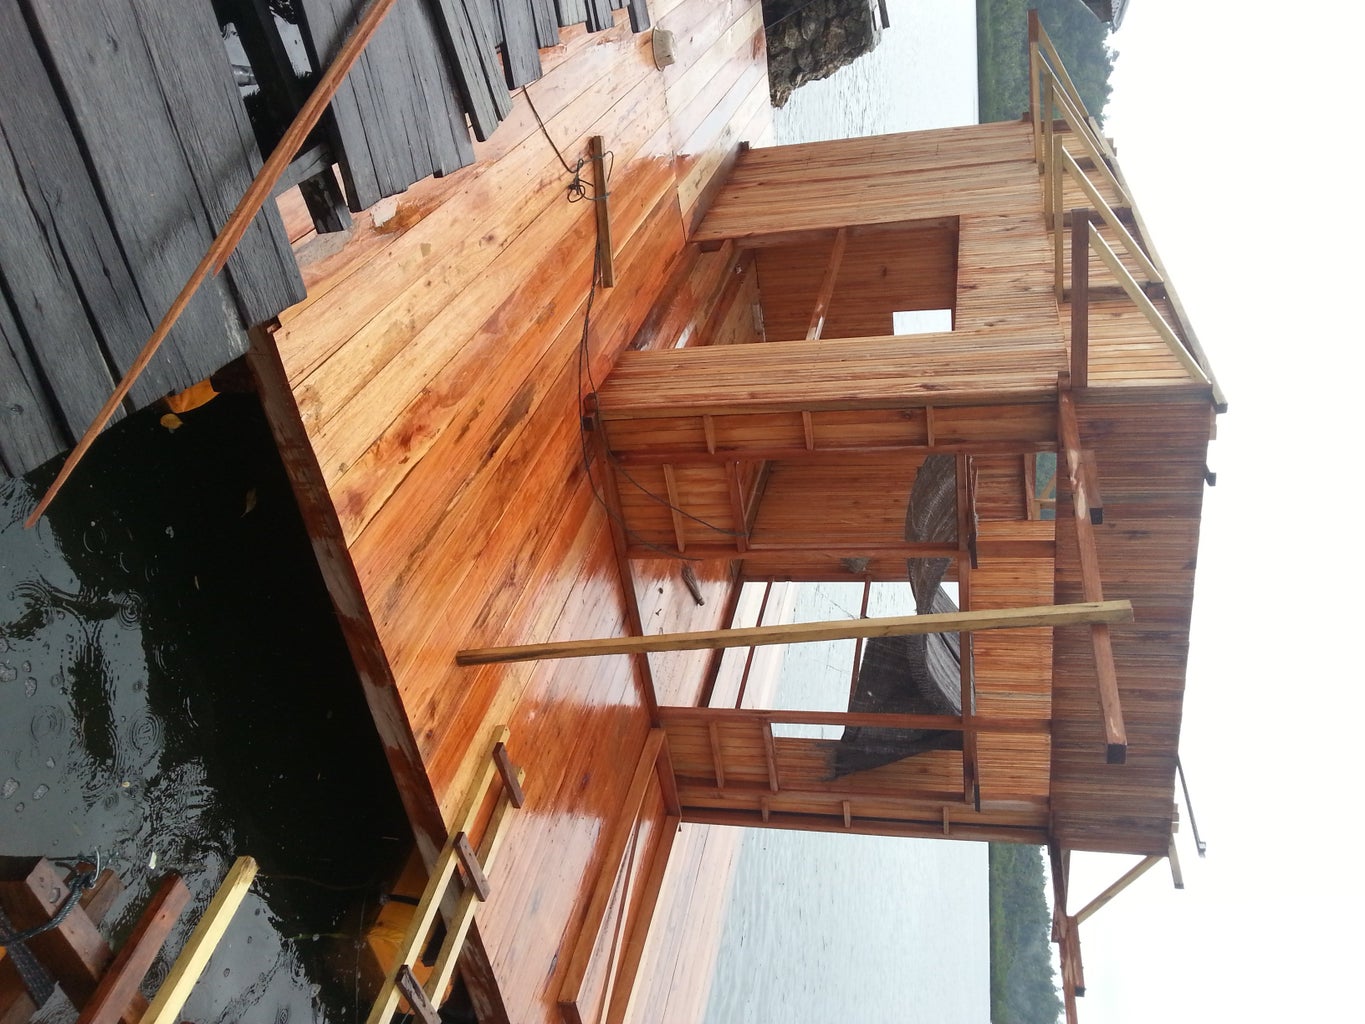
Step 5: Add the Structure of the House


Probably the most important aspect of this stage is to add the structure where there are no Health and Safety officers around, which was not a problem in Indonesia.
Step 6: A Bit of a Misnomor Really Because We Went Back to Step 2

After the initial joy of completing the process of fixing the structure of the house on top of the base we sat down and started looking a bit more closely.
We realised that, in fact, we had less than a metre each side of the house which we considered to be not enough in the case of side winds which we were afraid could turn the whole structure over
Step 7: Adding Walls, Roof, Windows and Doors


Our 2nd effort at building the base meant we ended up with a base 7 metres wide and 9 metres long.
As the room is 3 metres x 5 metres it meant there was 2 metres of the base all the way around the house which was much better for stability but also meant that we now had a 2 metre terrace on all sides.
Wow ! Great to be able to sit in the sun or go around the opposite side of the room to sit in the shade, fantastic !
Walls were made from wood called lembar seri, wood less than a centimetre thick which meant we could build the walls on the inside and outside and hiding the whole structure, not one beam in sight.
Pitate, made from Sago leaves were used for the ceilings.
The roof was made from plywood to keep the weight down and then covered with a plastic for waterproofing.
The whole process up to now had taken about 4 months but it was time for me to go back to England and save some money to get the houseboat completed.
Step 8: Replace Roof, Build the Inside


Yes, back to step 7 as after 6 months in England I'd found out that plywood wasn't a good idea in the heat of Indonesia.
The roof had a rippled effect where the heat had wrecked the plywood and strong winds had blown part of the roof off. I knew that if plywood got wet then this would be a problem but it didn't occur to me that the sun would affect the roof in the same way. We had to rip the roof off and replace it with corrugated iron.
A western style toilet was fitted with a tank underneath the houseboat for wastage plus a smallish container built from cement to hold water for showering. We made it from cement basically to get the shape that we needed that wouldn't eat up too much space.
The toilet door is a sliding door so that it doesn't eat up any precious space inside the toilet or inside the room.
A bunk bed was built where both beds can be folded up against the wall when they are not used.
2 more beds that can also be used as seats were also built.
One of them can be folded up against the wall and the other one has 6 safety boxes inside but can also be used to store guests bags.
A double bed was also built with a ladder to climb up to it so instead of the planned 3 or 4 guests we can actually get up to 6 in quite comfortably.
A small kitchen was built at the back of the houseboat with more storage space at the back and sides of the houseboat that can also be used for seating.
One of my brainwaves meant that I ended up buying 3 wall clocks, throwing or giving away the actual clock and just using the circular frames because just for a joke I wanted portholes to make the houseboat look like a boat and not just a house
Step 9: Finishing Touches


Painted and varnished the walls and added the logo of the company Bule Boleh Bajo which basically means a tourist can be like a Bajo sea gypsy.
A solar panel has been attached to the roof so that we have lighting and can also charge up mobile phones.
Then we had to figure out how we would move the houseboat.
After a few trial runs we ended up with two beams of wood protruding from the back of the houseboat with a wire attached to the two beams.
A boat with an outboard engine is the placed with the front of the boat pushing the cable which in turn pushes the houseboat
Step 10: Test It for a Couple of Days


This was the best part of the whole project.
If you like what you've seen, you are very welcome to Like our page at
https://www.facebook.com/Bule-Boleh-Bajo-137422209... on Facebook
You could visit our website at www.bulebolehbajo.com (hopefully one day the website will be completed and you may even be able to make a booking)
Step 11: More Information About Sizes and Dimensions of Wood Used
As requested, I'm adding a bit more information about dimensions but I'm quite willing to answer any questions on any aspect of the houseboat, including dimensions that anyone thinks I've missed out or are unclear.
All of the beds are 2 metres x 80cm, built to fit the size of the mattresses.
The Toilet is 1.5m x 1.2m.
The top of the beds are 40 cm from the floor so that they can also be used as seating.
Because 3 of them fold up it means that the bottom of the windows are 1.25m from the floor so that when the bed is folded up they don't block the windows. The top bunk bed is also 1.25m above the floor so that the bottom bink bed can fold against the wall without the top bunk bed interfering with it.
The double bed area is 3m x 1.50m. The mattress is 1.50m wide and 2m long so there is 1m x 3m spare space for bags at the foot of the mattress.
The roof is 3.15m from the floor at the front and 3m at the back. We deliberately made the roof sloping so that rainwater would run to the back of the houseboat so we could collect it for showering rather than wasting fresh water and also using petrol to collect fresh water from other islands. Sea water is used to clean the toilet, also in order to preserve fresh water.
For the actual room we used wood that was 8cm x 9cm x 3m and 8cm x 9cm x 5m for the base of the structure of the room and also for the top of the structure.
The posts at the corners of the room were 8cm x 9cm x 3m.
I'm quite embarrassed to say that it would be a lot easier for me to explain this all in Indonesian so I hope my terminology is understandable. Basically the structure of the room was made with 8cm x 9cm wood. I just can't think what the technical term is for the posts at the corners of the room in English !

Participated in the
First Time Author Contest

Participated in the
Outside Contest 2017


