

Introduction: Car Battery Charger With PIC12F683


This time I’m starting off with a device I already built, unfortunately there won’t be any photos from the actual build, just a quick article on how I imagined it and how it works.
A short story about how the whole thing started
My uncle has a nice little place at the countryside at about 50 kilometers away from where we live. Unfortunately there is no electricity in the house, so the lights, music, and anything else that’s electronic runs from a 12V car battery. The battery was charged before each trip with an old-school car battery charger, until the charger eventually broke. He brought it to me to get it repaired, but the two components it had inside both were dying so I decided to build him a new one. His birthday was coming, so I decided to make it as a present. I haven’t finished building it on time, but he was all-right with it!
Step 1: Parts List


Here's a list of the thing you will need to make a copy:
- Enclosure - buy the one you like the most, or make your own
- Transformer - think of the charging current, then make your decision about the amps. I have this one.
- Panel meter - must be able to measure your transformers maximum current. I have this one.
- Banana-plugs and sockets - buy in bulk off ebay.
- 220V cable socket - I bought this one.
- Fuse holder - I bought this one, this is for the transformers secondary winding
- Button - a random button, I've had this for ages
- LED - buy in bulk off ebay, I used a green and a red one, both 3 mm
- PIC12F683 - ebay link, buy more of these, they're very useful for small MCU projects
- 220ohm resistors - protection resistors for the LEDs
- 4K7 resistor - pull-up resistor for the button input
- 1K resistor - series protection resistor for the NPN transistors base pin
- Voltage divider resistors - any kind of resistors with 1:4 dividing ratio
- LM7805 - TO220 voltage regulator, buy in bulk off ebay
- PicKit2 or PicKit3 - build or buy, I used my home-made PicKit2 for the job
- Wire terminal block - I used this kind of connectors
- NPN transistor - a random BC transistor that is able to handle 30 mA
- Relay - general purpose small relay, able to handle the charging current
- Screws - 4 mm screws for the transformer
- Drills, saw, sand paper and other hand tools
- Computer to write the firmware on.
- Extension chord for mains
Step 2: The Enclosure


First, you need to imagine what the charger should look like, and get an enclosure that can fit in all the stuff you want. At first, I ordered one I thought was good, but when I saw it with my own eyes, I almost had a heart attack. Luckily the seller had this black enclosure on stock, I bought it without further hesitation. You can see how the two enclosures look like on the photo.
When you have both the enclosure and the clue how you want it to look like, you can start fitting in the components. I used my Bionic hand drill to drill a contour of the shapes I wanted to cut out, and snapped out the pieces of plastic. A small saw and sand paper was used to give the holes and slots their final form. After I cut these slots, I snapped in the components that supposed to go on the front and the back panels. The arrangement of components in and on the enclosure:
- Front panel: panel amp-meter, banana sockets, two LEDs and a button
- Back panel: 220V entry plug with fuses, fuse holder (for the transformers secondary winding), radiator and a current regulator (I changed my mind about this later on, but the holes were already there..)
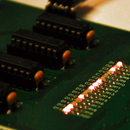
- Inside: transformer, prototype board, electronic circuitry
Step 3: The Electronics


At first I wanted to make this an analog-only schematic, but later gave up on the idea. I’ve decided to use a small PIC12F683 I’ve had on stock anyway. I was already familiar with this processor, I used it as a control unit in many of my projects, including the One-wire lock. This time I needed two LED outputs, a relay-driving-transistor output, and a button input, so the pin count proved to be more than appropriate.
When driving LEDs from a power source, current limiting resistors need to be added for the protection of LEDs. The LEDs are driven from the PIC (a 5V source), the LED forward voltage is around 2V, and we want a current of 15mA to pass through the LED. That results in a resistor of R = 5 – 2 / 0.015 = 200 ohm. I picked the closest standard value, a 220 ohm resistor.
The relay is an RS-5 relay said to have a coil current of ~30mA. That current can be handled easily by a BC transistor in TO-92 package, I chose BC546. A base-current limiting resistor of 1Kohm was used to protect the transistor, at 5V that means a 5mA base-current. The base current is in strict relation with the collector current. Instead of looking at the amplifying capability of that transistor, I chose the resistor based on an old habit: “collector current is ten times the base current”. 50mA is more than enough to drive the RS-5 relay on and off.
When it comes to interfacing buttons to microcontrollers, a pull-down or a pull-up resistor is required on the input to eliminate unpredictable voltage levels when the button is not pressed. I used the MCLR input of the microcontroller with a pull-up resistor of 4.7Kohm. When the button is pressed, the input pin is forced to zero volts (logic ‘0’), when the button is released, the input level is pulled up to 5 volts (logic ‘1’).
The rest of the electronics consists of wires and fuses, and their sockets, headers, connectors.
Step 4: Short Intro About PIC and Its ADC Module


Take a look on the block diagram of the ADC. It shows exactly what's described later with the registers, but maybe a little easier to understand. The four inputs are the PICs pins, CS selects the one that will be connected to the ADC input. One of them can also be used as a voltage reference, we turned this feature off by saying VCFG = 0. We turn the module on with the ADON bit on the bottom of the ADC, and let go of a conversion by toggling the GO/nDONE bit. Once the conversion is done, the ADC places the result in the ADRESH:ADRESL registers as instructed by the ADFM bit. We adjusted the result in the rightmost ten bit-fields.
To measure the voltage across the battery, I had to configure the PIC12F683 internal 10 bit analog-digital converter. Internal modules can be configured through their configuration registers, in this case ADCON0 and ANSEL. There are two more, which contain the 10 bit conversion result: ADRESH:ADRESL.
Before jumping to configuration, make sure there is no way for you to damage the PIC by applying voltages larger than 5V to its inputs. To be able to measure the 12V+ battery voltage, I had to add a voltage divider with 1:4 dividing factor. This means, that from the 0V – 14V battery voltage the PIC is only seeing a 0V – 3.5V range – which is safely under 5V. I used a 15Kohm and 5Kohm resistor for the voltage divider. Let’s check out the configuration registers.
ADCON0 register configurations
The 7-th bit of ADCON0 register is ADFM, which defines the way those 10 bits are arrange in the two, eight-bit ADC result registers. I got used with adjust to right, so I will pick that: ADCON0.ADFM = 1.
The 6-th bit is VCFG, which has to do with the positive voltage reference input of the internal analog-to-digital conversion module. The input voltage we want to measure now ranges from 0V to 5V, this means that we can select the input ground and the input power supply of 5V to act as our lower and higher voltage reference. Knowing this, we have to set ADCON0.VCFG bit to logic ‘0’.
Bits 5 and 4 are not implemented, I put zeros in them for simplicity.
Bits 3 and 2 of this register select the channel (input pin) on which the voltage level will be measured. At the end of the conversion, the content of the ADC result register will hold a number corresponding to the voltage level of the selected channel. I don’t have to change input channel in this project, so the selection is made at hardware initialization ADCON0.CHS1:CHS0 = 00.
Bit 1, named GO/nDONE is cleared at start, I set it in the measure state to one, and wait for it to reset automatically. This bit is set by hardware, and can be used to check whether a new AD measurement is available or not. Let’s set it to 0.
Bit 0 turns the ADC module on and off. Of course, we need to turn it on, so we must set it to 1, ADCON0.ADON = 1.
This means, that the hexadecimal number 0b10000001 = 0x81 needs to be put into ADCON0 for the module to work the way expected.
ANSEL register configuration
This register configures the acquisition clock and defines which analog channels will be used to measure analog voltage and which will be turned off to use the respective pins as digital inputs/outputs.
The 7-th bit is not implemented, I set it to 0 for simplicity.
The next three select the clock source: I tend to select FRC by default and change it only if something doesn’t work: ANSEL.ADCS = 111.
The lower nibble of the register affects the analog pins, the ones you need as inputs or outputs need to be configured accordingly. I only used analog channel 0 this time, so I have to put a ‘1’ at that position. ANSEL.ANS = 0001.
With these known, ANSEL register has to be set to 0b01110001 = 0x71.
In short, this is the way one should proceed to configure the ADC module of this processor. There are only two registers to fill, after that the conversion results can be taken out from ADRESH:ADRESL periodically.
Step 5: Short Intro About PIC and Timers


The timers can be used for quite a few tasks: creating time-bases, triggering periodical events, measure time between two events (measure frequency), and much more. In my small firmware I used a timer to make myself a ten millisecond time-base. Counting that one hundred times gave me a flag that got set each time one second passed. This was needed, because I knew I wanted the device to charge for 10 minutes and to measure for 5 seconds – a standard time-base had to be involved in the project somehow.
About PIC timers
A processor can execute thousands of instructions in fractions of a second, larger time-bases are usually constructed by counting milliseconds a multiple hundreds of times. To be able to calculate a small timing, like one of 1ms, we need to know how fast the PIC really runs at. The PIC12F683 has an internal oscillator of maximum 8MHz, this is what I used to clock the device. Knowing that the PIC needs four clocks to execute one single instruction, the instruction-cycle is 2MHz. based on that, the time needed by the PIC to execute one instruction is 1/2.000.000 = 500ns. This will be the time-base the internal timers will advance with. Each timer has an associated internal 8 or 16 bit register, which increases its value every time this 500ns passes. This register can be read and written at any time. When the 8 or 16 bit register overflows, a flag is set to signal this event.
Prescalers and postscalers can be assigned to timers, to achieve longer temporizations. A prescaler or postscaler is a counter on its own, configurable in a variety of ways. Simply put, these divide the clock at their input with a value that can be changed by software. A 1:8 prescaler gives one clock signal on its output after every 8-th clock at its input. This means, that adding a 1:8 prescaler on a timer input will slow down the speed this timer advances by 8. Postscalers work exactly the same, it’s usually the position of these circuits (in regard with the timer register), that determines whether we’re talking about a prescaler or a postscaler. Prescalers slow down the advance rate of the timer register, postscaler delay the moment when an overflow event is triggered. Using these circuits we can create timestamps of longer periods. The event that occurs at every overflow is often described as the “setting of the interrupt flag”.
Let’s see the configuration of the timer in our particular example!
Configuring the timer 0
In our processor there are three timers available, we will use only one: timer number 0. The registers that need to be configured for this module to work are: OPTION_REG, INTCON.
Configuration of OPTION_REG
The higher nibble of this register doesn’t have any effect on timer0, I will set them to zeros. The lower nibble consists of the PSA bit (bit 3) which determines where the prescaler will get assigned, to timer 0 or to the watchdog timer. I want it to divide the advance rate of the timer 0 timer register, so we have to set it to 0. Next, I want to set it to divide the clock as much as it can 1:256. To achieve this, I must set the PS2:PS0 bits to 111. This results in OPTION_REG being set to 0b00000111 = 0x07.
Configuration of INTCON
This register has little to do with timer 0 as it’s an interrupt configuration register, but – since we’re using interrupt with timer 0 – I have to mention it. The three bits that are related with timer 0 are the following: GIE, T0IF, T0IE.
GIE is the bit that enables interrupts on a global level, if this is set to 0, no interrupt will be triggered. Of course, we need to set this to 1.
T0IE is an interrupt enable bit too, but this one is strictly there for enabling/disabling the timer 0 interrupt. We have to set this to 1 too.
T0IF is the timer 0 interrupt flag bit that gets set each time the timer 0 register overflows, we have to clear this bit at start-up, it will be set by hardware once the timer register reaches the maximum value and overflows. Hence T0IF is to be set to 0.
We have to set INTCON to 0b11100000 = 0xE0 to make this timer work the way we want.
Other things that needs to be done
To create the exact timing of one milliseconds, we're going to have to pre-load the timer register. The number of timer steps divided by 256 (because of the prescaler I chose) added to this preload value should give the overflow value of the timer register. In our case this value is 256, since we're using an 8 bit timer.
The stuff we know:
- oscillator clock = 8 MHz
- instruction clock = 2 MHz
- instruction period = 500 ns
- prescaler used = 1:256
- timing we want = 10 ms
The stuff we want to find out:
- timer register pre-load value.
We know we want a 10 ms timing, and we know that our timer steps at a rate of 256 * 500 ns. Solving that multiplication tells us that the timer 0 register will advance when 128 μs passes. 10 ms / 128 μs = 78, this number is important because it expresses our 10 ms in number of timer steps. We know we want the timer register overflow to occur after 10 ms, and we know that this occurs after the maximum 8 bit value, 255. Simple enough, we just have to put 256 – 78 = 178 into the timer register, and wait for the flag to set. This will happen after 10 ms.
This is not enough, we also have to refresh the timer register with this value after every overflow. If we fail to do so, the timer register will count starting from zero, and the timings will be totally off (128 μs * 256 is not 10 ms).
I mentioned how these overflow flags can trigger interrupts (can and will, because we enabled this feature in the INTCON register). The interrupts are handled in a special part of the program called an interrupt service routine. Whenever an interrupt is triggered, the program jumps to this special part of the program, and executes it. After it executes that part of the code (often referred to as the interrupt being handled), the program continues where it left off before the interrupt was signaled. This allows a programmer to react fast to these kind of events, in fact, this is the reason why interrupts were “invented”. The interrupt service routines should be made short, so their execution is fast enough. I wrote the timer register reloading in the interrupt service routine, this guarantees that the timer 0 overflows will occur after 10 ms over and over again. The interrupt flag must be cleared too, or else the processor will “think” that an interrupt is being signaled – it will get stuck in the service routine and won't reach the main code again. This is a classic error, and can hold you back for quite a long time.
Step 6: The Firmware

Writing the firmware was quite simple, as I picked an extremely simple charging algorithm. The idea was to charge the battery for ten minutes, then take a measurement across the battery. If the battery voltage is above a given threshold, stop the charging, if it’s not, continue.
To be able to set up timings, I implemented a 10 ms interrupt and set a software flag at every 100-th time this interrupt occurs. That gave me a time-base of one second. Counting these seconds was the next thing I implemented - I wrote macro definitions to be able to change the charge and measurement timeouts easily. The final on-off times were:
- Measurement: 5 seconds
- Charge: 600 seconds
The code itself is very simple, and self-explanatory, I will send it to anyone who asks for it. It's basically a mix of those described in the previous steps, some macros, oscillator configurations and the simple algorithm i described before. Shall there be any questions about it, feel free to ask!
Software tools used were MPLAB X and XC8 compiler.
Step 7: Future Development
There is still one unused pin left, it could be used to change the battery voltage the charging stops at. Unfortunately this unused pin doesn't have analog input feature, which means that one LED would need to be moved there to make place for a potentiometer on an analog channel. I thought this doesn't worth the fuss, at least not yet. I hard-coded the charge limit at around 13.4 V. Attaching the pickit takes seconds, so the limit can be changed, if it's required.
Other features can be imagined as well, a communication possibility for example. The possibilities are endless, especially because the firmware is almost completely processor independent. It needs one timer and an ADC module. Porting this code to a PIC12LF1840T39A i used before would be simple and would offer RF communication without external transmitter.
Step 8: Photos About the Device and Final Words


I add this step as a showcase. At power on the green LED is lit, the yellow is turned off. As the button is pressed the green starts blinking, indicating that the charge/measurement is in process. The yellow LED is turned on when the charging is in progress, and it's turned off when the measurement is made. After a successful charge the yellow LED is turned off and the green is constantly on. At that point the device can be turned off, and the battery can be removed.
I hope everyone enjoyed reading this instructable, if you would like to see this as a winner, please vote for it! Thanks!
Cheers!

Participated in the
Epilog Challenge VI

Participated in the
Tech Contest

Participated in the
Teach It! Contest Sponsored by Dremel


