

Introduction: Cardboard Play Dome


I wanted to make a small play house for the kids, but I didn't want to spend money. Aside from a $3 pack of hot glue sticks, everything I used here is stuff I already had.
I searched online for geodesic domes so I wouldn't have to do all the math myself. I found a suitable one that people suggested homeless people use as emergency shelter, then scaled it down and added squares on the bottom.
For this project, I used:
cardboard
box cutter
pen or pencil
ruler
hot glue
white school glue
clear spray primer and top coat
white spray paint
metallic spray paint (in two colors I happened to have)
black and white acrylic paint
metal powder mixed with white glue (use metallic paint if you have it; i didn't)
chopstick, napkin, and tape (use a round brush if you have one)
small paintbrush
large crappy paintbrush
Step 1: Measure and Cut Triangles and Squares


If there were no doors or windows in this dome, it would consist of:
30 AAB triangles
10 BBB triangles
10 B squares
In this case, A measured 10 7/16 inches and B measured 12 inches.
I drew 1 inch flaps outside the edges of the triangles and squares (skipping the corners, as shown) so I could attach things together on the inside of the dome.
I left out three of the BBB triangles to make two windows and the top of the door for this project, and one of the B squares.
I suggest holding a ruler tightly while you slice along the outline of your shapes with a box cutter. Remember to cut outside the flaps, not inside them along the triangle or square. It helps to cut one and use it as a guide to trace the others, then cut the rest along the pencil lines, rather than measuring every time.
Step 2: Fold the Flaps


I made an indentation along the sides of the triangles or squares before folding.
Holding the ruler tight, I traced the edge I wanted to fold with a dull corner of the box cutter (the handle, not the blade). Then, I kept holding the ruler in place while folding the flap up, using the ruler and the indentation as a guide.
You might want to be careful while making the indentation along the grain in the cardboard; it sometimes tears the top layer a little.
I tried to put the ugly side of the cardboard (like the taped or printed side) on the inside of the dome. If I was folding flaps up, the ugly side would also be face up.
Step 3: Glue Flaps Together


Start with the 30 AAB triangles. Taking 5 at a time, glue the short sides of them together to form a pentagon. You should end up with 6 of these pentagons. If you measured and cut right, the pentagons won't be completely flat. Be sure to keep all the flaps on one side.
The exposed edges of the pentagons should all be the B measuring side, 12 inches in this case.
Now glue one of the BBB triangles to a side of a pentagon. Glue another pentagon to another side of that BBB triangle to end up with something like picture 6.
Let's say the exposed edge of that BBB triangle is the bottom of this piece. Glue another BBB triangle to one of the pentagons so that its exposed edge is also at the bottom. Keep gluing pentagons alternating with BBB triangles so that one edge of each pentagon and one edge of each BBB triangle line up in a sort of gently curved bottom (like in picture 7) until you have 5 pentagons and 5 BBB triangles.
In my case, I only used 4 BBB triangles here so I could leave the top of the door open.
You should have 1 pentagon left and 5 BBB triangles left. I had only 3 BBB triangles left because I wanted to leave two windows in the dome.
Stand the line of glued pentagons and triangles up so that the bottom is resting on the floor. Bring the ends together to form a circle like in picture 8. In my picture, the open triangle is the top of the door. You might decide not to leave an open triangle. Notice that instead of seeing pentagons in this structure, you could see hexagons with one top piece missing.
Glue the BBB triangles, point down, into these spaces.
Now there should be an open pentagon shape at the top, ready for you to glue in your last cardboard pentagon.
I'm really sorry for not having pictures of that part; it seems that Lilith got into my photos and deleted some when I thought she was simply playing Tozzle on my iphone.
Now glue a square along the edge of each exposed triangle edge at the bottom of the dome. This will raise it B unites above the ground, 12 inches in this case. Glue the sides of the B squares to each other where they touch. Once again, make sure to keep all the flaps on the same side. Some people keep them on the outside, but I wanted mine on the inside. Whichever you choose, be consistent.
If you want to reinforce your structure, cut extra triangles and squares to match up with the ones you have, but without flaps this time. Glue the shapes without flaps to the shapes with flaps on the outside (if the flaps are kept on the inside). This will make a double layer of cardboard for the structure, but not a double layer for flaps. This works best if you keep the grain of the cardboard perpendicular; have one piece with a vertical grain glued to one piece with a horizontal grain.
That's a lot of extra work, though, and probably not worth it. I reinforced the squares this way, but not the triangles. Note in the last picture, the square at the edge of the door has one exposed cut edge along with a flap.
Step 4: Glue on Little Reinforcing Strips


This seemed to add a lot of extra strength to the structure without being too time consuming or difficult. Part of this I did while gluing the main pieces together.
Note the strips of cardboard in picture 2 and 3. I folded these and glued them at the points of the open triangles where the windows and door were.
Next, I cut random strips of cardboard, folded them, and glued them over seams that seemed a little weak. This seemed easiest if I glued on one side of the strip to one panel, held it until the glue set, then bent the strip back to apply glue to the other side and pressed it to the adjoining panel. It can be tricky to try to hold a bent strip to two panels at an angle without one becoming unglued or something. See pictures 7 and 8 in this strip for what I mean about gluing one side at a time.
I also glued a bottom to the door side to stabilize the structure. I was too lazy to try to glue a bottom to the whole thing; I didn't have a huge single sheet of cardboard and it seemed like more work than it was worth. You can see the bottom in picture 1 of this step. Note the triangular corners from the bottom piece that I folded up and glued to the outside of the structure. One side was a bit small so I glued another strip of cardboard over it to reinforce that one.
Step 5: Prime and Base Coat


I was really glad that the dome fit through the doorway so I could do this outside. I hadn't thought about it before gluing it all together and was a bit nervous. Good thing it did fit.
I had considered smoothing out all the corners and strips by coating this thing in paper mache, sanding it down, and making it a cute hobbit house or something with a green grassy or thatched roof... but my friend said he liked the look of the strips and Josh said it would take way too long to make and to dry, and then I thought I could make it look like a junk space ship thing and use the reinforcing strips as a design element.
As I said in the intro, I didn't want to have to buy anything for this project. I happened to find some clear primer and topcoat, white spray paint, pink spray paint (which I didn't use), and two half full cans of metallic spray paint - one was a dark metallic gray, the other a bronzey gold color. I'd have liked more metallic spray paint, but we work with what we've got.
Hey, Krylon - if you're reading this, feel free to send me some free spray paint and I'll make something cool! (just kidding... mostly)
I generously covered the outside of the dome with two coats of clear primer, letting it dry between each one. I could've sanded the cardboard to eliminate those tiny fibers that stick out, but this was for the kids, who aren't critics (since they don't talk) and I was pressed for time.
After that, I painted the dome white. I think I'd have preferred black as a base coat, but I didn't have any.
Step 6: Add Metallic Corners and Edges


If I'd had a lighter silver spray paint, I'd have lightly coated the dome with it first before continuing with this step.
I started with the darker metallic spray paint because I liked that color better. I kept the can moving so it wouldn't get too blotchy; I wanted it to fade from the darkened corner out toward the white, instead of being a definite line.
I painted little circles over all the corners of the dome, then sprayed a line along the edges of the triangles and squares where the seams were. I ignored the little cardboard reinforcing strips for this, knowing I'd paint over them with something different later on. Once I ran out of the darker gray metallic spray paint, I switched to the bronze-ish metallic spray paint and continued. I wasn't worried about the two colors looking funny; I knew that after I added all the effects I planned, it'd look just fine.
Step 7: Add Detail With Acrylic Paint and a Brush


I don't know how one would do this step using spray paint. I didn't have any black spray paint, anyway.
I mixed black and white acrylic paint to make a dark gray. I had a wide, messy bristle paintbrush that was perfect for this. I dabbed some paint on but brushed it on a paper towel to get off the excess; I wanted the brush to be relatively dry for this. I first dragged it along the seams to darken them, then dragged it lightly over the face of the cardboard, going across the grain so it would deposit paint at the ridges. I tried to make it lok rough.
Halfway through this, I decided to paint the cardboard reinforcing strips gray. Then I returned to the dark gray texturing with the large brush.
Because the base color of the dome was white, there was a bit too much contrast now. If I'd had a silvery spray paint to start with, I wouldn't have needed the metal powder.
I had some metal powder in three colors: statuary bronze (really dark), bronze, and silver. I mixed a little silver and bronze with the statuary bronze to make a dark silvery metallic color, then took a paper towel and rubbed the fine powder all over the dome. Don't breathe this stuff in, and wash your hands after using it; it clings to EVERYTHING and has some metals in it that you probably don't want to keep in your body. Don't go too heavy with the powder or it'll cover up your lovely painting job.
After the dome looked metallic enough for my taste without covering up the paint, I sprayed it very thoroughly with a clear top coat to seal in the powder. I also used a brush on clear coat to make sure the powder wouldn't rub off. Like I said in the previous step... this would've been easier if I'd had some silver spray paint to cover the white before using the dark metallics along the corners and edges. I could've skipped the powder entirely, and I think it'd look almost exactly the same.
After this, I looked at the edges, especially around the cardboard reinforcing strips. The large paintbrush can't get into them very well. I took a small paintbrush this time, and used watery dark gray paint. This allowed the paint to flow into the little cracks, etc. I painted around the edges and reinforcing strips, wiping off excess with a dry paper towel. This left paint in crevices, making it look a little more shadowy and realistic (at least in my mind).
Step 8: Paint on Rivets


I didn't have any metal paint for this. Instead, I mixed some of the silver colored metal powder with white school glue.
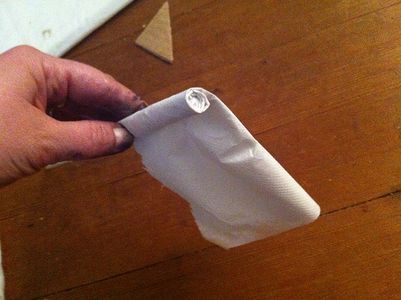
I also didn't have a round sponge tip paintbrush, so I wrapped a napkin around the wide end of a chopstick, secured it with tape, and used that to paint the circles.
The circles might've been a bit big for rivets, but it's a kid's play structure. My friend said they look like polka dots, but I like them.
Dip the brush in the silver paint, wipe off excess, and press onto the cardboard near a seam. Rotate the brush a little to make sure any dents in the circle brush get filled in. Spinning the brush a little will ensure a good circle. Repeat wherever you think a rivet should be.
After this, I decided the rivets should have some shadows. I had a lot of painted rivets, so I didn't want to do anything too complicated. Yes, I was sloppy and quick, and I'm okay with that.
Mix some slightly watery black or dark gray acrylic paint. Using a small paintbrush, quickly paint a C shape along the edge of the rivets, overlapping the C onto the rivet a bit. In my structure, I painted all the C shapes at the lower left side of the rivets.
While I had the paintbrush and watery dark paint, I also painted a line along the lower left edges of the reinforcing strips to make it more shadowy. That made the shadows more consistent with those on the rivets.
If you look at the dome from the top, there's no real direction that the light should appear to come from, since I painted ALL the rivet shadows on the lower left side. That's okay with me. People are likely to only look at one side of the dome at a time, anyway... and those who gaze down at the top and criticize the shadow placement can make their own damn dome.
Step 9: Insert Stuffed Animals, Pillows, and Kids
Once the rivets are dry, the dome is ready for play time.
We're having a lot of fun with ours.
Thanks for reading! Go make one and post pictures!

Runner Up in the
Celestron Space Challenge

Finalist in the
2nd Annual Krylon Summer Contest

Finalist in the
Green Living & Technology Challenge


