

Introduction: Chainmail Armor Tutorial


In this tutorial I will show you how to make and link rings together to make chainmail armor.
Step 1: Getting the Materials


Tools you'll need:
- variable speed drill, 3/32 drill bit
- two needle nose pliers
- mini bolt cutters, here's the pair I have - Mini Bolt Cutters
Materials you'll need:
- 14 gauge galvanized/stainless steel wire (I got a quarter mile of wire)
- 3/8'' wooden or metal dowel
You can pick up 14 gauge wire online or at a local hardware store. You can choose a higher or lower gauge steel, but the higher the gauge the thinner your rings will be.
Step 2: Making the Rings


- Drill a hole in one end of your 3/8" dowel, about an inch from the end with the variable speed drill and 3/32 drill bit.
- Place the dowel in the drill and thread the wire through the hole.
- Spin the drill slowly. The wire will wrap around your dowel and will look like a spring. Continue spinning the drill until the wire coils right to the end of the dowel. Keep the coil as tight as possible!
- Once the entire dowel has wire coiled around it, cut the wire. Then cut the end of the wire you inserted into the hole.
- Slide the coil off the dowel.
- Using your mini bolt cutters, cut along the length of the spring. Individual rings have been made!
Step 3: Linking the Rings Into Chainmail
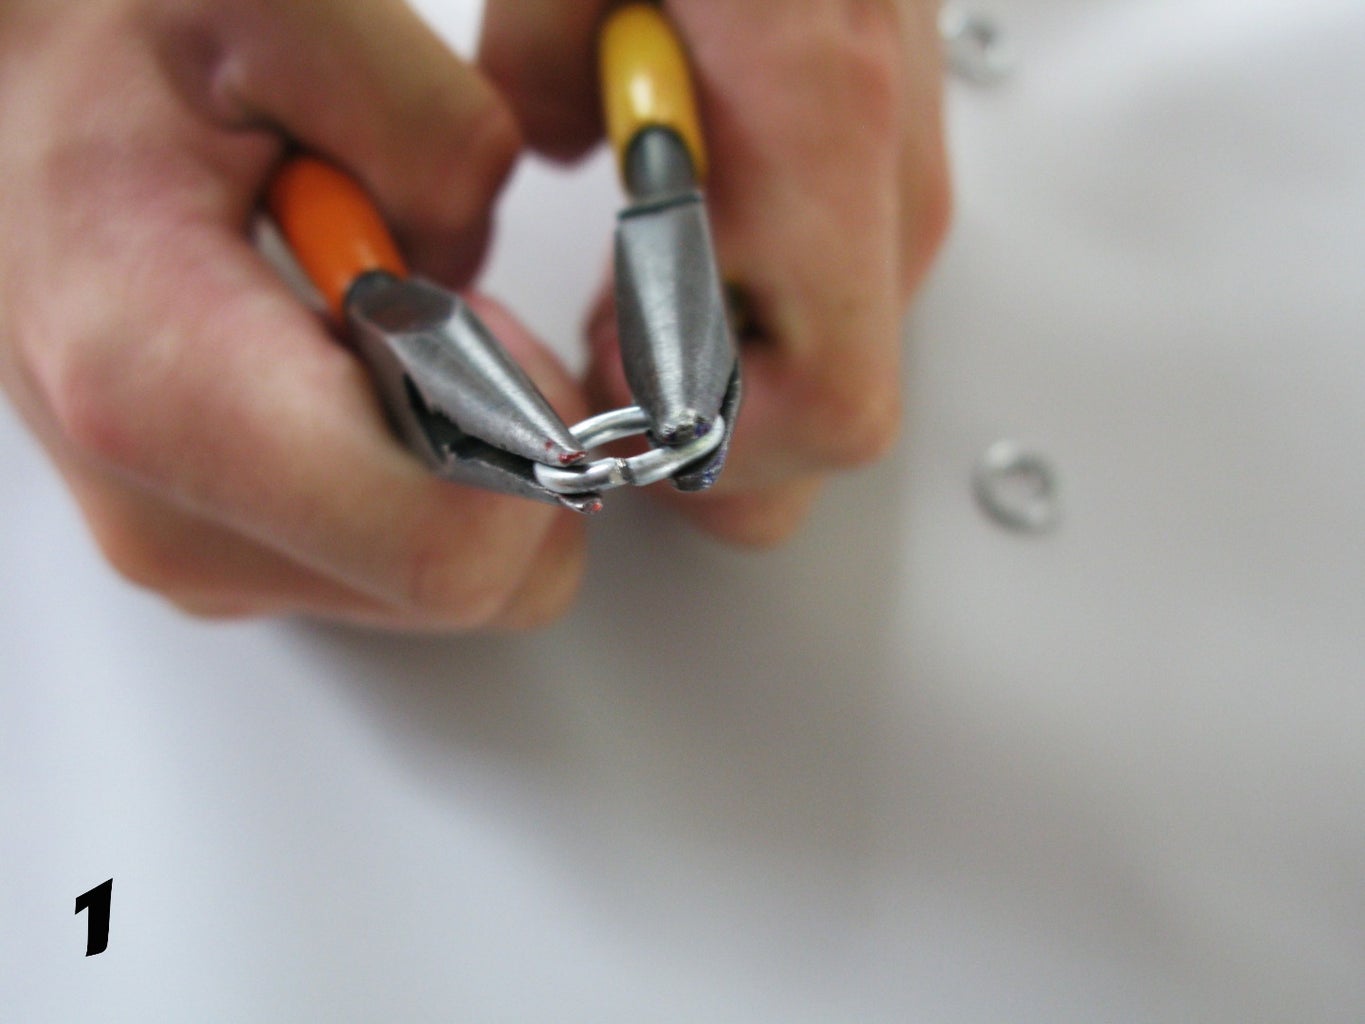


- With your needle nose pliers, bend 1/2 of the rings cut from your coil so that the two ends join and make a closed circle.
- You will also need to bend some of your coil cut rings open in order to connect other rings together as shown in steps 4 and 6.
- You'll end up with piles of open and closed rings. You'll need approximately an even amount of opened and closed rings.
- Hold an opened ring with your needle nose pliers and hook four rings onto it.
- Close the opened ring like in step 1. Your result should look like picture 5. You will need a large amount of these 4 in 1 linked rings. Arrange your 4 in 1's so that there are two rings over and two under.
- Take another opened ring (I used a blue ring in the picture) and hook it down and up through the two rings on the top of the 4 in 1.
- Place the bottom two rings of the top 4 in 1 over the opened ring.
- Carefully pick up the opened ring and close it as in step 1.
- After joining two 4 in 1's together this is what it will look like.
- Continue this pattern to make strips of whatever size and length you want.
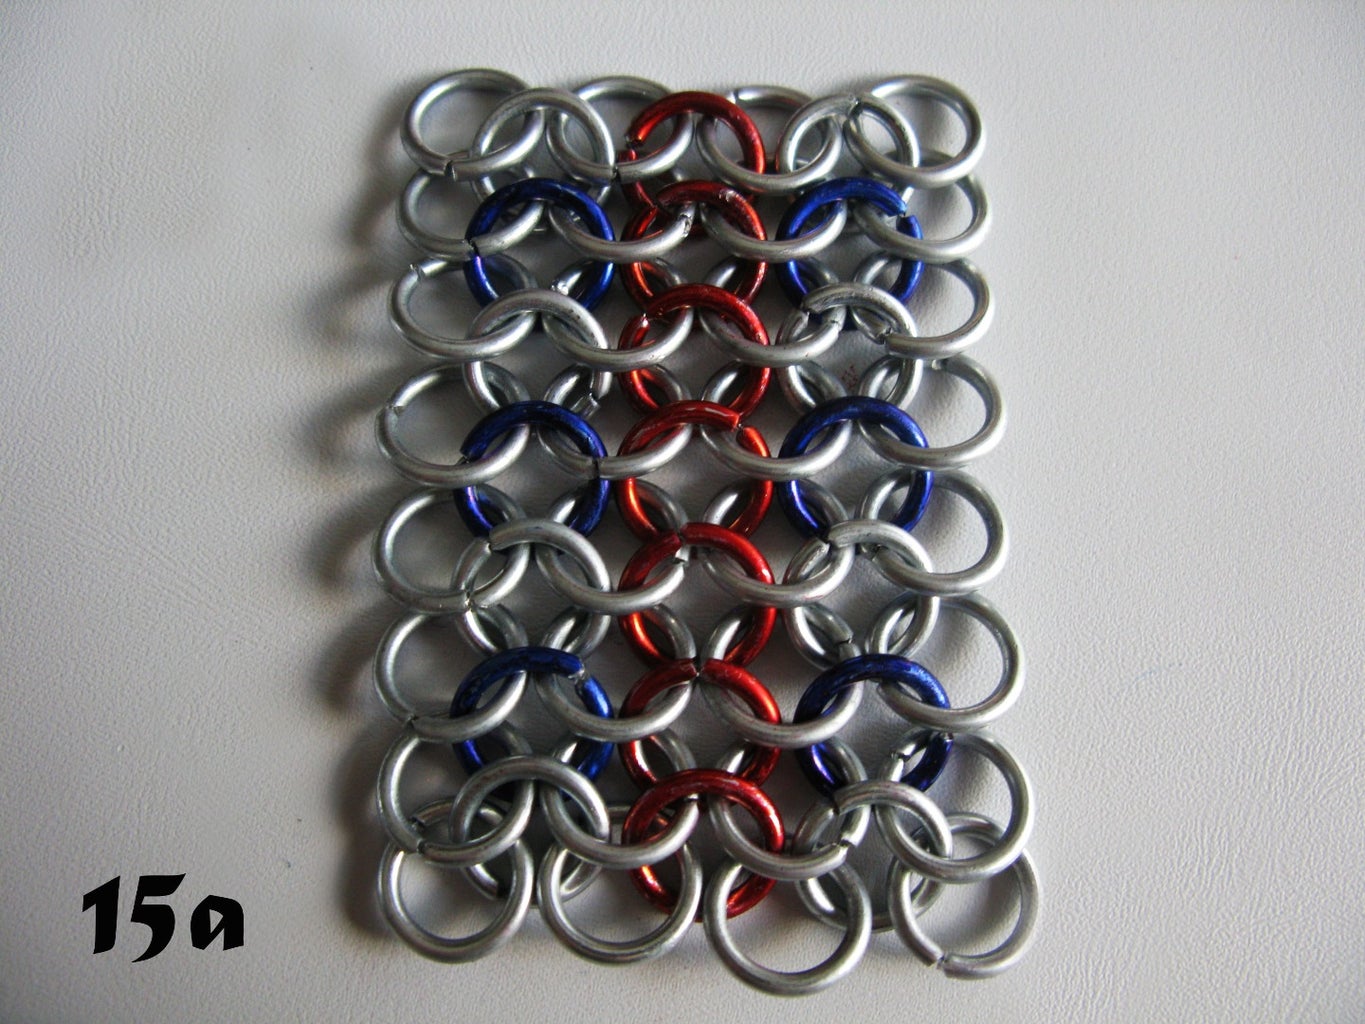
- To increase the width of your maille, join strips together. Take another opened ring (the red ring in the picture) and hook the opened ring down and up through the first two rings.
- Place the next two rings over the opened ring.
- Carefully pick up the opened ring and close it.
- This is what you will have if you hooked it correctly.
Continue this pattern down the strips until they are attached. (Refer to pictures 15a & 15b).
Choose a shirt that's a couple sizes bigger--after all chainmail doesn't stretch! Expand your piece in width and length with chainmail strips until it matches the size of the shirt. Repeat again to make the back. Use your creativity to add extra strips at the sides and shoulders so you can fit into your custom armor. Attach your pieces together at the shoulders and sides. I used approximately 12,500 rings to make my chainmail shirt.
Step 4: Now You're Ready for Battle!


Runner Up in the
Metal Contest


