

Introduction: Changing Aircraft Landing Gear and Tires


Hello to my subscribers, new readers, and aviation and restoration lovers. My name is Greg, this is my third instructable.
I have worked as a float pilot, flight instructor, and aircraft salvager. I love planes, motorcycles, and electronic goodies.
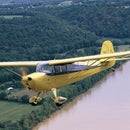
Today we're going to overhaul the landing gear on a Super Cub. The Super Cub was originally a piper cub with a big engine, now it is a whole genre of aircraft designed for 2 people and with versatile engine and landing gear options.
The super cub we got in our shop was crashed due to a miscommunication regarding fuelling the plane. Everyone survived the accident, but the plane will need significant work to get flying again.
If you've ever wanted to install big wheels on your plane , or heavy duty landing gear, get out your note pad and we'll get started.
Step 1: The Old Gear / the New Gear


So you had a bad landing. These things happen, as long as you walked away, life is good.
Now what to do about the many bent parts on your airplane...
Well let's look at the old landing gear.
The impact forces caused these flimsy tubes to split ,bend, and crack.
Let's take those off and put them aside.
Now this new landing gear is a little more sturdy, painted to match the plane, and the new tires are oversize at 8.50 inch as opposed to the normal 6.00 inch tires. I put my shoe in there for scale, a normal tire is slightly bigger than my foot.
These are not tundra tires, but they are bush wheels.
Step 2: Preparing the Wheels


These wheels we got a hold of were used, so who knows the condition.
One way to find out.
We start by giving the hubs a little clean up with varsol and the trusty tooth brush.
Now that we can see what we're working with, it seems there is rusty goop around the bearings so we'll pull them apart and clean and repack.
Next we're going to look at the bearings and see if they need replacing.
Step 3: Bearings (top)


There is a little c clip which retains the bearings in the wheel hub. There is one on each side. So we'll pull out the top...
Step 4: Clean the Bearing


No surprises here, everything is grimy but functional.
Let's give all the parts a once through the varsol, then blow them dry with the air hose.
Make sure the bearing and the felt guard especially are completely dry before continuing. Any moisture sealed into the wheel hub will cause them to rust out.
You can see in the pic where I have press dried the felt guard before blow drying it and the bearing .
Step 5: Repack Bearing


I'm sorry I didn't have my shop assistant here today, she's a very busy lady.
I didn't have enough hands to properly show how to repack grease into wheel bearings, so if you haven't done it before you probably want to get a pro to show you. I like to use gloves cause this stuff get's all over.
It's not any different from other bearings though, what I do is get a lump of bearing grease in my hand and then push the bearing sides down on it with a scooping motion and pushing the grease in gaps with palm of my hand.
When the grease oozes out the other side of the bearing you're done.
Step 6: Reinstall Bearing


After cleaning in and around the centre of the wheel hub, we can reinstall the bearing in the opposite order we pulled everything out.
Remember the c clip to retain it all.
Step 7: Opposite Bearing


Flip the wheel over and do the same thing on the other side.
Clean up the hub, remove c clip, remove bearing, clean all, repack bearing, reinstall.
Step 8: Waiting for the Other Shoe to Drop...
Same procedure steps 2-7 for the other main wheel we are working with.
Step 9: Mounting the Wheels on the Gear


Now that our wheels are ready to go, we try to mount them on the landing gear axles. If you choose to put the gear on the plane and then mount the wheels that's fair enough.
Only in our case, the wheels won't slide onto the axles because they are painted. Curious. We sand off all the paint using wire wheel and then wrapping sandpaper around and getting mostly all of it off, then the wheels fit on. With a little lube and a rubber mallet, we're in business.
One large nut and cotter pin hold the wheels onto the axles.
Step 10: Mount Gear on the Aircraft

In this case, we didn't mount the gear yet, but I'll update with pictures when we do, this particular plane will need much more work before it flies again.
I have included a comparison pic of old gear vs. new gear though of a similar plane.
The gear is held on by two bolts (one for each arm of the landing gear) and a shock chord system which is like bungee suspension. Make sure you put the gear on facing the right direction. One of the landing gear arms is a little beefier and is perpendicular to the body of the plane. This one is the front. The other arm is slimmer and connects around the rear door post.
Step 11: Go Flying!

The landing gear is good to go on this airplane until the next inspection is due.
Thank you! Please raise your hand with comments and questions.
WARNING:
Do not attempt maintenance of an aircraft unless the work in questions is by definition "elementary maintenance" and you are the owner or are supervised by the owner of the aircraft. Do not attempt maintenance other than maintenance that is elementary unless the aircraft is registered as an "Owner maintenance" aircraft and the previous conditions apply, or the aircraft is a kit, homebuilt, or experimental aircraft where modification and maintenance is allowed by law in your country/state/province.
WARNING:
Do not go flying unless qualified under the licensing standards of your country/state/province. Do not fly in an aircraft unless it is properly maintained accord to the manufacturers standards. Do not fly an aircraft unless you are trained on the type and class of aircraft you intend to fly. Do not fly an aircraft unless you are current on that type of aircraft. Do not fly an aircraft without considering weather or airport conditions at your departure point, arrival point, and enroute points. Do not fly an aircraft in conditions it is not made to withstand.


