

Introduction: Cheap STK500 AVR Programmer for Atmel Studio


Atmel Studio is a powerful tool for making AVR programs, but writing a program is the first step. To use your program, you must make a circuit and transfer your code into the microcontroller. You can program your AVR from Atmel Studio by the use of STK500 hardware. Why you cannot program MCU directly from computer by cheap hardware like PIC microcontrollers? The answer is that to transfer your program to IC you must use SPI connection, but there is no SPI port on the PC. There is plenty of software that uses RS232 port as SPI, but you cannot program your AVR directly from Atmel Studio like them. Here I introduce you software that simulates STK500 hardware on the PC and sends data to the microcontroller using RS232 via simple and cheap hardware. Note that using PC RS232 as SPI port is slow and programming the chip will take more time than an STK500 device.
Step 1: Making the Hardware
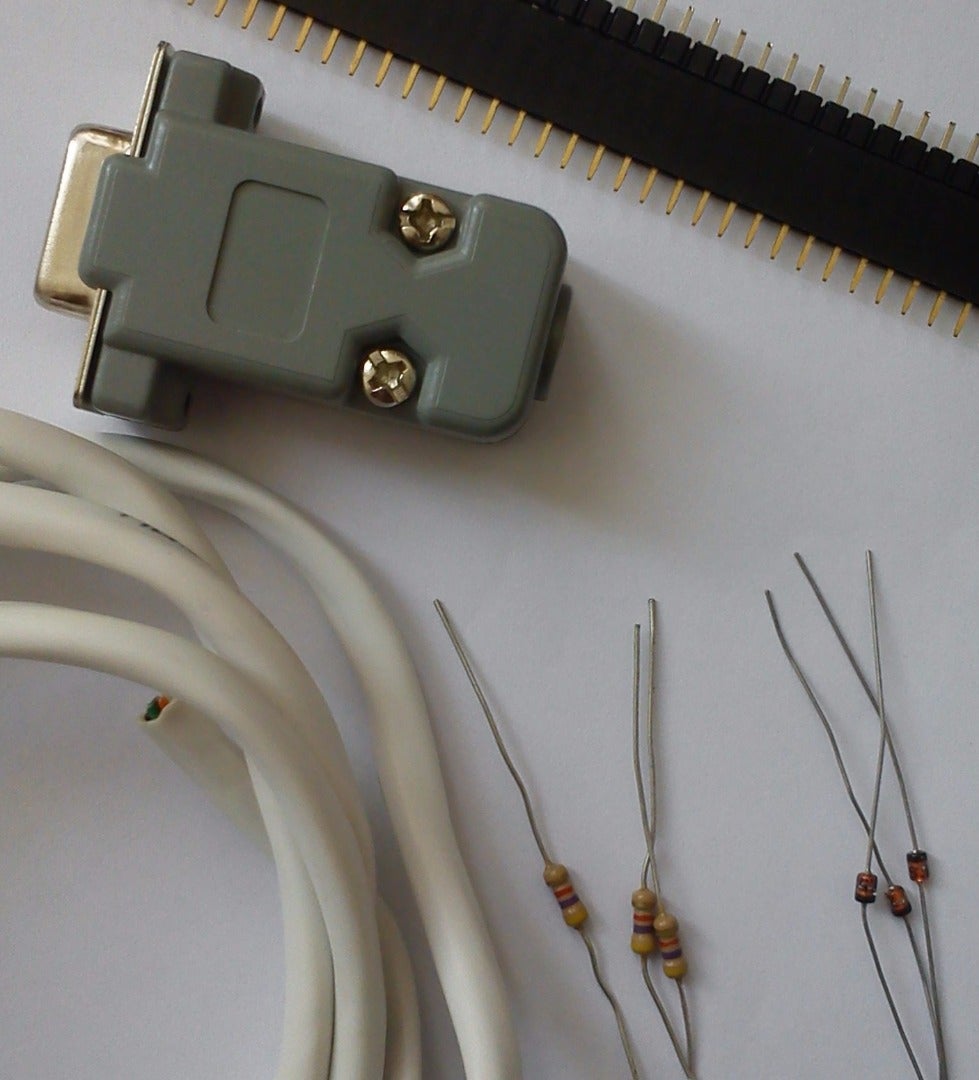


To make the hardware you need:
- About 1 meter cable with 5 wires or more
- DB9 female connector
- Pin header
- 3x 4.7K resistors
- 3x 5.1V Zener diodes
- Soldering tools
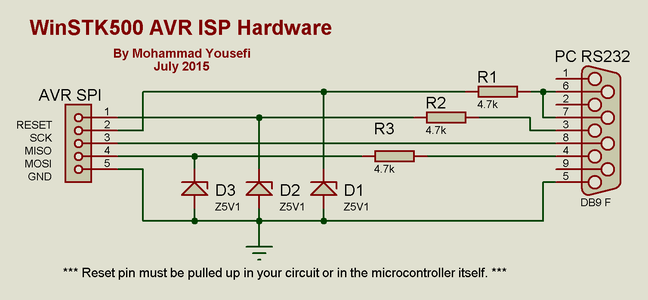
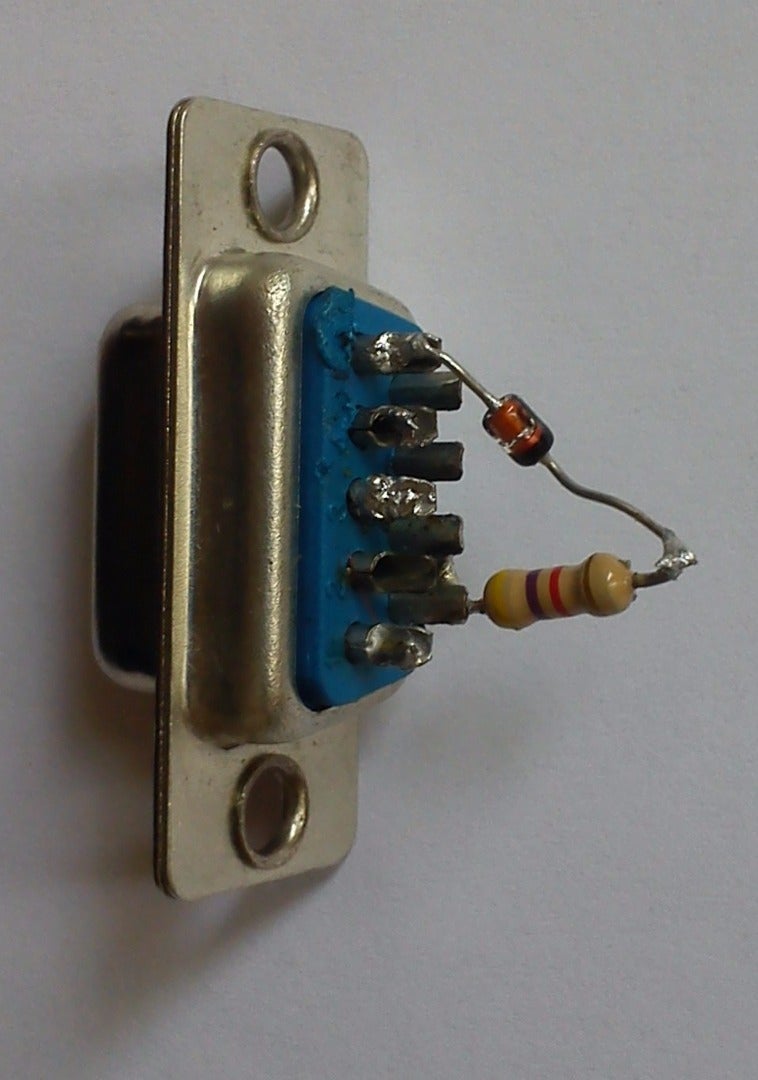
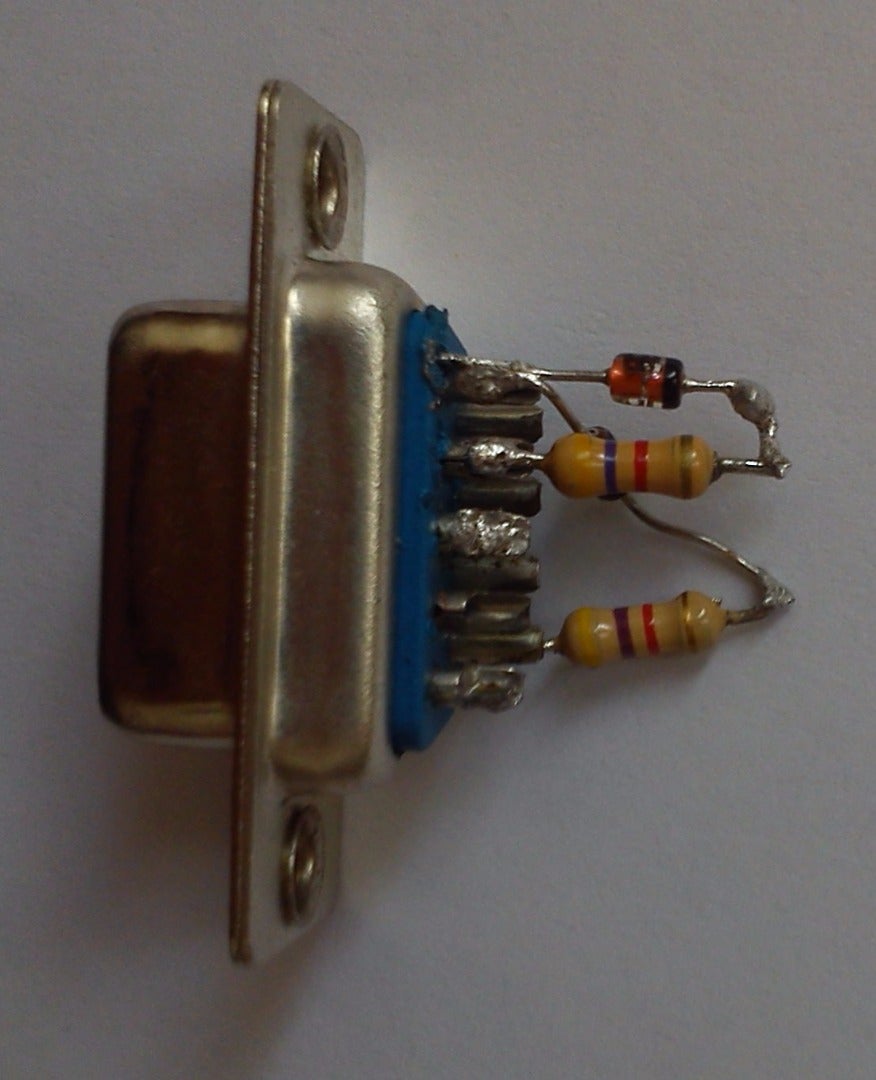
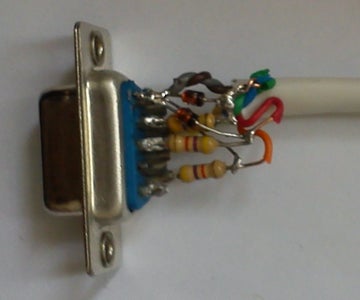
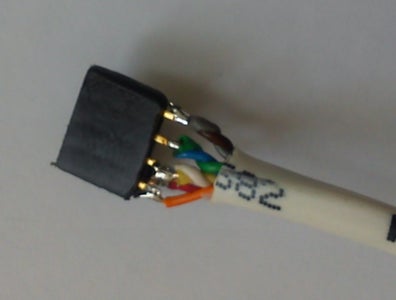
Solder resistors to pins 3, 4, 6 and 7 of DB9 connector, solder N pin of diodes to the other end of resistors and solder the other leg of diodes to the pin 5 of DB9 connector. Solder cable wires between resistors and diodes and pins 4 and 5 of DB9 connector. Solder the other end of cable wires to the female part of Pin header.
Looking at the circuit diagram will help you a lot while making the hardware.
Note that RESET pin of microcontroller must be connected to +5V via a 10K resistor in your circuit if there is no pull-up resistor in the microcontroller itself.
Step 2: Virtual Ports
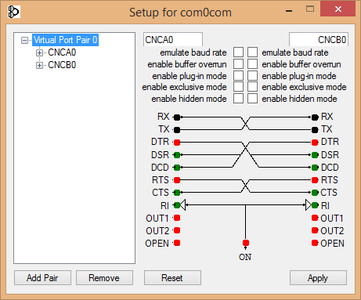
Before using WinSTK500 software you need a pair of virtual serial ports. There is a lot of virtual serial port emulator software like Virtual Serial Ports Emulator, com0com (mirror) and etc. Here I used com0com software. After installing com0com, create a pair of virtual serial ports like ones on the picture.
Step 3: Installing WinSTK500


Download WinSTK500 from http://www.dihav.com/winstk500/, and install it on your PC.
If you want to access WinSTK500 easily, run Atmel Studio and from the Tools menu select External Tools…, add a new tool, set the title to WinSTK500, select [Install Location]\dihav\WinSTK500\WinSTK500.exe as the command and click OK. Now you can find WinSTK500 on the Tools menu.
Step 4: Connecting to WinSTK500


Connect your MCU to the hardware and connect it to RS232 serial port. Run Atmel studio, select WinSTK500 from Tools menu, select CNCB0 as STK port, select your computer serial port (usually COM1) as SPI port and click Start button. Click on Add target… from Tools menu and add an STK500 tool at CNCA0 port. Choose Device Programming from Tools menu, select STK500 CNCA0 from Tool drop down menu, choose your microcontroller and use ISP interface, then click Apply button. The Atmel Studio will be connected to WinSTK500.
Step 5: WinSTK500 Settings

After connecting to WinSTK500, you can see 3 items related to the tool at the top of the items located on the left panel of Device Programming window.
- You can change SPI clock frequency on the Interface settings, but note that WinSTK500 is a slow device and only supports 10-25 KHz, the default frequency is about 16 KHz that is recommended not to change it.
- Tool information is just some info about the tool.
- The Board settings are just some variables that do not affect WinSTK500.
There are also two options on the WinSTK500 window:
- Command Failure Reset defines the behavior of the WinSTK500 when the command does not execute and is usually set to SCK Pin. If you tried programming several times and you faced timeout error and all connections are OK, try changing this option. You can also find some info about this option on your microcontroller datasheet.
- If after connecting to WinSTK500, Atmel Studio said that the STK firmware must be upgraded increase the Software Version to avoid this message.
Step 6: Programming Your Microcontroller

After connecting your microcontroller to Atmel Studio via WinSTK500 you can program it from Device Programming window. Note that after programming the RESET pin will not become high, so to run the program the programming cable must be disconnected.
Step 7: Can WinSTK500 Program AT89?

The difference between programming AVR and AT89 is the RESET pin polarity. So you must use another hardware that I have placed its circuit diagram here. I have not tested it myself, but it must work correctly. If you made it and it worked well tell me and the other readers in the comments.


