

Introduction: Cigar Box Walking Stick Guitar

This is my first attempt at Instructables. I have been learning to build mountain dulcimers and stick dulcimers for a few months. This is not really a beginner project. It requires some previous experience. I took only a few photos during this project, but for those who believe, as I do, that "A picture is worth a thousand words.".... I think there is enough information here to inspire new approaches to building a stringed instrument. This instrument had good volume and sounded pretty decent to my untrained ears. You will notice the irregular spacing of the frets. I used a diatonic scale, as is used on dulcimers. Here is a link which offers more detail on the subject: http://www.cpmusic.com/roadmap.html
Step 1: Getting the Pieces in Place

Some tools you may need: I used a band saw to cut the stick and fingerboard to size. Sanders for shaping and smoothing. Drill press for cutting holes for tuners and the sound holes. A mat knife and jeweler's saw for opening the ends of the box where the stick must pass through, also to cut the fret slots. A screwdriver to secure the tuners. For materials: I bought a set of three dulcimer strings (12, 12, and 20), the old cigar box, three tuners and the brass nails. The stick, I found out in the desert. It was well aged by the sun and stressed by termites by the time I found it. I used a scrap if 1-1/2" x 1/4" cherry for the finger board and tail piece. As a walking stick I left space above the tuners for a comfortable handle. The tuner holes (5/8"dia) were below this and spaced about an inch apart . I used 1/4" bit to drill out the holes for the tuning pins to slip in from the side of the stick. Before moving on to positioning of the stick, cut the sound holes. I used the drill press for mine. The sound holes, it seems, can take any size or shape. I liked this pattern. The real challenge working with a crooked old stick is to find one side of it that is nearly straight. You must be able to secure the stick where it runs through the box so that when the fingerboard is attached (1)you have a surface perpendicular to the top edge of the box and (2) parallel to the face of the cigar box. You must be able to run a line straight down the center of the fingerboard to the center of the base of the instrument. To do this requires positioning all the wood parts so they are aligned properly, taping and marking to know where to cut out the box ends. This is intuitive, I just do what makes since with the stick I have to make things fit.
Step 2: Secure the Stick

You can see in the photo the stick is bent. It enters and exits where it must to have the neck centered. I just cut small pieces of wood and glued them around the ends of the box to strengthen the box and hold the stick in place. That is not a hole in the back. It is a tiny mirror glued in place on a beveled platform. I loved the lable that would have been forever hidden inside the guitar enough to add a mirror. This was risky, because I had no idea if it would create some kind of bad harmonics. It does ring when a certain note is played.
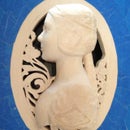
Step 3: A Peek at the Label

I love how this worked out. Just a little whimsy!
Step 4: Fretting and Fretting

Before anything is glued in place: measure, check and adjust everything several times. I placed dowels in the stick to support the fingerboard along the neck of the stick. Insure it is flat before glueing it. I used bone for the nut and bridge. It cuts easily on a band saw and sander. Please use your tools in accordance with manufacturer safety guidelines and common sense. Use someone else's instructions for figuring scale length and deciding what you need to do with yours. So much depends on the parts you asymble. Use one of the online fret calculators and cut as precisely as you can to place the fret wires on the fingerboard. I mark the measurements with an Exacto knife. Then score the wood with the Exacto and cut with jewelry saw and a jig to keep the cuts square.
Step 5: To Sum It Up

I glued the lid to the box shut and dry fit the rest of the parts in place until the box had dried. Then I glued each end of the fingerboard to their respective locations. Be sure it is flat along its length and squared with the box. The tail piece does not show well in the photos. I made an L shape to wrap over the end of the box so I could drive three nails into some hard wood for added strength. With the tuners in place, and the fingerboard in position on the dowels, I attached a string to run down the center line to the base of the instrument to locate the position for the tail piece before it could be glued in place. I applied a few coats of Minwax Tung oil and tuned it up. Just wish I could play it.
Step 6: Nothing Ventured...
Hope I remembered enough to be useful. The rest is up to you and your imagination.


